


Connector Sync Logs
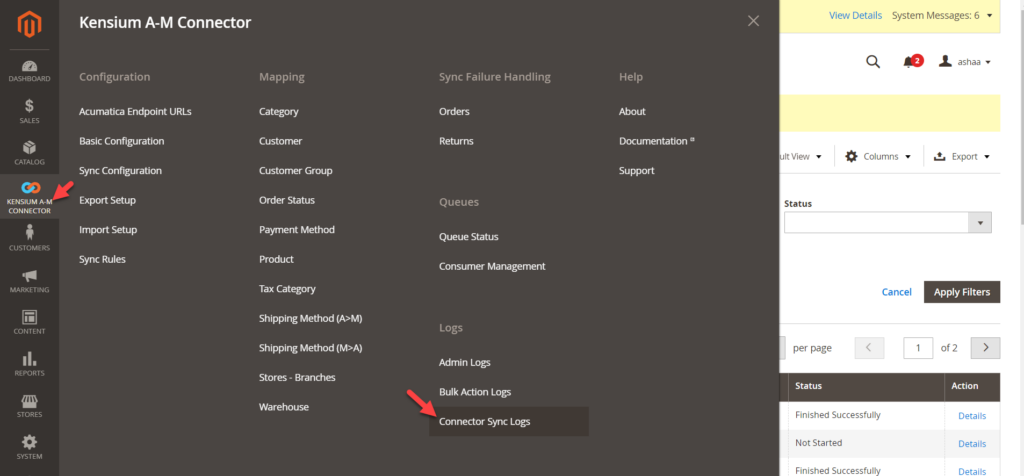
The connector sync log is widely used and the most common section from where the user can identify every transaction within the log with the Log ID. To access the Connector Sync Logs, click on the Kensium A-M Connector on the left panel.
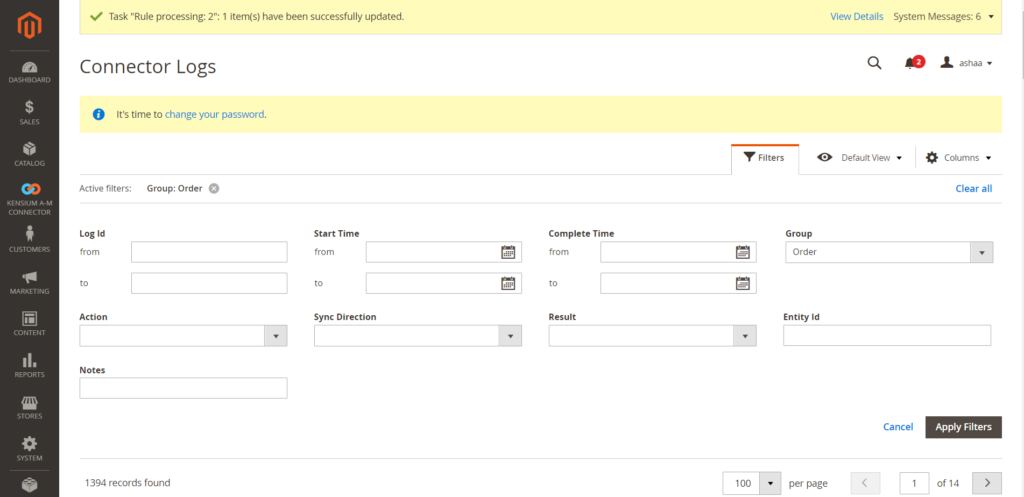
Filtering the Records:
You can filter the record by using the following criteria.
- Log ID (From-To)
- Start Time (From-To)
- Complete Time (From-To)
- Group (Select the sync type from the dropdown).
- Action (Select the action type from the dropdown- Create, Update, Publisher and Delete)
- Sync Direction (Select from the dropdown- Acumatica to Magento or Magento to Acumatica).
- Result (Select from the dropdown- Success, Failure, Warning)
- Entity ID (Enter the ID in the text box). You will get the ID only if the sync fails.
- Notes (Enter the notes in the text box)
Record browse:
All transactions will be displayed here, irrespective of the sync direction of the result.
|
Grid Name |
Description |
|
Log ID |
Log ID refers to the transaction ID. |
|
Start Time |
This indicates at what time the process has been started and is shown with a date and time stamp. |
|
Complete Time |
This indicates at what time the sync process has been completed and is shown with a date and time stamp. |
|
Group |
This indicates all the syncs. From the dropdown, all types of syncs will be available. |
|
Action |
Four actions are available in this column. Create, Update, Publish and Delete are the 4 options. So, the action column will show any of them based on the action taken. |
|
Sync Direction |
You can select the Sync direction from the dropdown. Either it will be Acumatica to Magento and vice-versa. |
|
Result |
The sync result could be success, failure, or warning. |
|
Entity ID |
For the transactions which gets fail, the application generates an entity ID. |
|
Notes |
This refers to the entity reference data such as product SKU, customer email or order ID etc. |
|
Action |
You will get an option to view. Upon clicking on the View hyperlink, you will have a detailed view. In case of failure, you can view the reason for the same. |
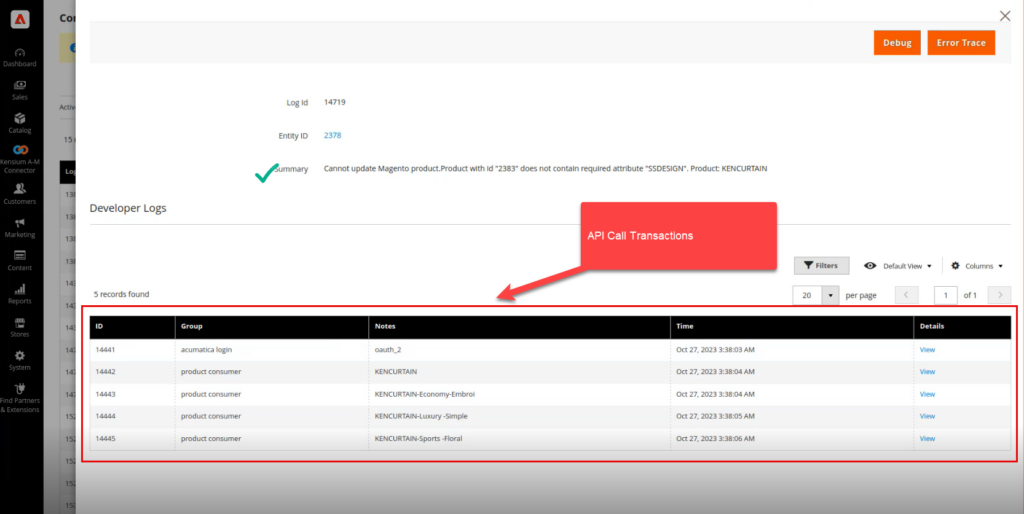
View: Upon clicking on the View hyperlink, a new popup will appear on the screen. E.g., if you consider a failed transaction in the connector log and click on the [View] option. The developer’s Log will help you trace the error.
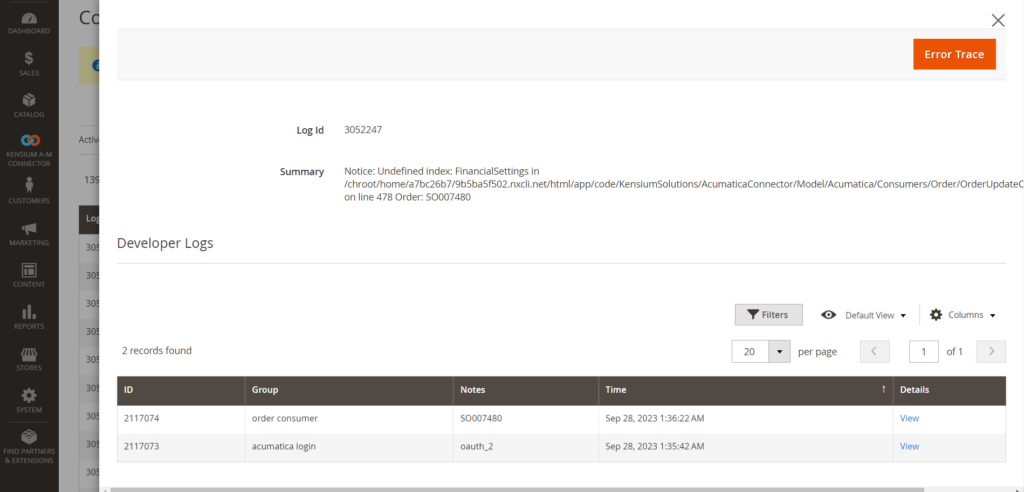
When you select Info, you will get the screen with the Error Trace. To trace the error, click on the [Trace Error] button. When you select Debug from the Configuration you will be able to view the Developers Log.
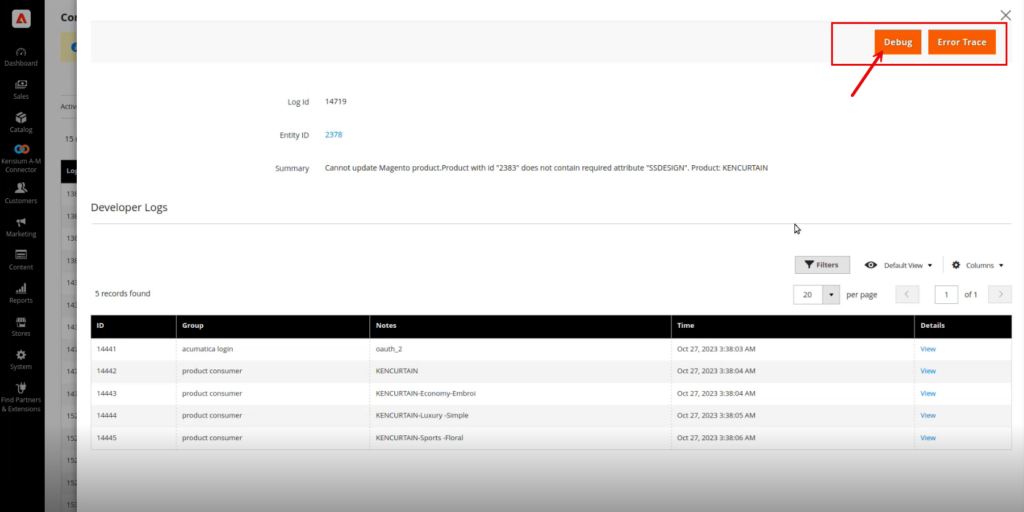

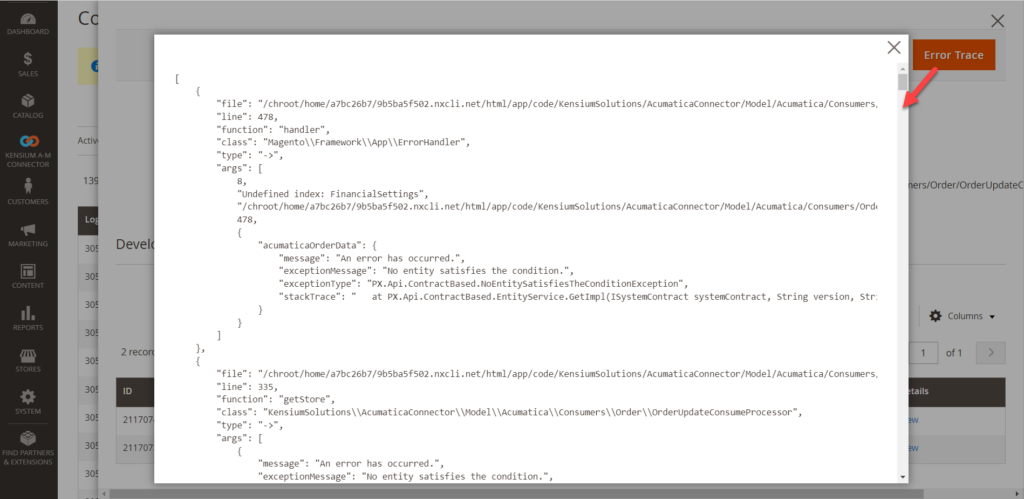

So, if you need to rectify the data to sync the data successfully you need to go back to Acumatica Schema and open the JSON file from the schema management. The data which you see in the trace error section in Magento is fetched from the Acumatica schema. Once you fixed the data in Acumatica you need to sync the data again.