


Establishing Product Sync Schema
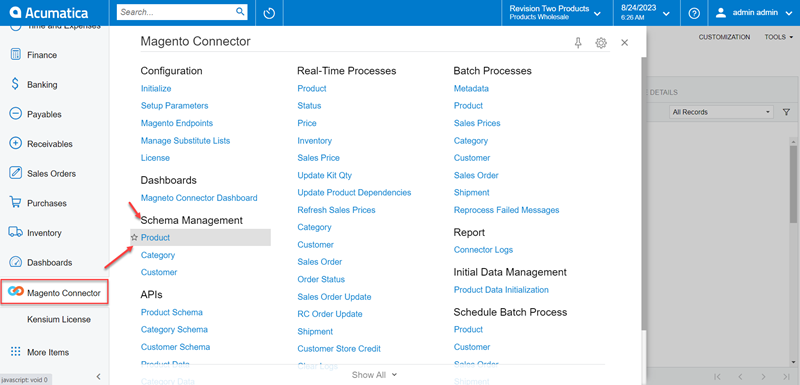
Navigate to the Magento Connector workspace and select Product under the Schema Management section.
- Click Refresh Schema.
-
Select the tab of schema to enable. The tabs are:
- General Settings
- Price/Cost Information
- Attributes
- eCommerce
- Additional Features
- Packaging
- Toggle the Active box for all Schema and Display Names applicable.
- Click on [Save].
To access the product page Schema Management, click on the Magento Connector on the left panel, and the following screen will appear.
If you click on the Product, you should be redirected to the Product page as shown below.
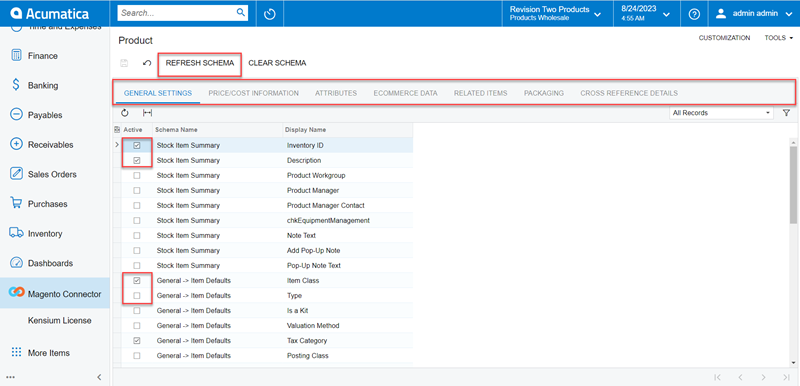
All tabs should be viewed on the screen to ensure all desired schema are toggled.
The selected schema will be active for syncs between Magento and Acumatica. The purpose of toggling the selected product schema in Acumatica is to ensure that only the schema that a user selects will trigger syncs. This reduces server load and optimizes communication between Acumatica and Magento. Product attributes will not sync if they have not been toggled on in the Schema Management section.
|
|
Some of the fields within the Product Sync Schema will be preselected upon publishing the connector package (As shown in Figure 7). You should review fields before the connector is initialized. Any new customization fields added to these tabs will automatically appear for mapping. |