Import Setup in Kensium A-M Connector
The Magento connector allows you to export the configuration set-up for ease of use. You can import functionality for Mapping and Functionality. Click on the Import Setup as shown in the figure below.
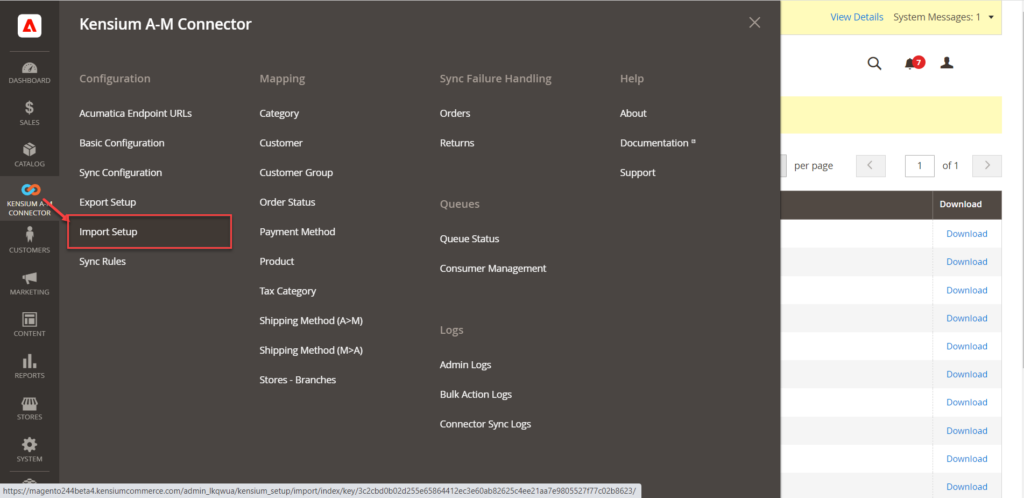
Once you click on the [Import Setup] you will be redirected to the [Import – Mapping & Configuration] window.
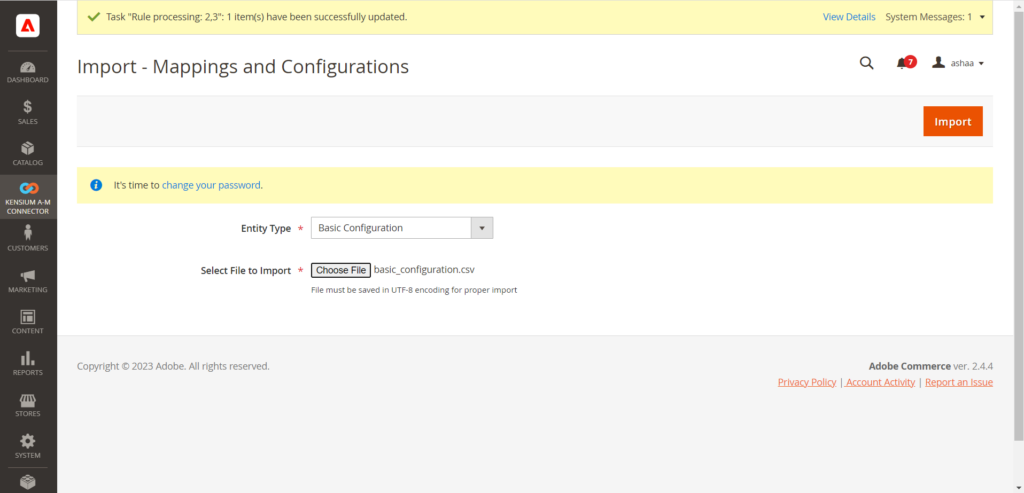
You will have the option to choose the Entity Type from the drop-down menu. To import select the file that you want to import. Make sure you are selecting the correct file to successfully process the import as shown below.
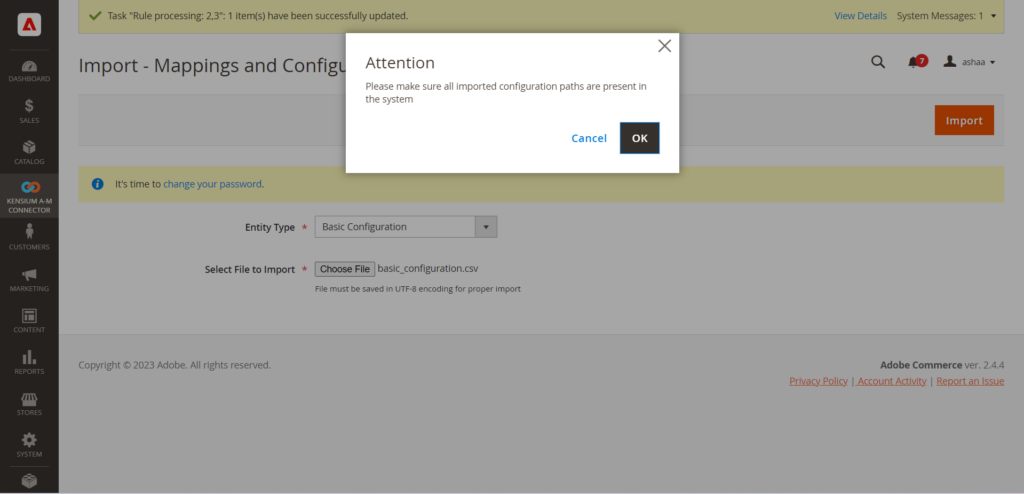
Click on the Import button to proceed. A pop-up window will appear on the screen before the records get inserted as [Please make sure all imported configuration paths are present in the system].
|
|
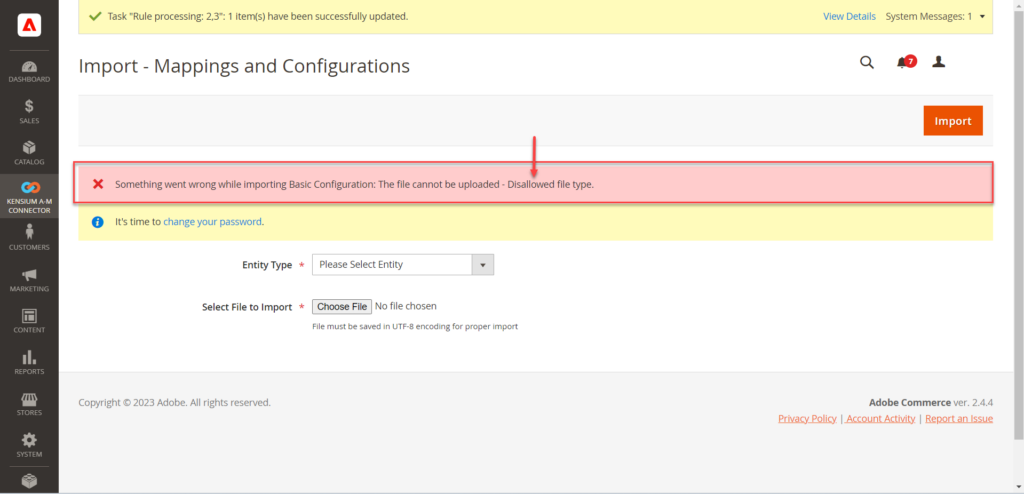
The application supports only the .csv file format. So, we strongly recommend you double-check the file format before importing. |
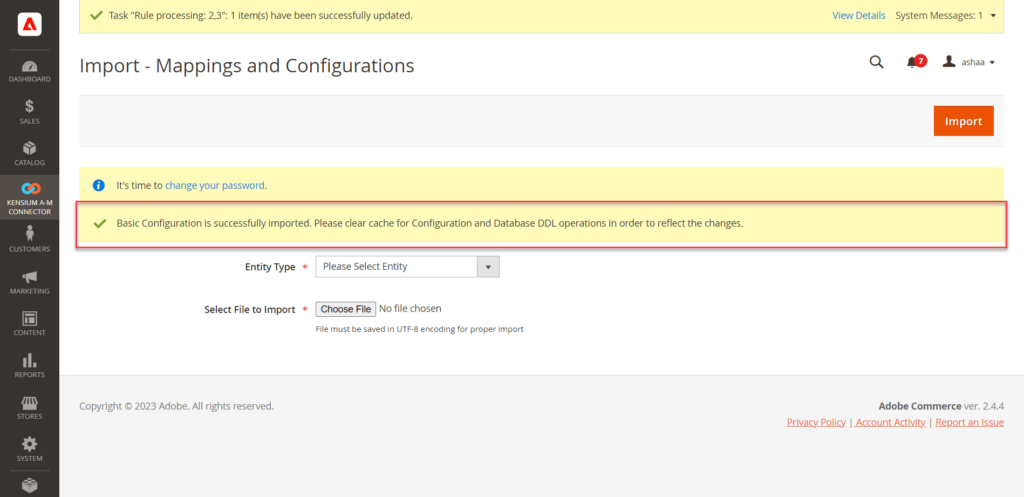
The application gives an information message upon the successful import along with the Entity Type.
|
|
If the file type doesn’t match in those cases the import will fail and you will be notified about this along with a hint about what caused the error. |
See below:
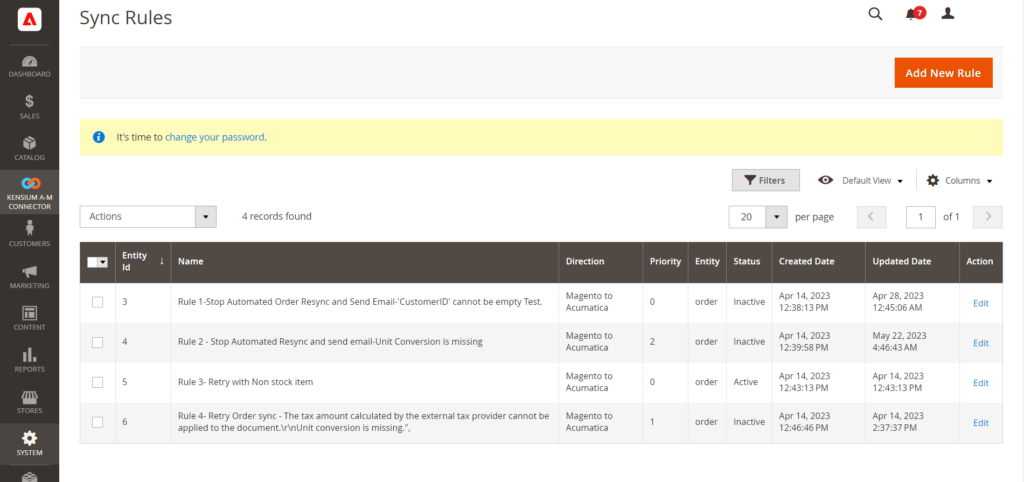
Sync Rules:
The application allows you to set sync rules. The rule applies to the process of synchronization of orders. Under the Kensium A-M Connector, the Sync Rules option is available under the Configuration menu as shown in the figure below.
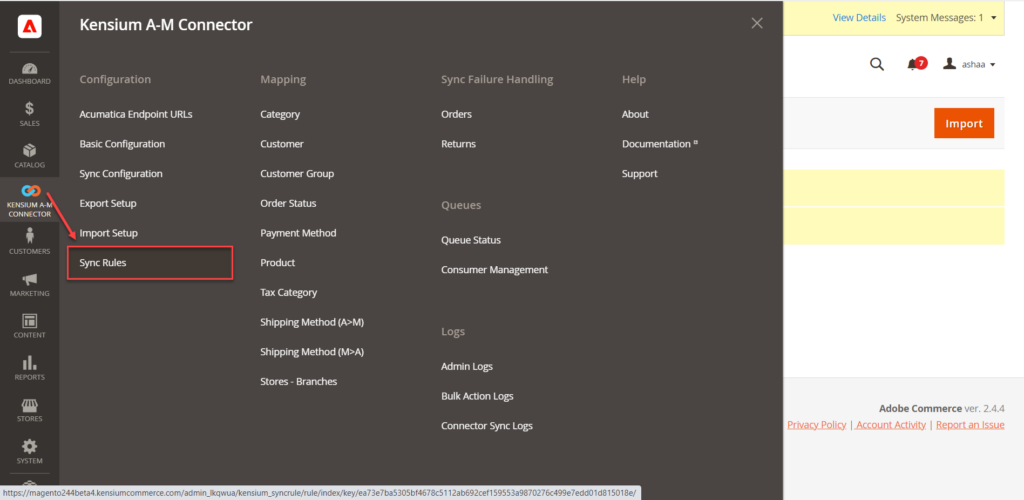
You can add sync rules from this section by clicking on [Add New Rule].
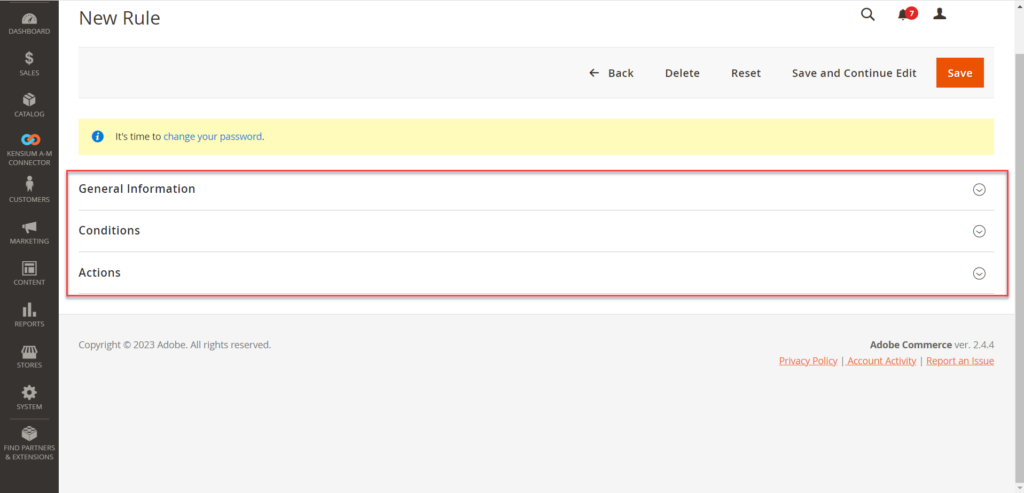
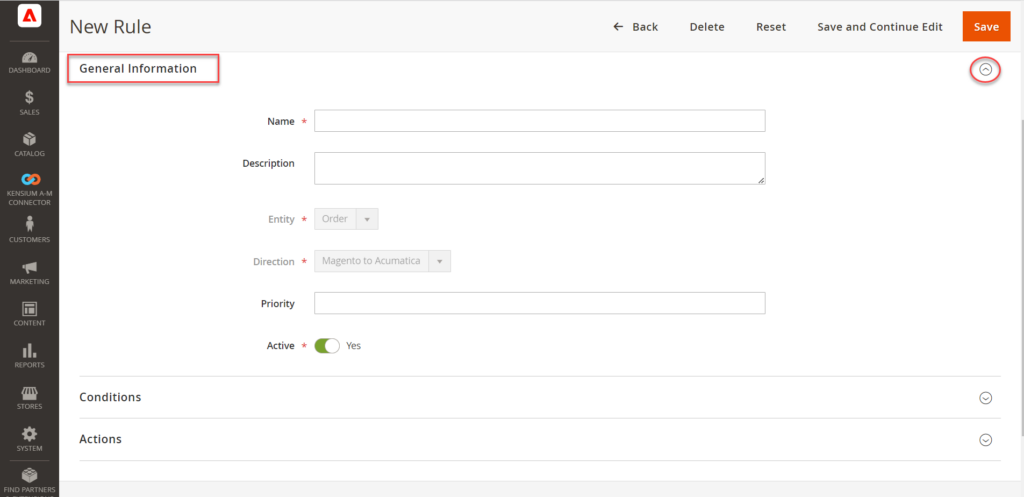
The Add New Rule section is divided into the following:
- General Information
- Conditions
- Actions
- General Information: In the General Information section, you need to enter the following field-level information.
- Name: This is a mandatory field. You need to set the rule name.
- Description: You can write a general description for setting the rule. For example, if there is a negligible difference in the price of the product you can write in the description section. This is an option field.
- Entity: This should be by default Order. Since the sync rule applies to the order only.
- Directions: This field is mandatory, however, doesn’t require manual entry or selection. The data sync direction is set from Magento to Acumatica by the application.
- priority: You need to set the priority of the Order synching from Magento to Acumatica.
- Active: This should always be enabled. Toggle the button to enable. This is mandatory to set the sync rule.
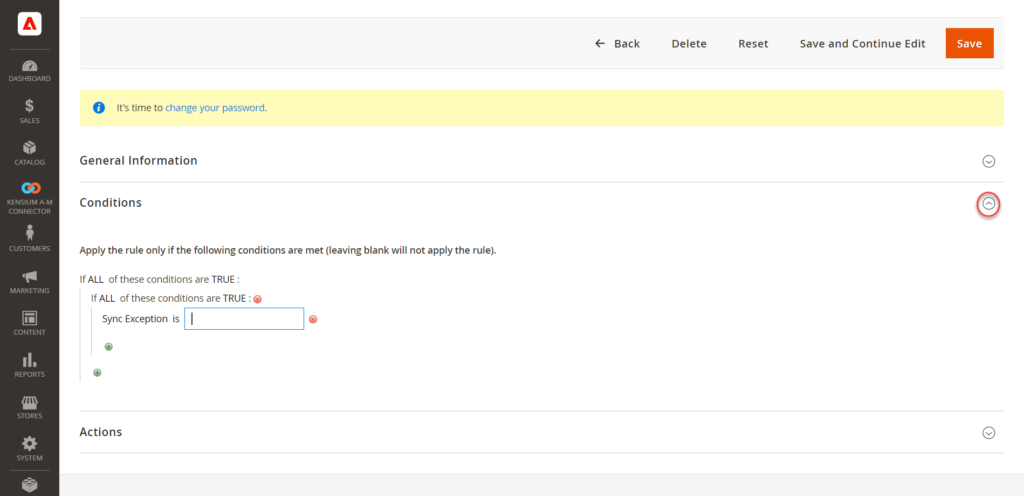
- Condition: This is an important section where you can apply the condition for the sync rule. You need to define the conditions that need to be met to set the sync rule.
- You can add the condition by clicking on the sign if all these conditions are true. The application will provide you with the following options to choose from the drop-down.
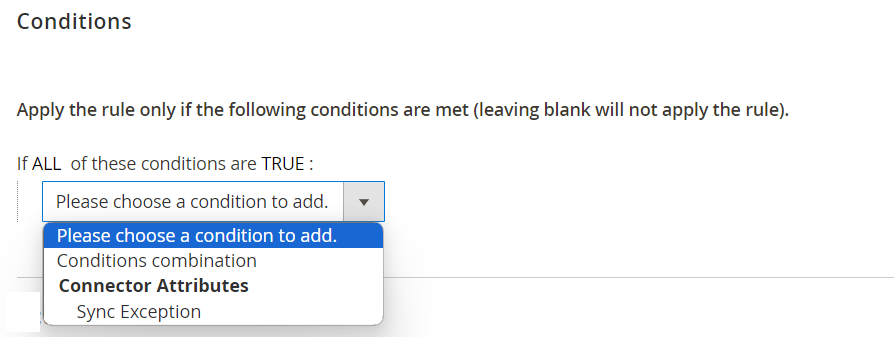
- Condition combination:
- Connector Attributes: Connector Attributes refer to the specific characteristics or properties that are utilized to establish a connection between Magento and Acumatica.
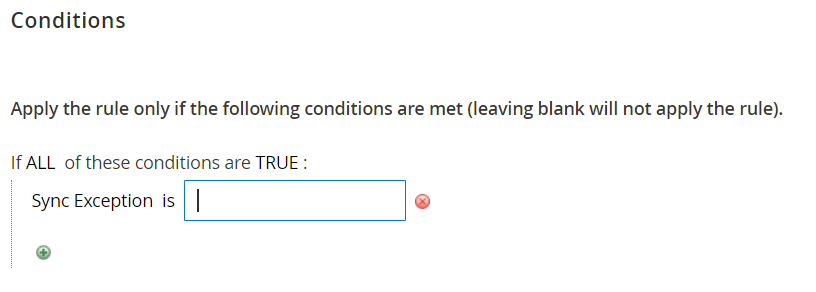
- Sync Exception: You will get this option under Connector Attributes. After selecting the Sync Exception, the application will allow you to write the condition in the text box as shown below:
- Actions: You can take any of the following actions based on the condition. You have to choose the action based on certain conditions.
See below:
If you leave the condition blank the rule will not be applied by the application.
- Retry Order Sync: In case you want to retry the order sync.
- Retry Order Sync with Non-Stock Items: In case you want to retry the Order Sync with the Non-Stock items, you need to select this option. The application will ask to enter the non-stock item ID in this scenario.

- Stop Automated Order Re-Sync: This will stop the automated order re-sync.
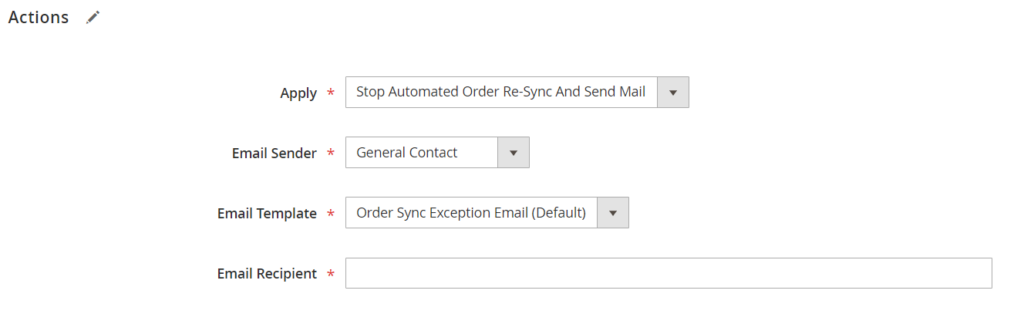
- Stop Automated Order Re-Sync And Send Mail: This action will stop the automated order re-sync and you will have an option to send an email to the contact. The following sub-field will appear on the screen, and you need to enter the information for all the mandatory drop-down and text fields.
- Email sender: Choose the email sender from the drop-down.
- Email Template: By default, the application provides you with an Order Sync Exception Email.
- Email Recipient: Enter the valid email address of the email recipient.
- Change Order Status: You can change the order status from the drop-down menu. The following option is available in the drop-down.
- Order Status: Cancelled, Closed, Completed, On Hold, Payment Review, PayPal cancelled reversal, PayPal Reversed, Pending Payment, Pending, Pending PayPal, Processing, Rejected.
After completing all the steps to sync rule setup you will be landed on the following [Sync Rule] screen.
|
|
Sync rules will be applied for the Magento to Acumatica failed orders only. |