


Customer Mapping
Customer Mapping is followed by Category mapping in the Mapping section upon clicking on the [Kensium A-M] connector. Upon clicking the [Customer], you will be redirected to the following screen.
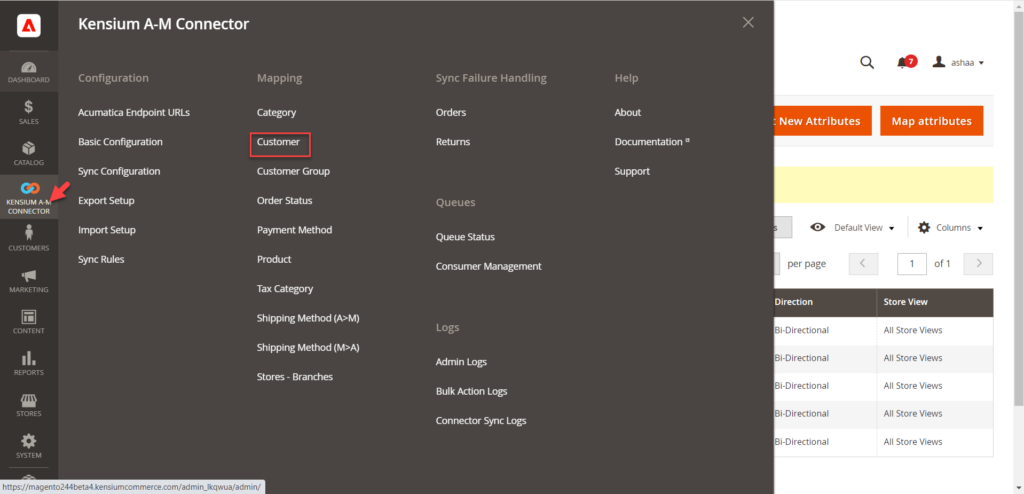
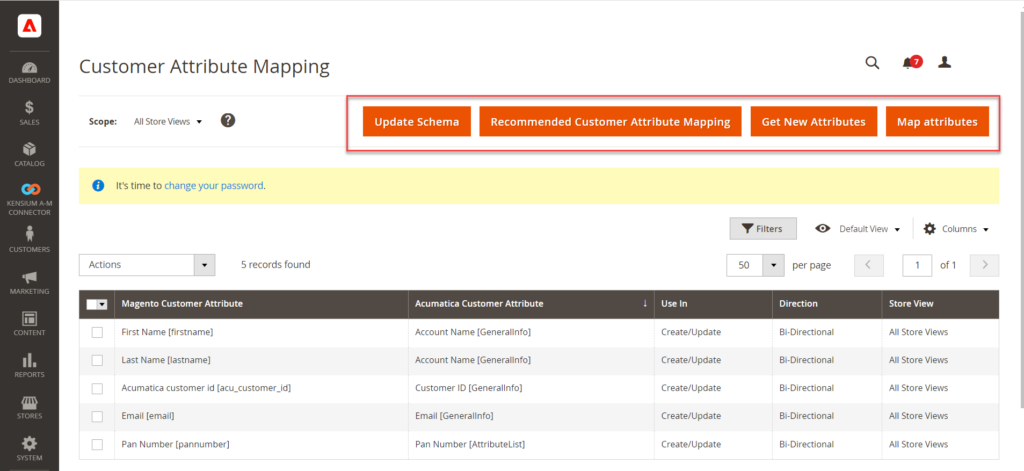
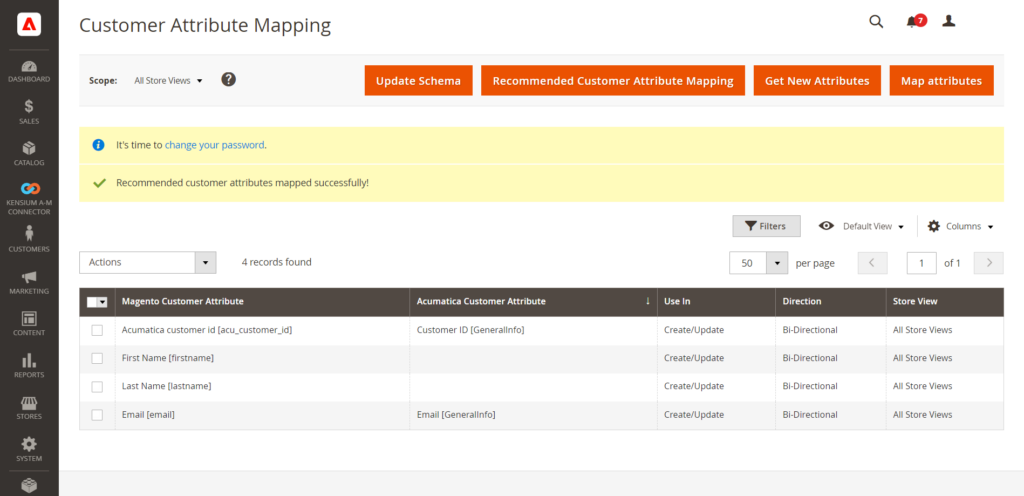
This includes the following options in the Customer Attribute Mapping screen.
- Update Schema
- Recommended Customer Attribute Mapping
- Get New Attributes
- Map Attributes
Update Schema:
The customer-selected fields in Acumatica will be synchronized within Magento once you click on [Update Schema]. Upon clicking on this a pop-up will appear and to update you need to click on [OK].
![Confirmation message upon clicking [Update Schema]](/wp-content/uploads/2023/12/Confirmation-message-upon-clicking-Update-Schema-1024x501.png)
- Recommended Customer Attribute Mapping:
In the first place, the customer attribute mapping browse will be blank on your screen. To bring the default customer attribute you need to click on the [Recommended Customer Attribute Mapping]. A confirmation message will appear on the screen. Click on [OK] and the default attributes will appear on the screen.

- Get New Attributes:
Upon clicking the [Get New Attributes] a Grid Slider will open up and here you find the list of Acumatica Attributes which are not yet present in Magento. Provide a screenshot of the Grid.
To create any attribute, click on the Create button and it will open up the Magento Customer Attribute Form with the loaded Acumatica attribute data. Provide the Screenshot of the form. After configuring the attribute data in the form click save to create the attribute in the Magento.
Once the attribute is saved it will be available for the mappings.
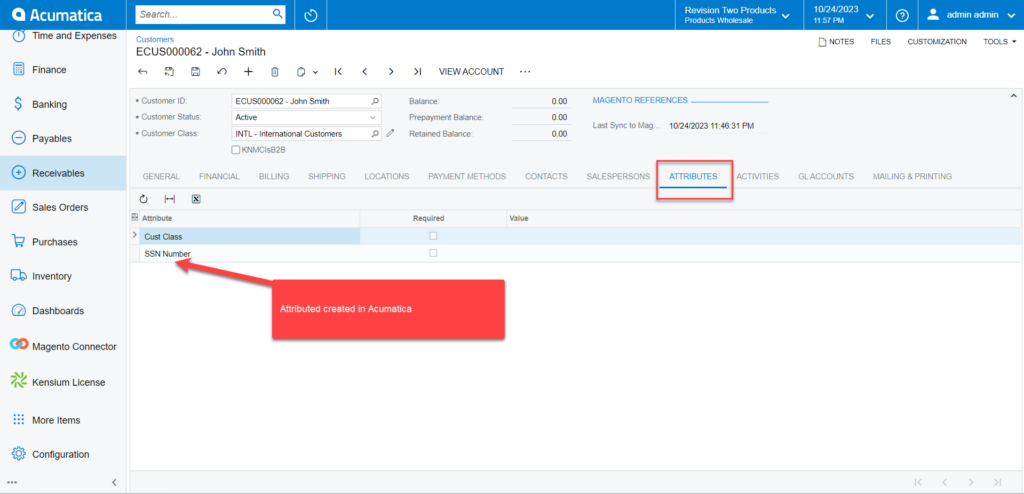
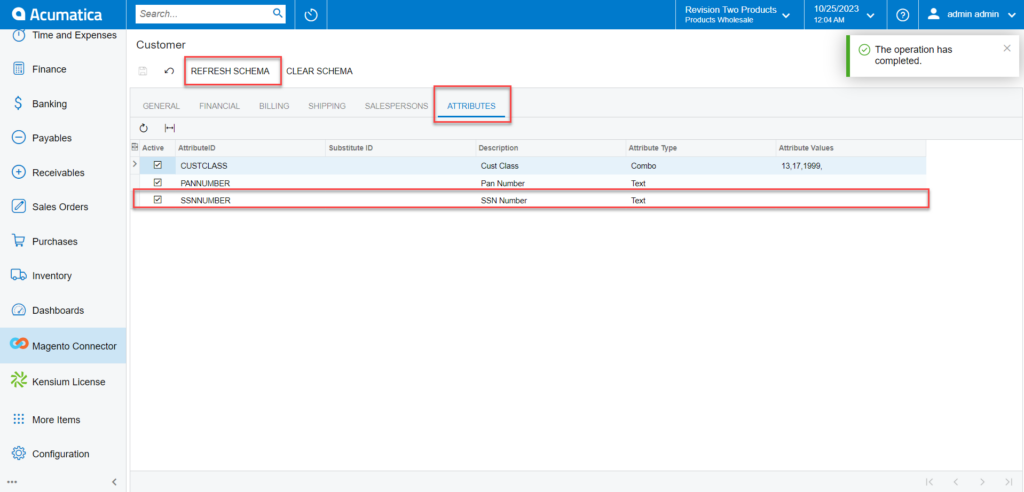
Go to the Attributes section.
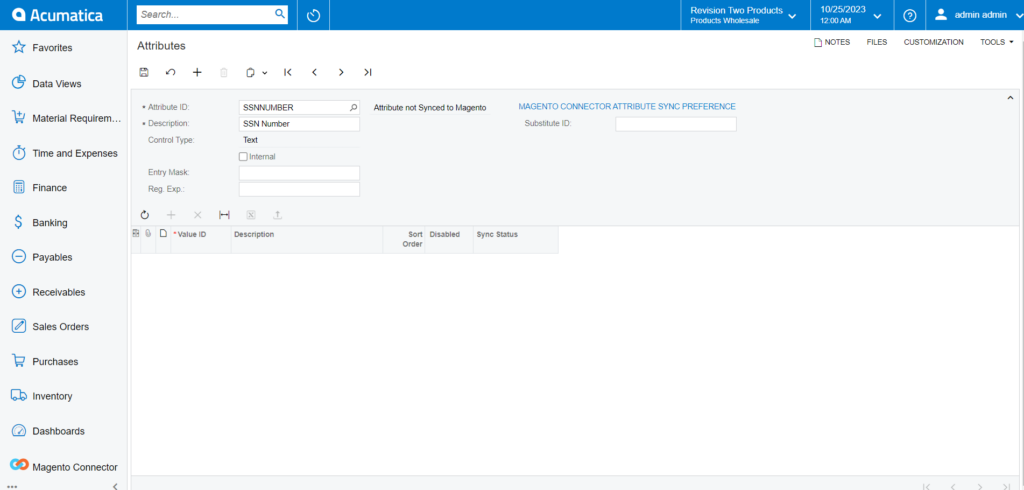
Click on the Customer Schema and click on the Refresh Schema the SSN Number, the newly created attribute should be displayed within Acumatica.
![Click on [Create] for new attributes](/wp-content/uploads/2023/12/Click-on-Create-for-new-attributes-1024x494.png)
The next screenshot is not available from Magento in the instance.
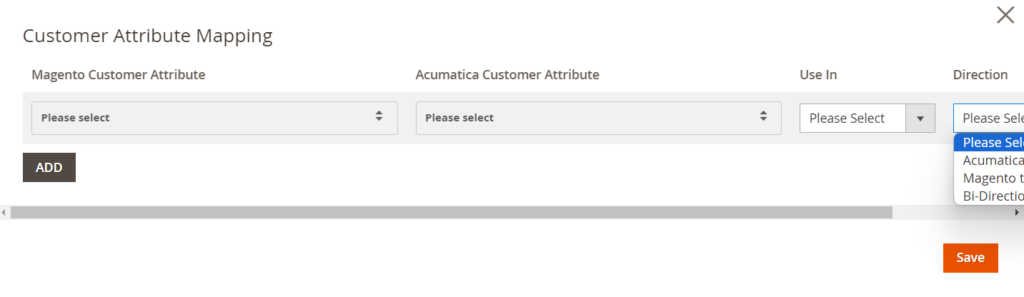
This feature allows you to configure to map the customer attributes. You can map the Magento Customer Attributes with the Acumatica Customer attribute. The mapping of customer attributes could be bi-directional. You will have 4 dropdowns as shown in the following figures.
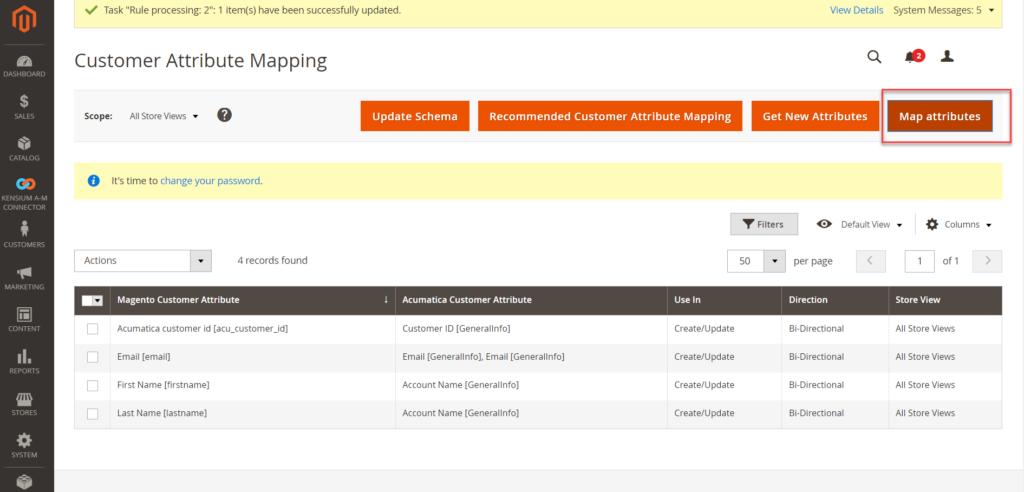
Upon clicking the [Map Attributes] the following pop-up will appear on your screen.
|
Field |
Field Type |
Description |
|
|
Magento Customer Attribute |
Search Drop-down |
Select the field which you want to map with the Acumatica from Magento. |
|
|
Acumatica Customer Attribute |
Search Drop-down |
Select the Acumatica field which should be mapped with the Magento field. |
|
|
Use In |
Search Drop-down |
Select the option from the following drop-down list.
|
|
|
Direction |
Search Drop-down |
Select the direction from the drop-down. For Customers, you will have the option for bi-directional as customer records will be having both in Magento and Acumatica.
If you select only one direction then updates will always be triggered from one side, i.e., the selected side. If you select Bi-Directional then the updates will be triggered from both the end. |
|
Since in Acumatica, the Account name refers to the Customer name. However, in Magento Customer name is defined as two separate text boxes first name and last name.
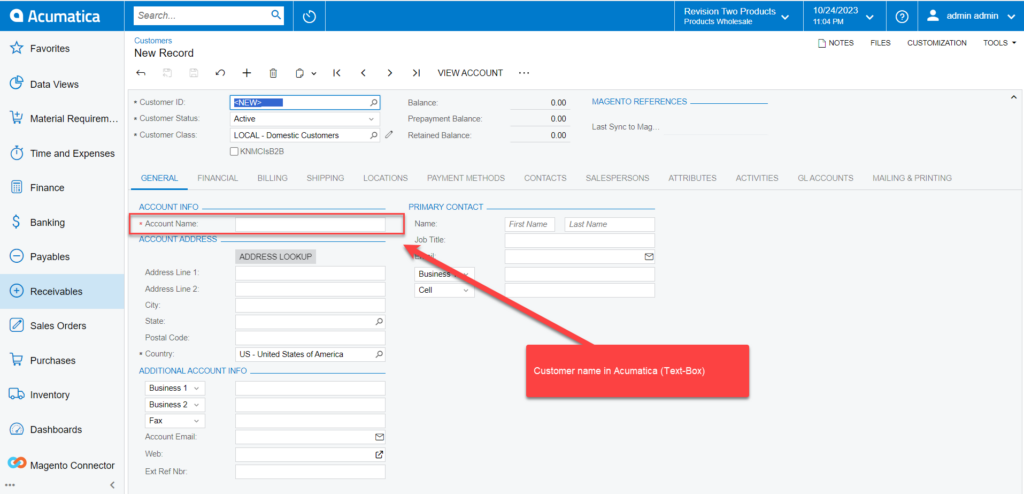
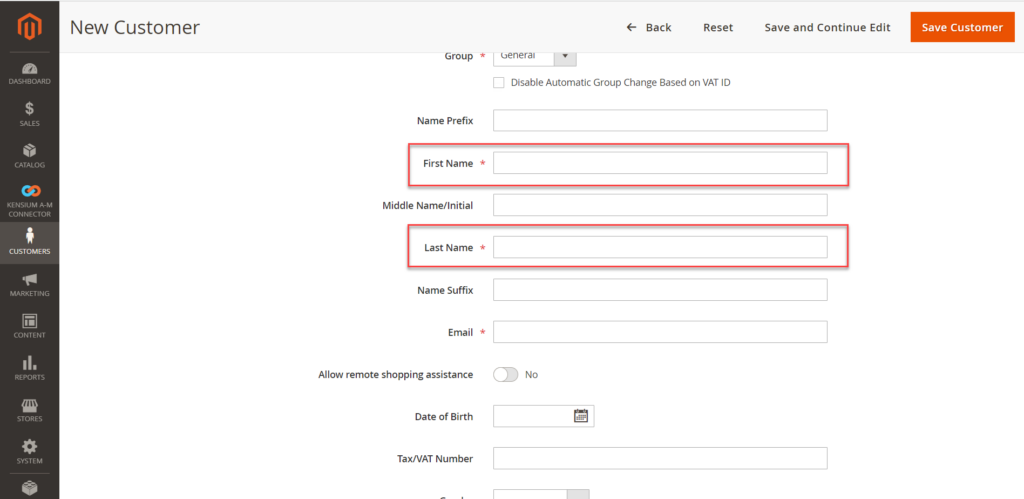
The Account Name will be mapped with the Customer’s First Name and Last Name in Magento.
In case you only have one name in Acumatica then at the time of mapping Magento will enter the name in the first name and the last name there will be a dot as it’s a mandatory field.