Orders in Acumatica and Sync with Magento
You can place an order within Acumatica and sync the same into Magento. You need to follow the steps as described below.
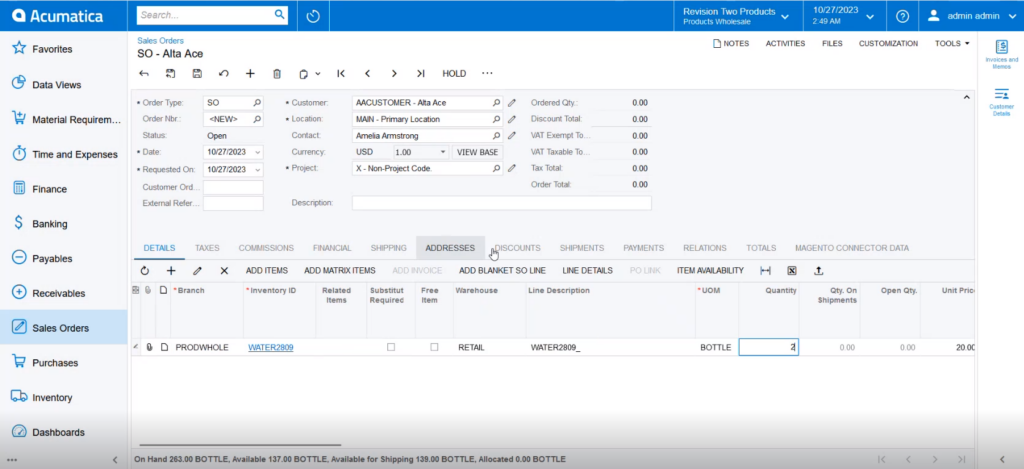
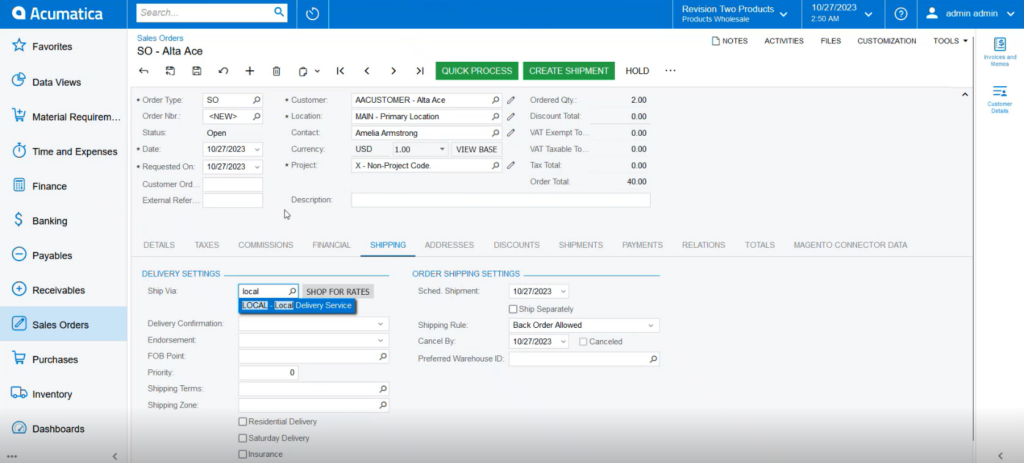
Step 1: Create the Order in Acumatica.
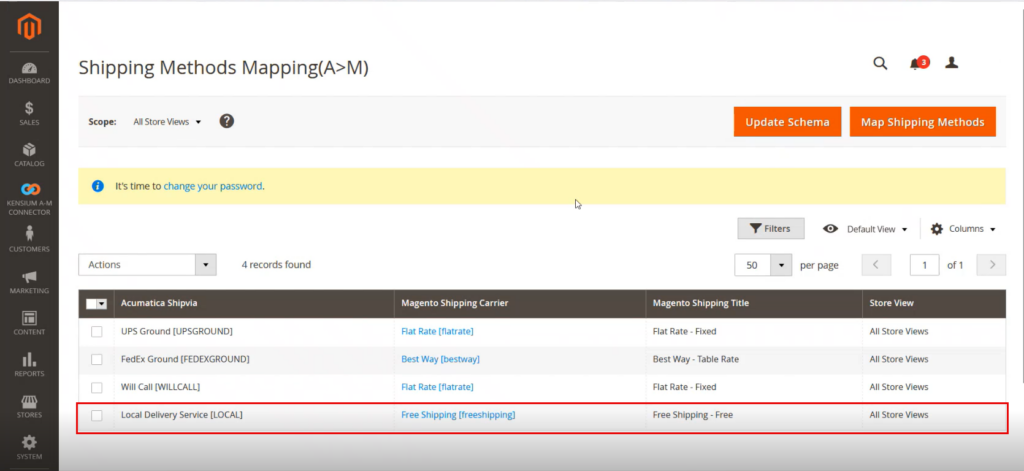
Step 2: Check the shipping mapping (A-M) from Magento.
Step 3. Go back to Shipping details in Acumatica Sales Order and select the shipment.
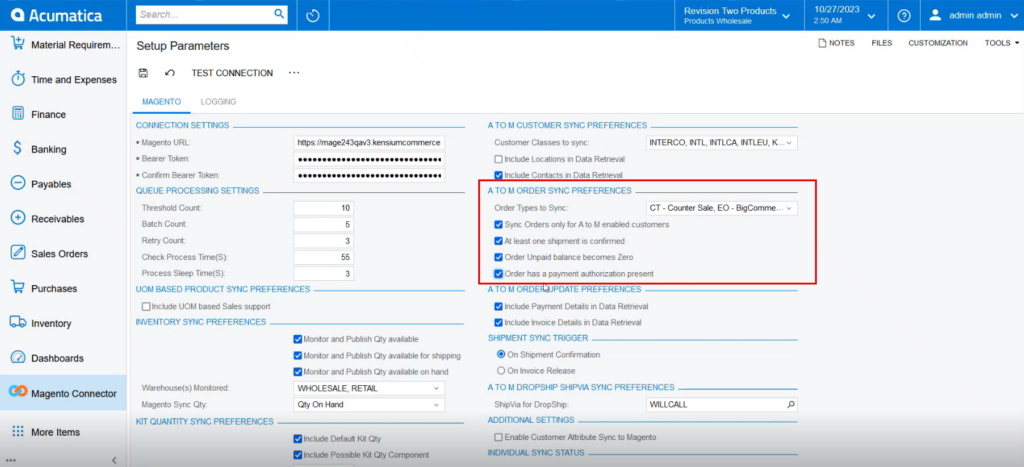
Step 4. Go to [Setup Parameters] to check [A-M Order Sync Preferences]. Any of the 3 conditions should match to sync the data.
Step 5. From payment check the unpaid balance amount. If it’s not 0.00 to satisfy the criteria create a payment record to change the unpaid balance to 0.00.
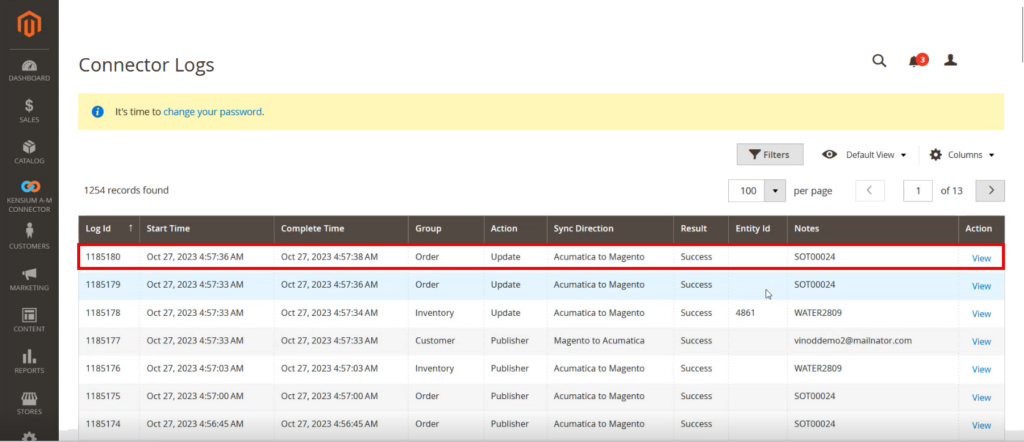
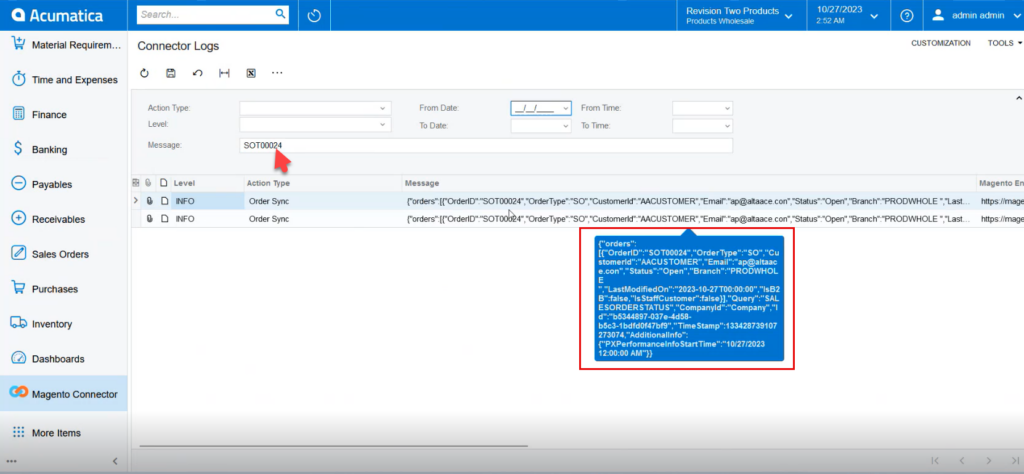
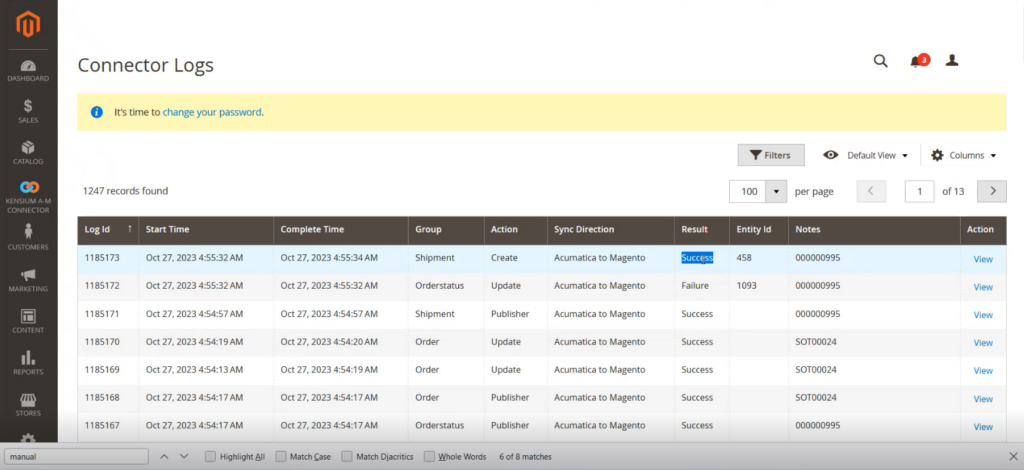
Step 6. To check the sync status, go to Reports Connector Log the following screen will appear.
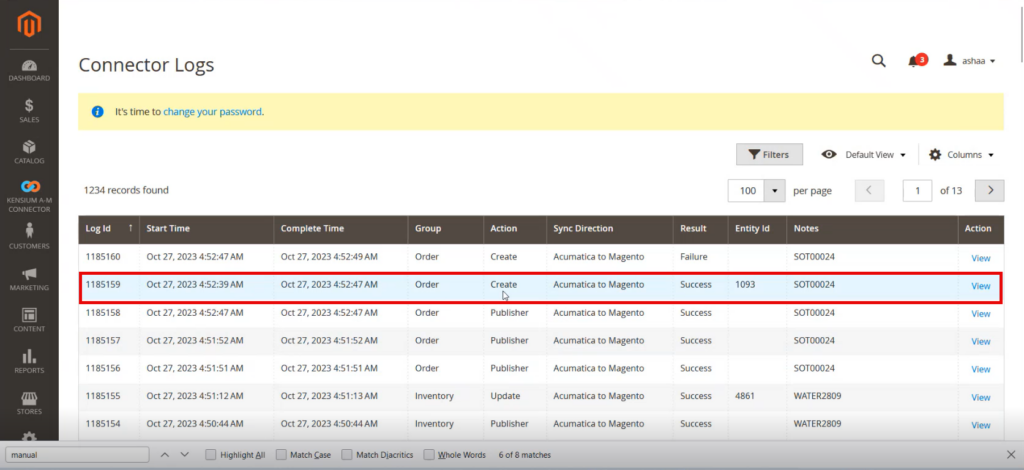
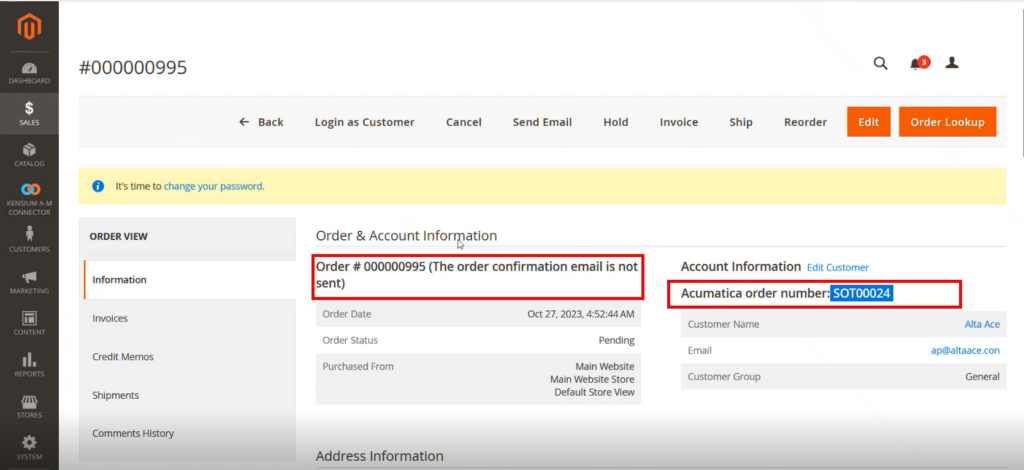
Step 7. Go to Magento Connector Log to check the Order Sync Status.
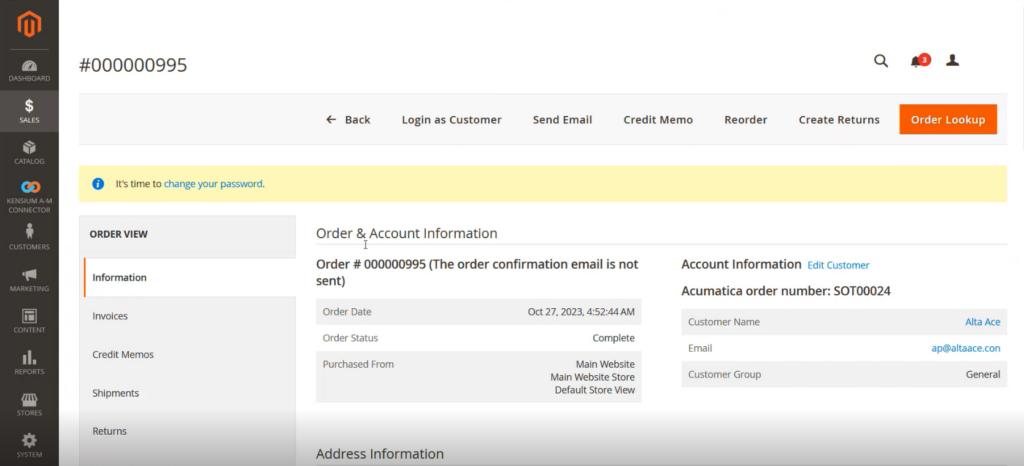
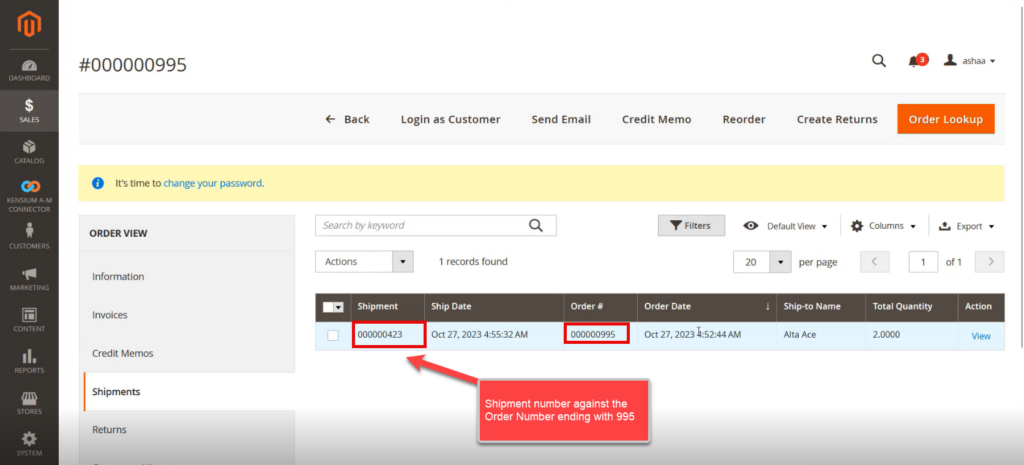
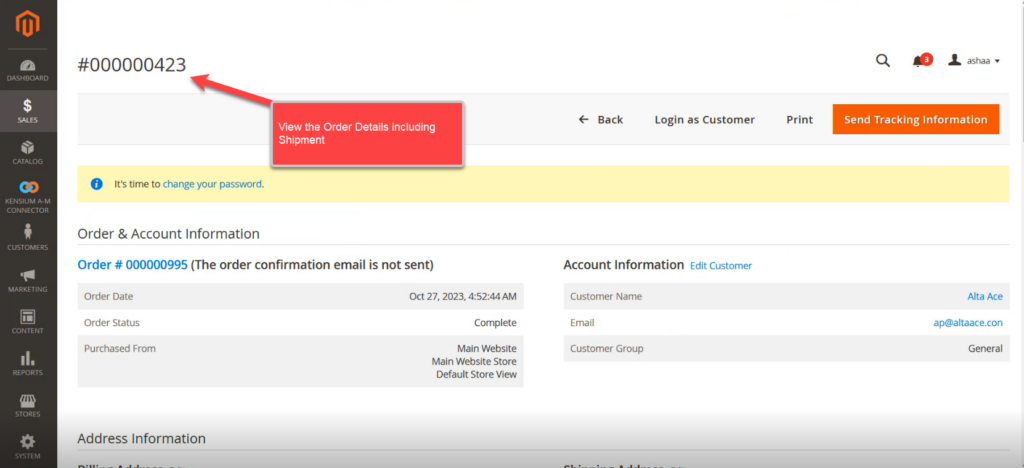
Step 8: Click on [View] and go to the Order. You can view the Acumatica and Magento Order Number in the Order Screen.
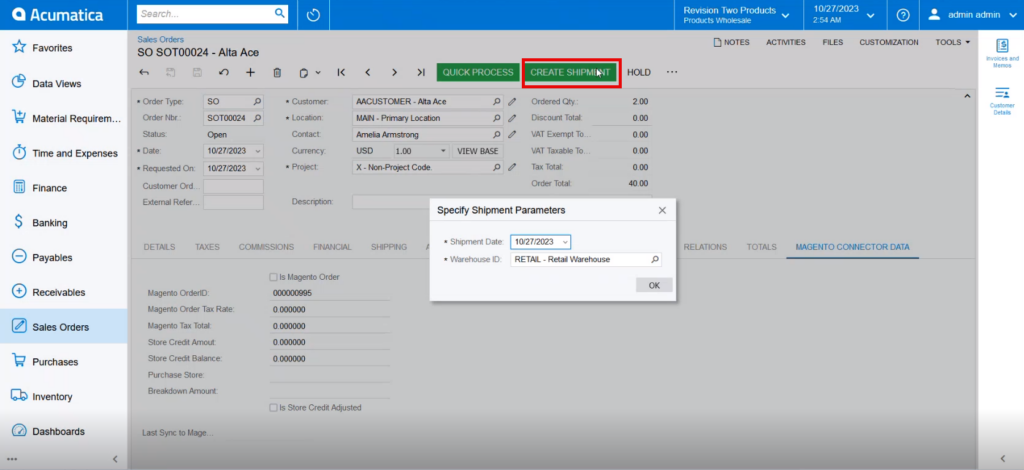
Step 9. Go to Acumatica sales order to create the Shipment.
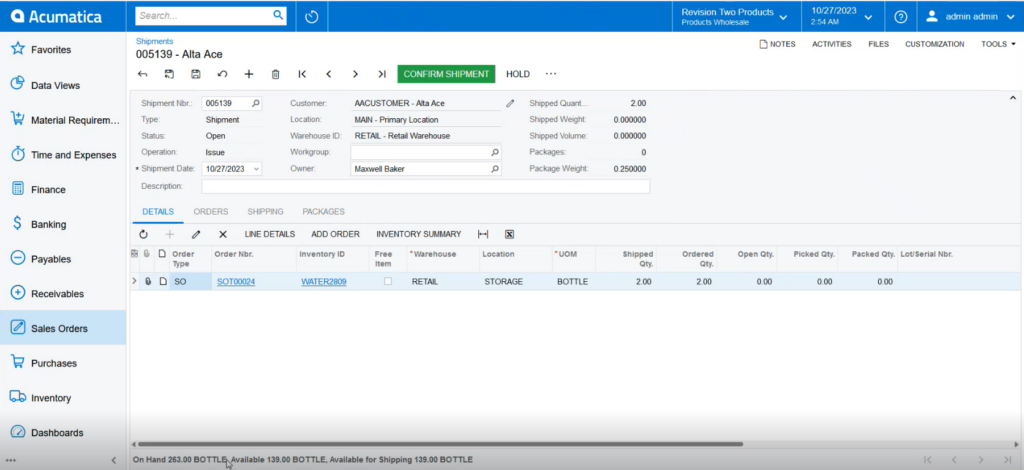
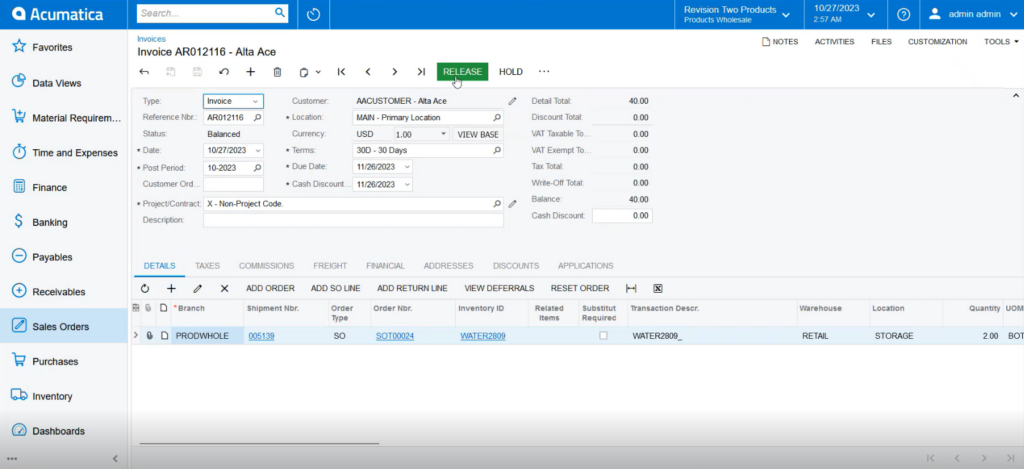
Step 10: Confirm the Shipment and Release the Invoice.
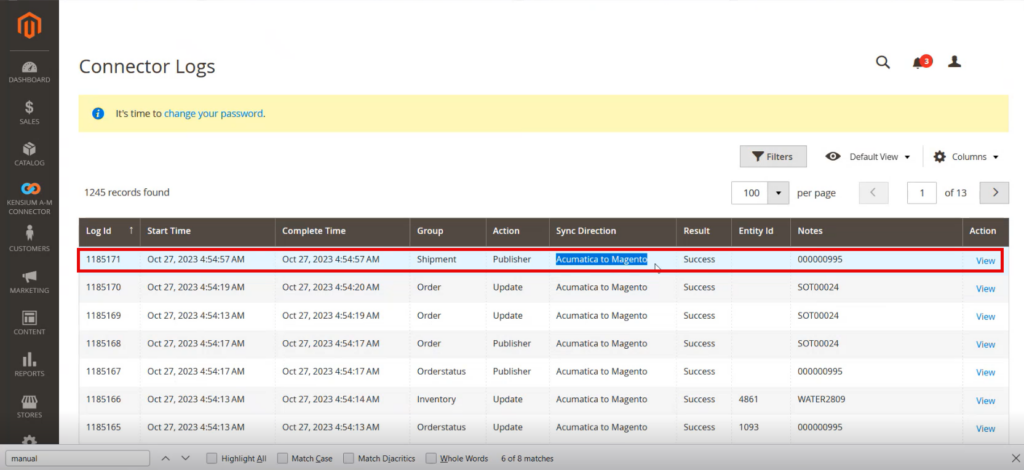
Step 11: Go to the Connector Log and it should be published unless you see any error. Shipment and invoices are created in Acumatica, however, the returns will take place in Magento.
Step 12: Now Release the Invoice. After you release the invoice, the trigger will take place from Acumatica.
Step 13: Go to the Magento connector log for the update.