Acumatica Schema Field
Go get Acumatica Schema Field, you need to search for [Item Classes] in the Global search bar.
- Click on [Item Classes] under [Preferences].
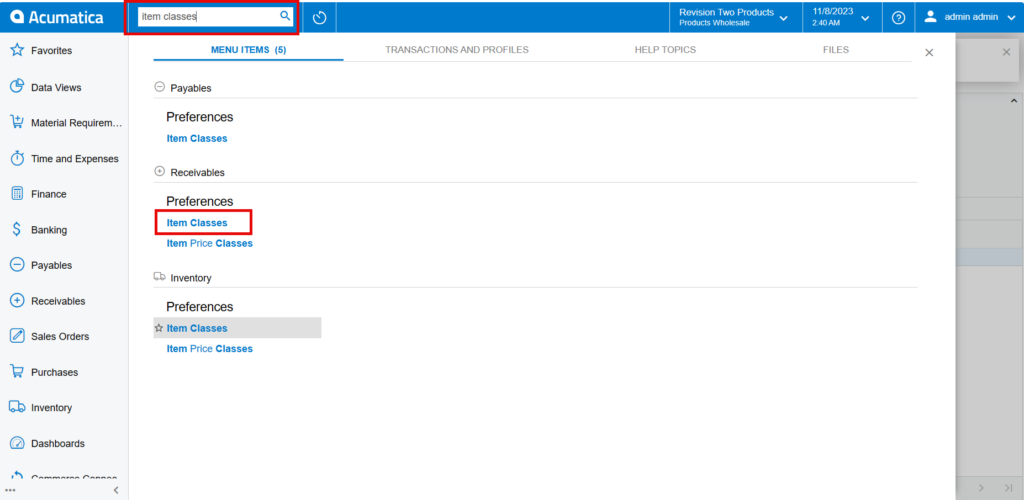
- You will be redirected to an Item classes screen.
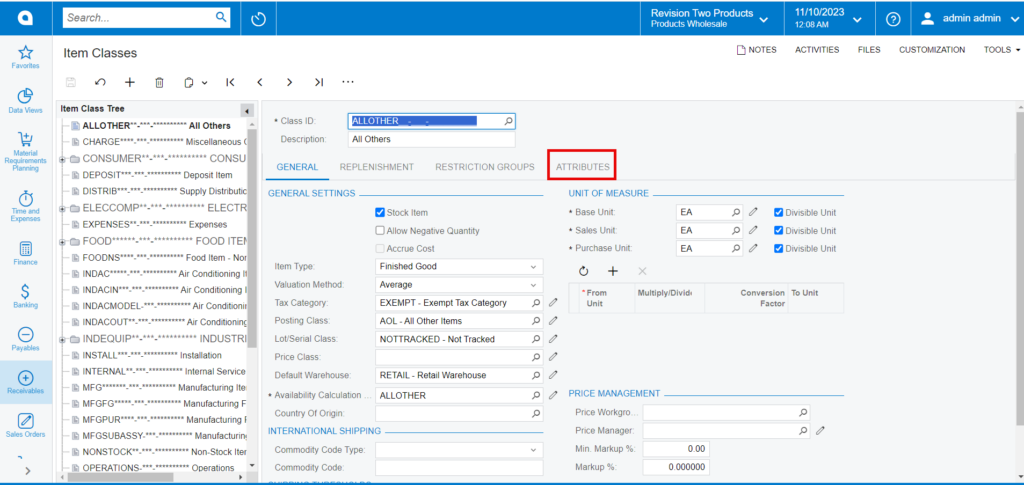
- Click on [Attributes].
- Click on [+] icon.
- You need to search for the [Attribute ID] from the existing list of options.
-
You need to add the [Description] and then select the [Category] from the drop-down menu.
- Attribute
- Variant
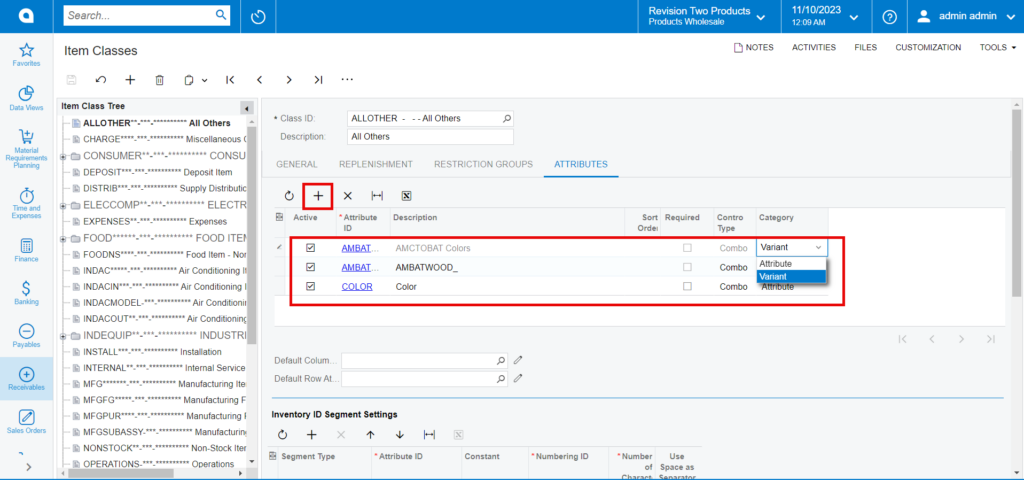
- Click on [Save].
- You need to refresh the created Attributes in [Products] under [Schema Management].
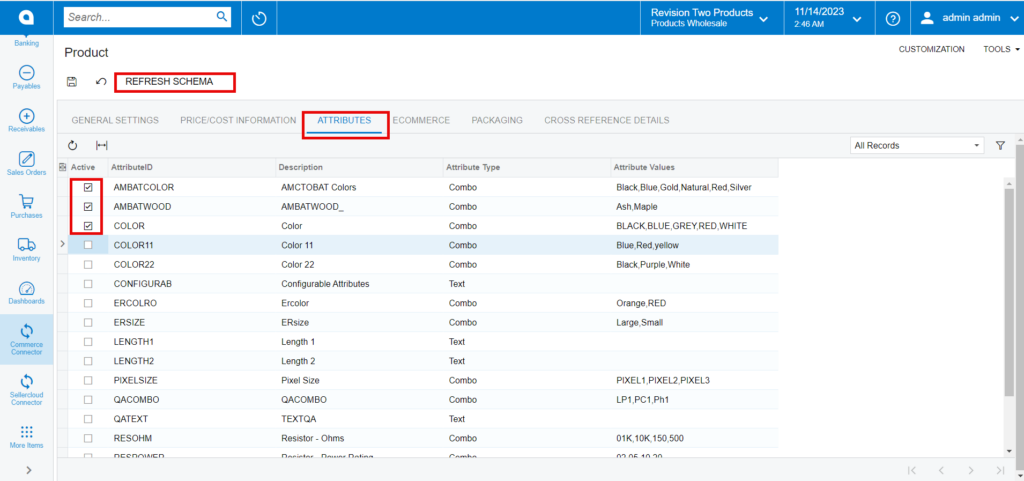
- You must enable the checkbox for the created [Attributes].
- Click on [REFRESH SCHEMA].
- Upon Refreshing it will reflect in [Product Custom Column Mapping].
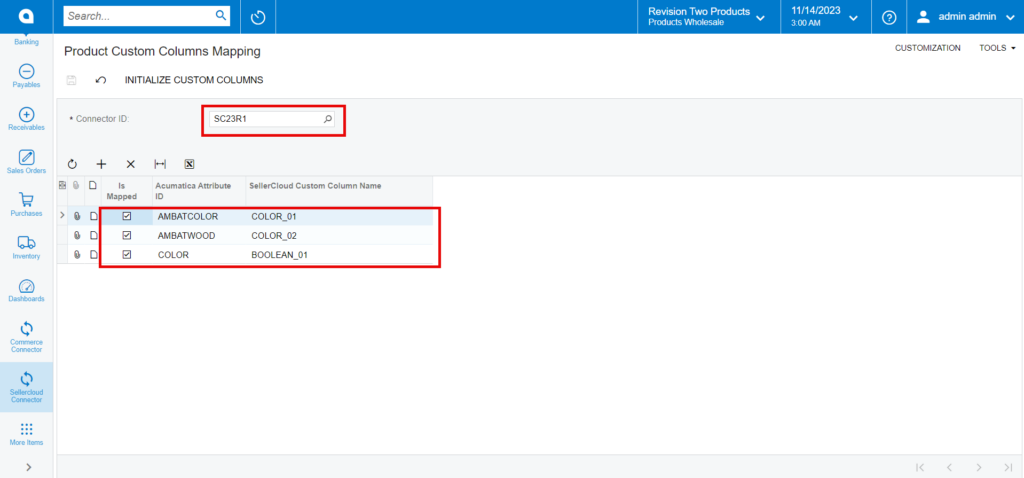
- You must map the created Attributes in SellerCloud Connector. Navigate to [SellerCloud Connector Connector] and click on [Product Custom Column Mapping].
- You will be redirected to Product mapping screen.
- Search for [Connector ID].
- Click on [+] icon and add the created attributes.
- Click on [Save].
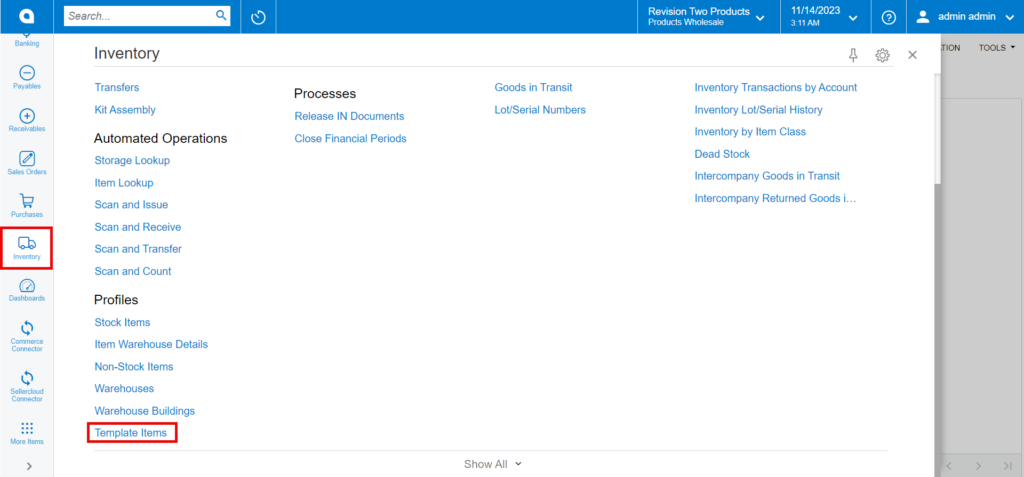
- Upon mapping the attributes in Acumatica and SellerCloud Connector you need to navigate to [Inventory] and click on [Template Items].
![]()
- You will be redirected to [Template Items] screen, then click on [+] icon.
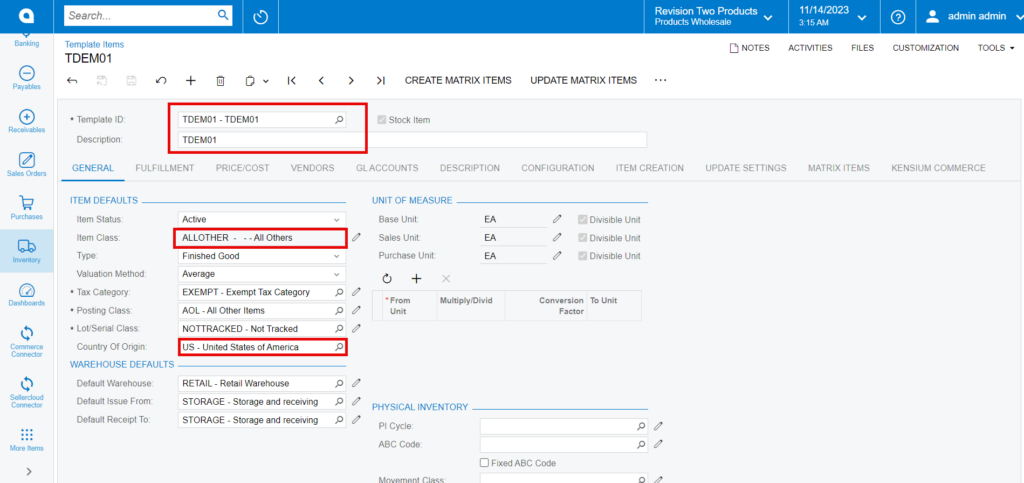
GENERAL
- You need to create [Template ID], [Description], [Item Class], and [Country or Origin] in Template Items screen.
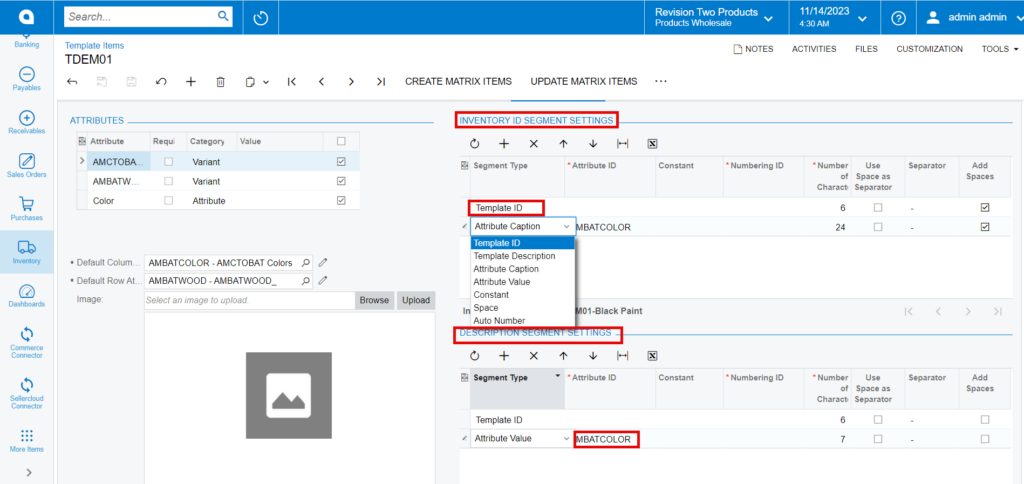
CONFIGURATION
- You need to navigate to the [Configuration] screen.
- Click on [+] icon under [INVENTORY ID SEGMENT SETTINGS] and [DESCRIPTION SEGMENT SETTINGS] and Select Template ID from the drop-down menu.
- Search for the created [Attribute ID].
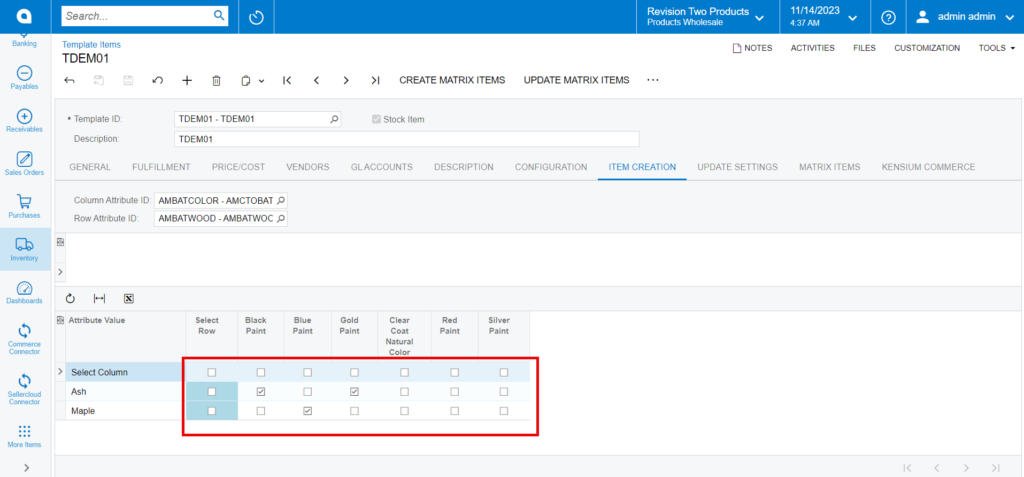
ITEM CREATION
- You need to navigate to the [Item Creation] screen and enable the check boxes for [Attribute Value] to create combinations.
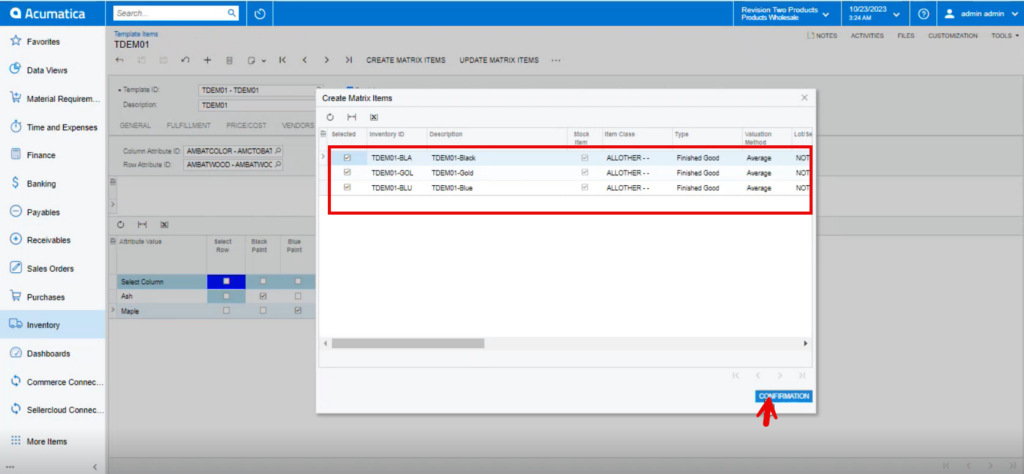
- Click on [CREATE MATRIX ITEMS]. The Child Items will get created.
- Click on [Confirmation].
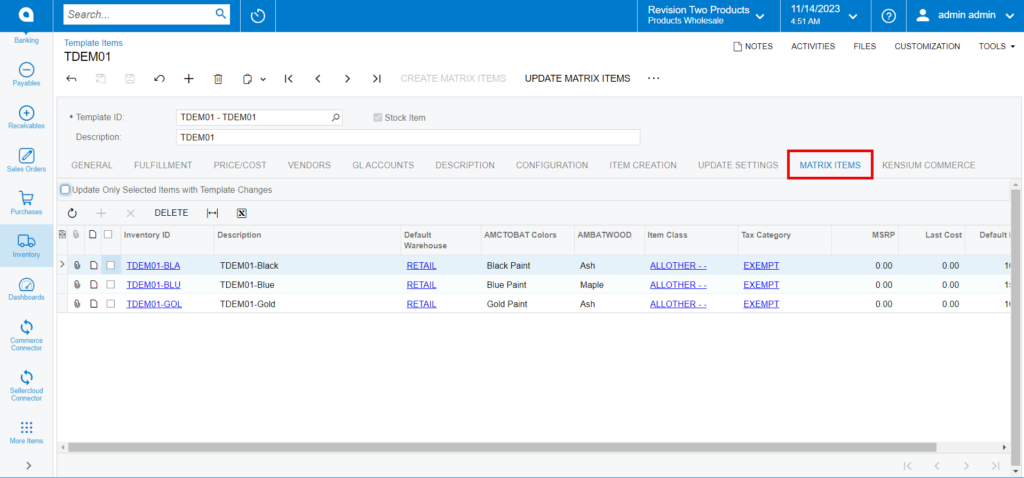
MATRIX ITEMS
You can view the child items in [MATRIX ITEMS].
- You must enable the child items to SellerCloud Connector.
- Click on the child item and the new screen will be auto populated.
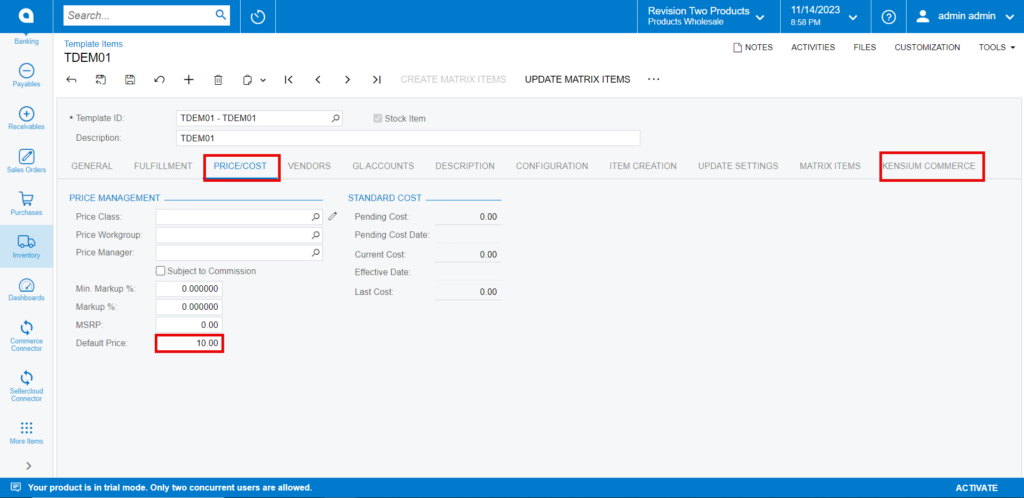
- Enter the price in [Default Price] and click on [Kensium Commerce].
- You will be redirected to a new screen.
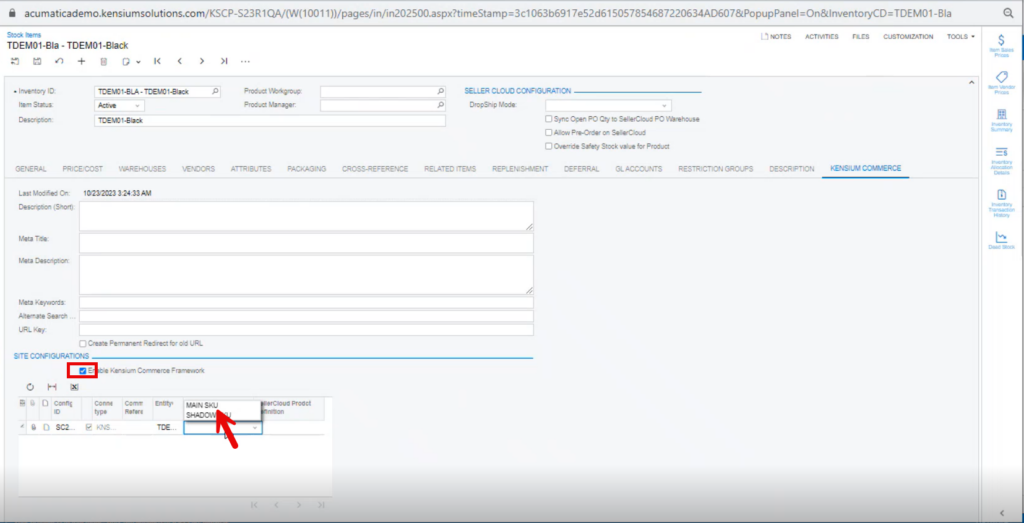
-
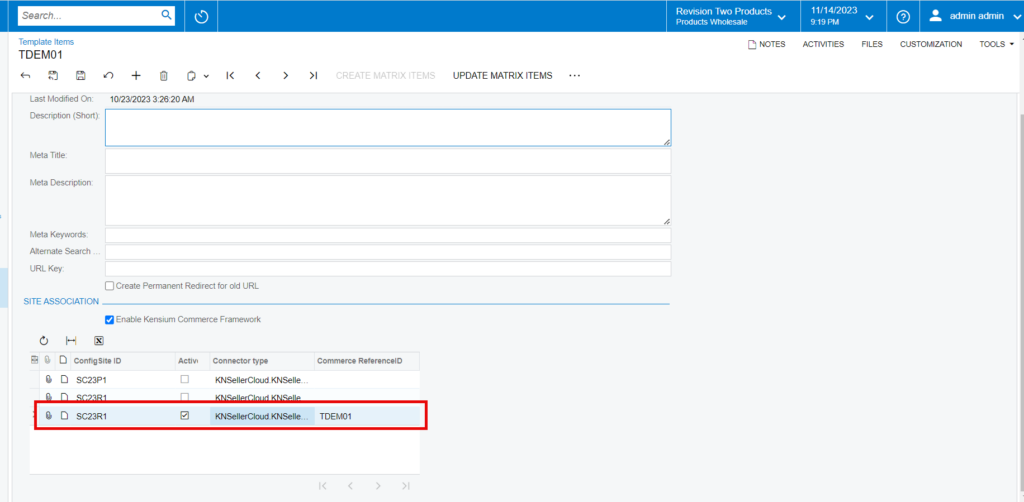
You must enable the check box for [Enable Kensium Commerce Framework] and then enable the check box for [Connector Type] and select the [product type] from the drop-down menu:
- MAIN SKU
- SHADOW SKU
- Click on [Save].
- Similarly, you need to add [Default price] for the remaining two child’s items and map with Kensium Commerce.
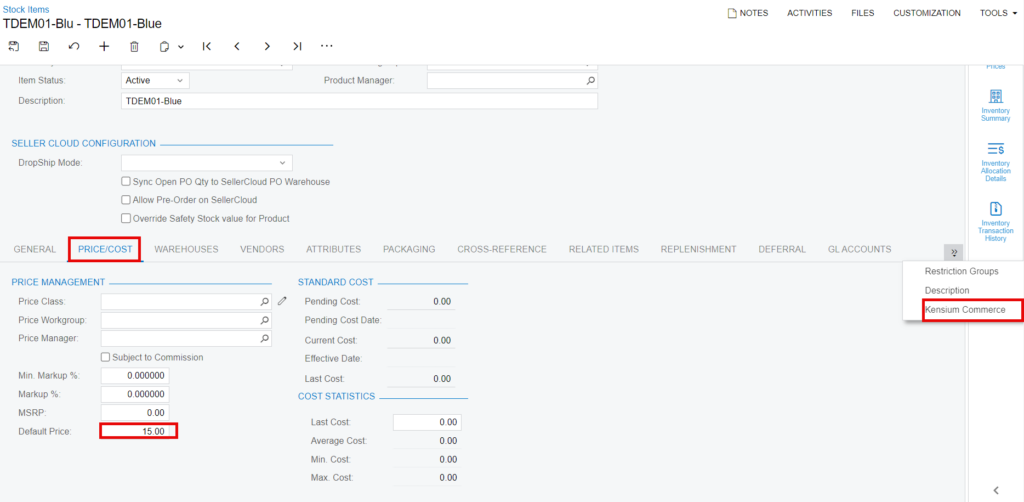
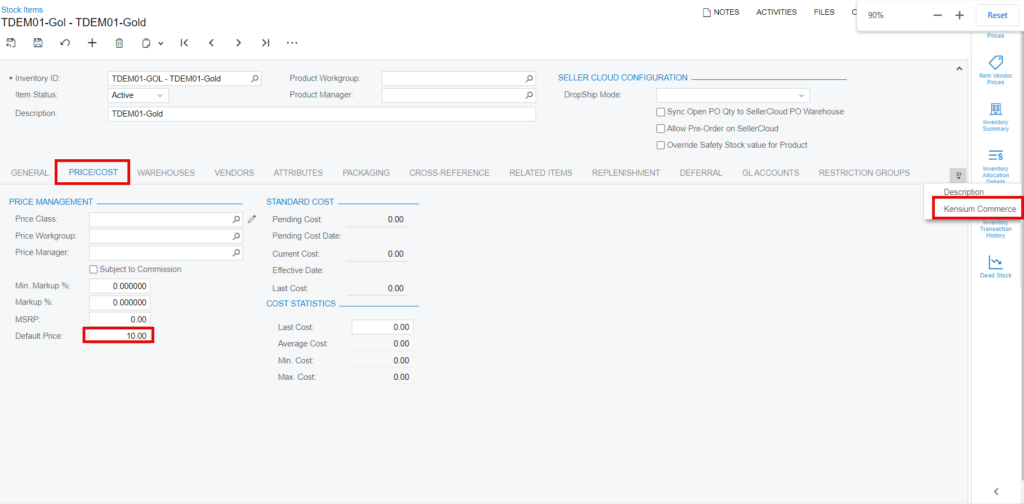
- You must configure this child’s items with parent item.
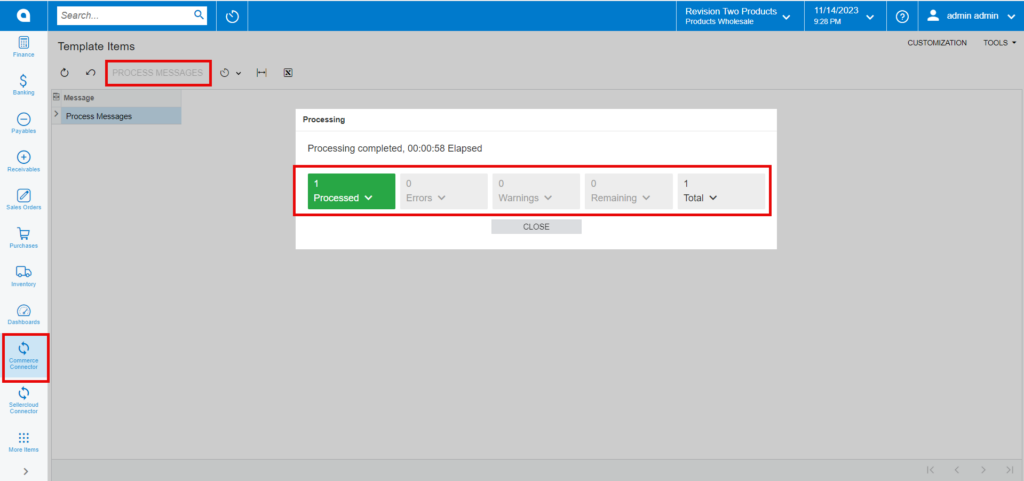
- To activate the connector, navigate to Commerce Connector and click on [Template Items], then a new screen will appear click on [Process Messages] then a successful message will pop-up on the screen.
- You need to navigate to [logs] screen and check for [Template Item] Sync.
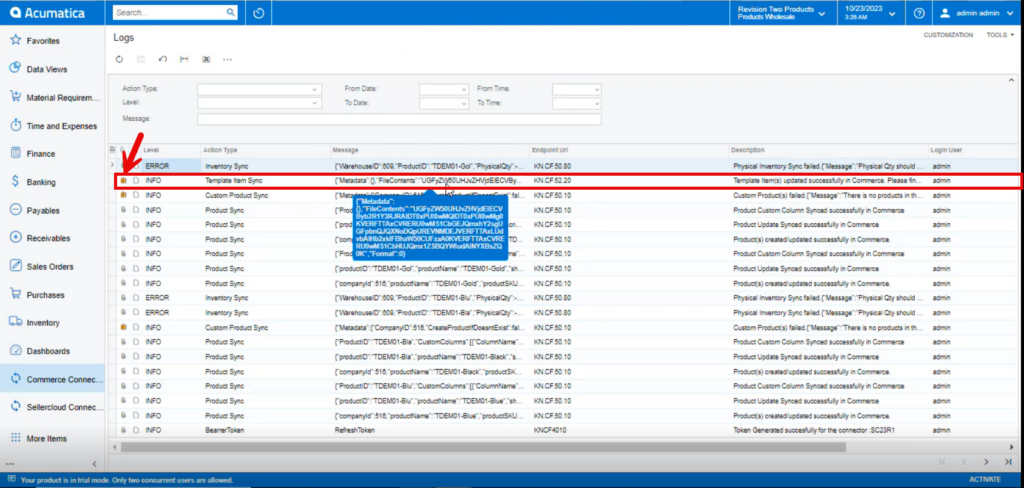
- Click on the INFO of Template Item Sync a new screen will pop-up with the child items.
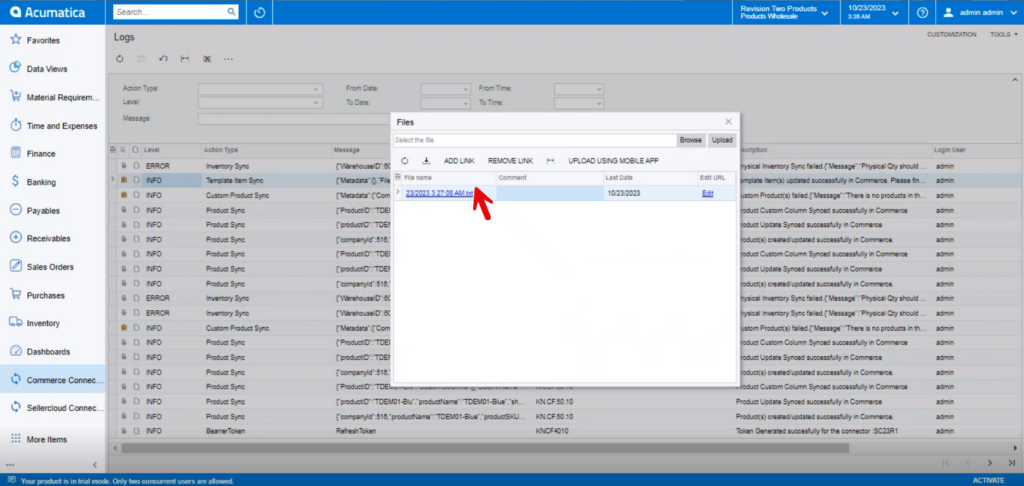
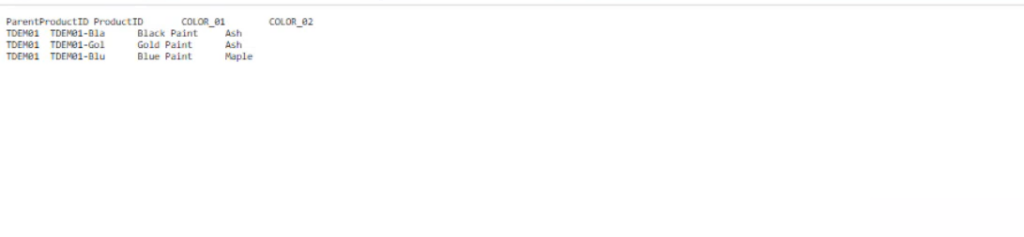
- Click on populated file you will be redirected to a new screen with Parent and child items.
- To view the Child items in SellerCloud Connector follow the below screenshots.
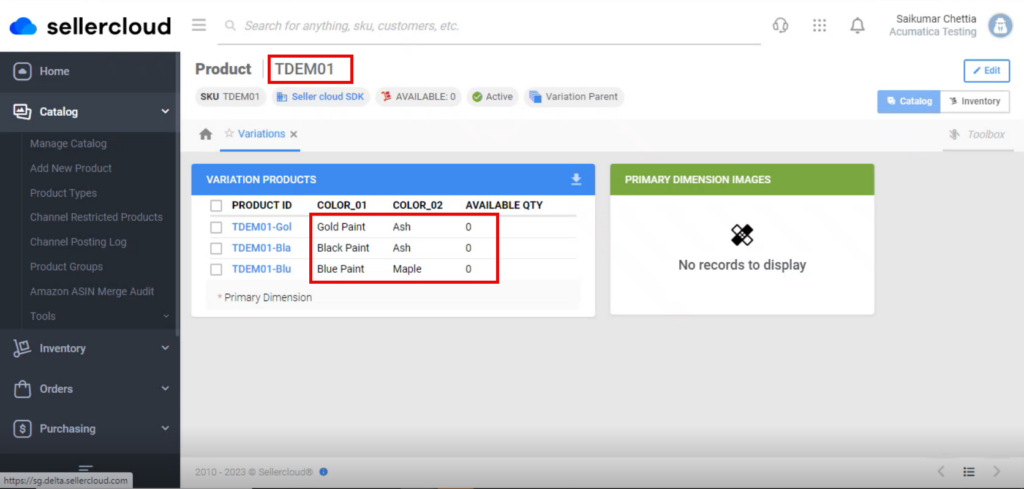
- You need to navigate to SellerCloud Connector and search for [Tdemo1].
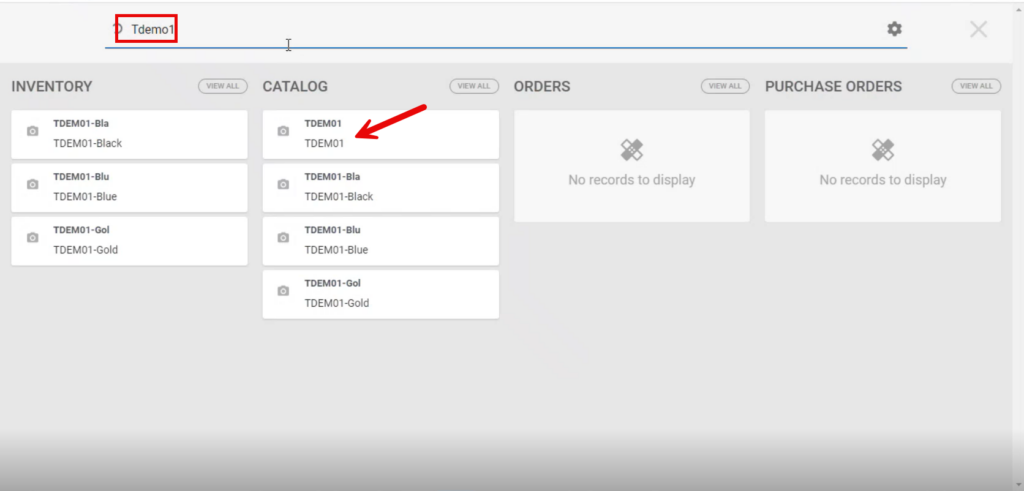
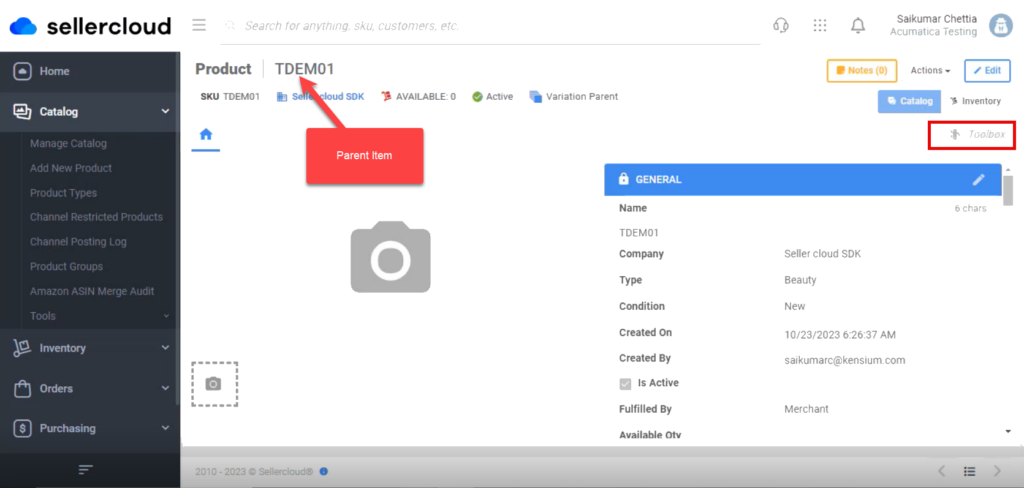
- Click on [TDEMO1].
- Search for [variations] in the search bar
- Search for Variations in [Catalog] and click on [Variations] a new screen will appear where you can see parent with child items.
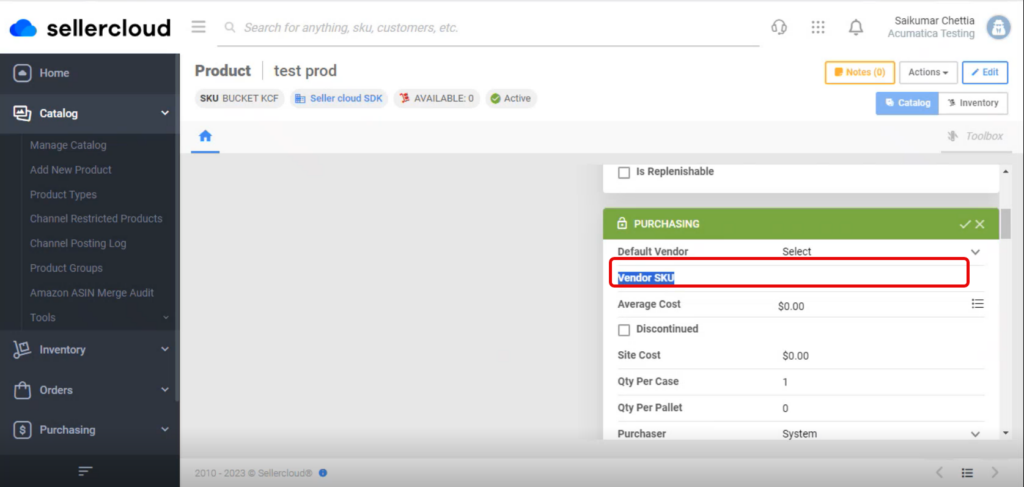
- If you want the Acumatica Schema field to be updated with Custom Mapping Field.
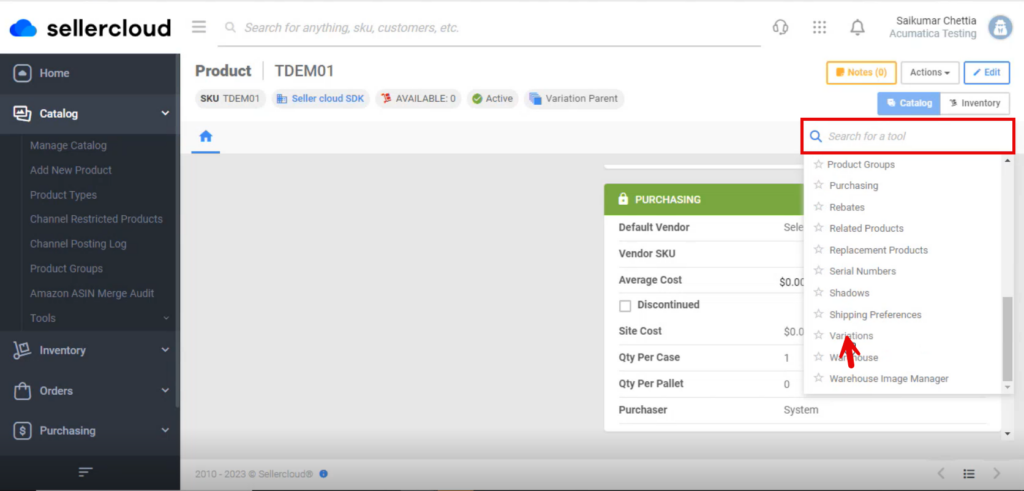
- You need to get the [Custom mapping] Field from SellerCloud Connector.
- Navigate to the SellerCloud Connector App.
- Search for Test in the Global Search Bar and a new page will appear with all the Inventory, Catalog, Orders, and Purchase Orders.
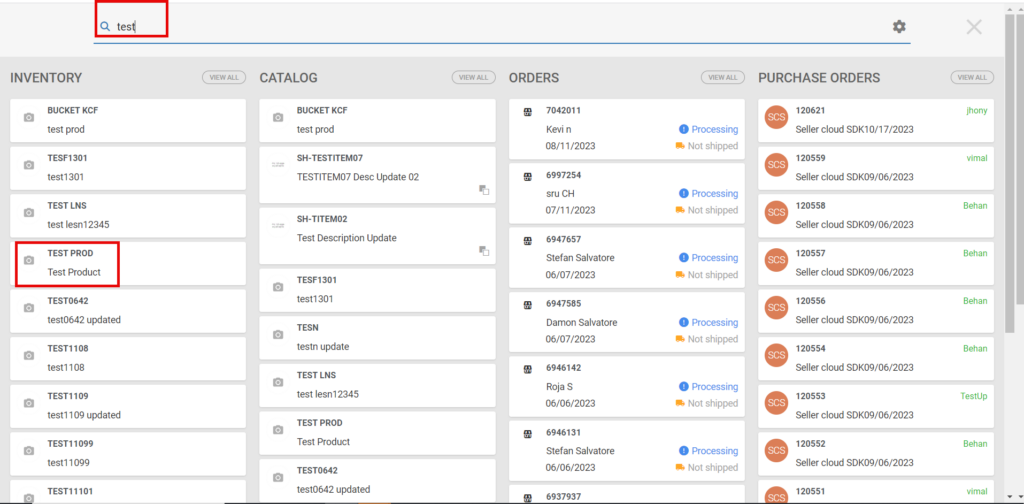
- Click on [TEST PROD] copy the [Vendor SKU] and paste it into the custom mapping field. So, when the product is synced, the template ID will update at the Vendor SKU Level.