Shipment
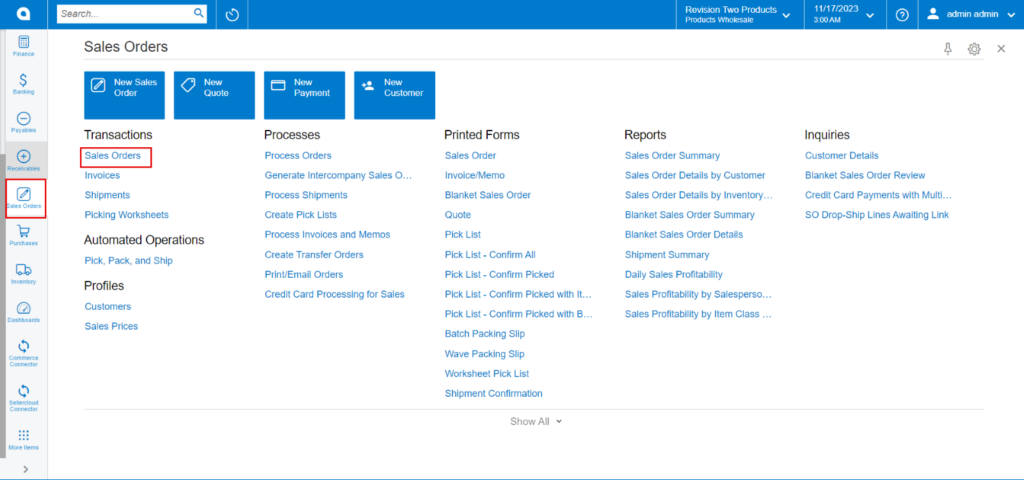
- You need to navigate to [SellerCloud Connector] in Acumatica and click on [Sales Orders] under [Transactions] and you will land on a new screen.
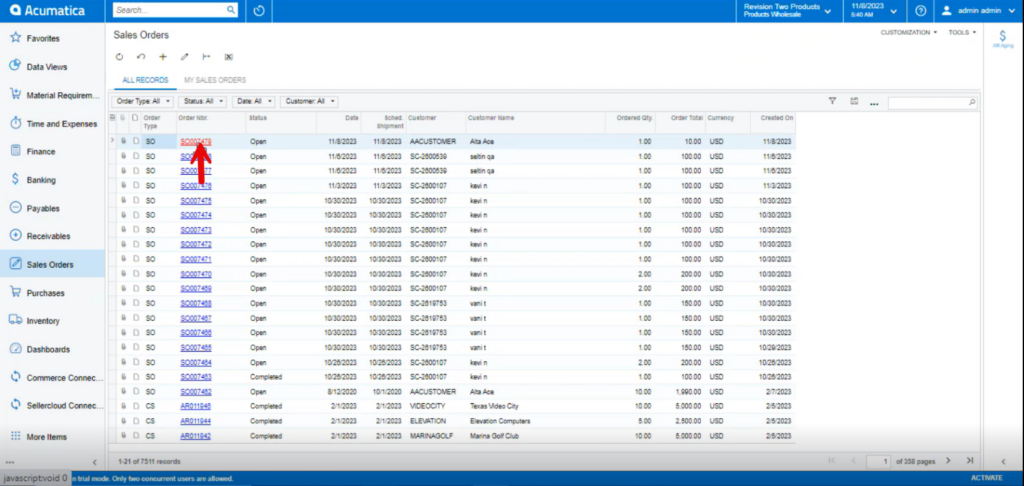
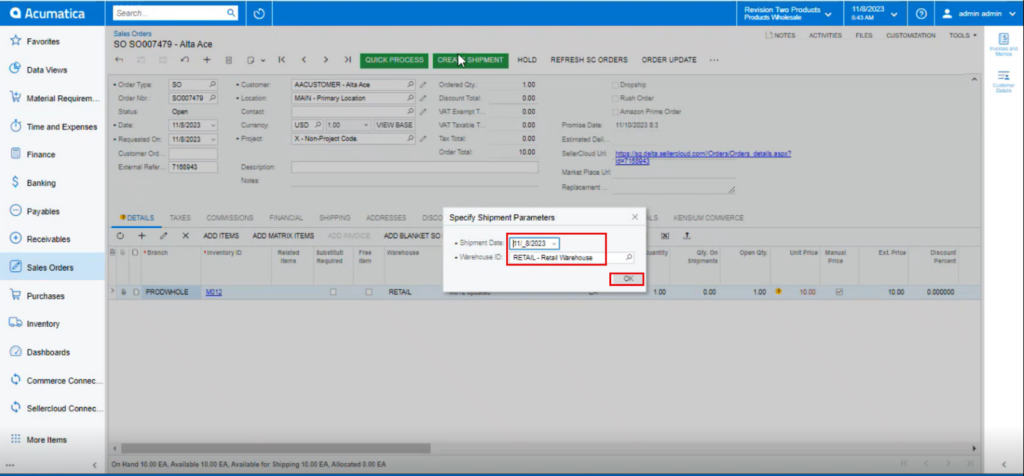
- You need to select the created sales order.
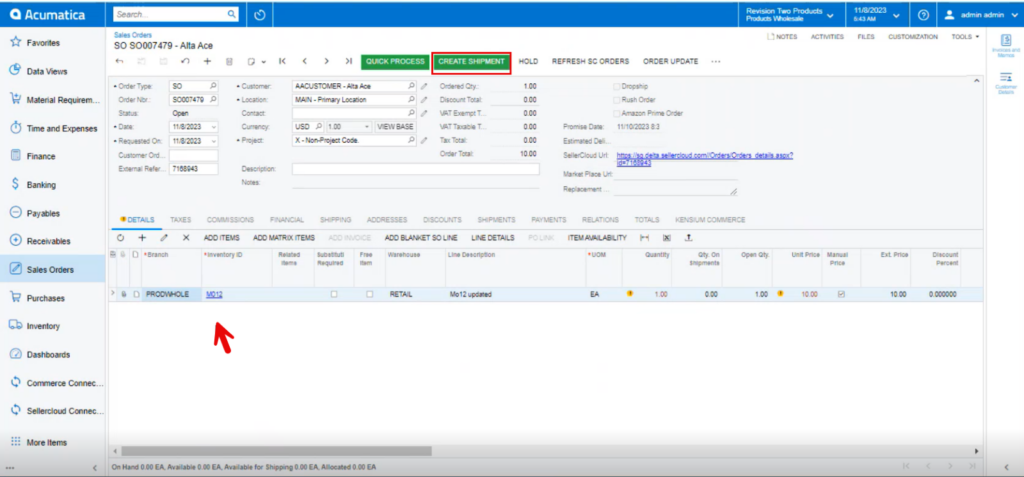
Click on the [Create shipment].
- You must select [Shipment Date] and [Warehouse ID].
- Click on [Ok].
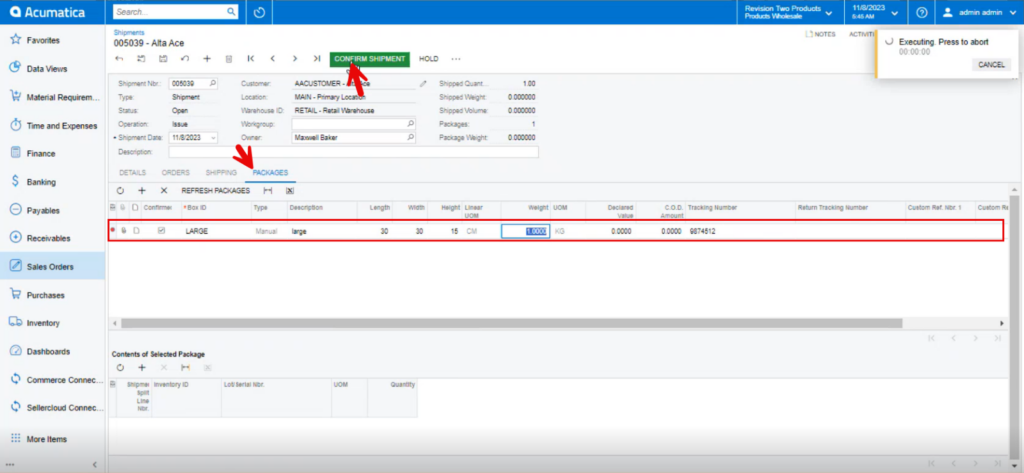
- You need to enter the package details under [PACKAGES] and then click on [CONFIRM SHIPMENT].
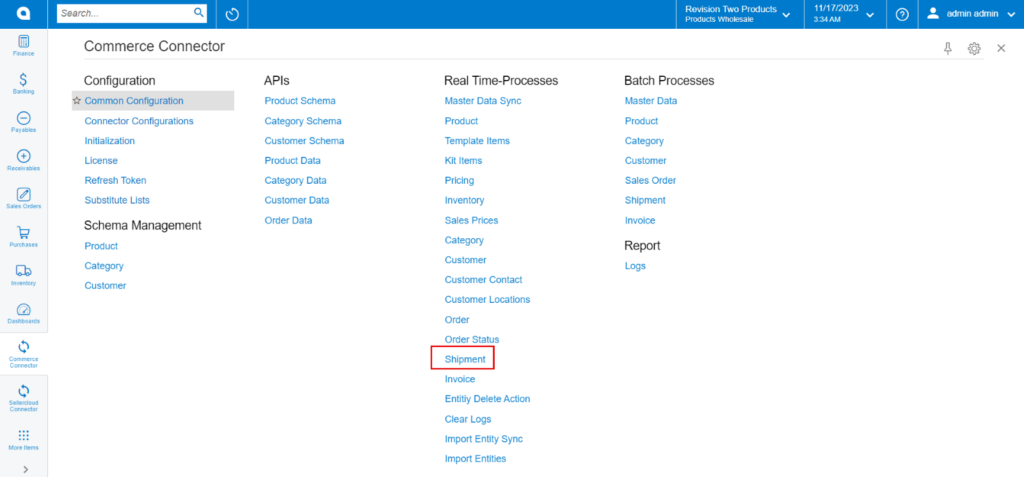
Upon creating the shipment navigate to [Shipment] under [Real Time-Processes] under [Commerce Connector].
- You must enable the check box.
- Click on [Process].
![Click on [Process]](/wp-content/uploads/2023/12/Click-on-Process-1-1024x472.png)
- You can view the shipment successfully in Log screen.
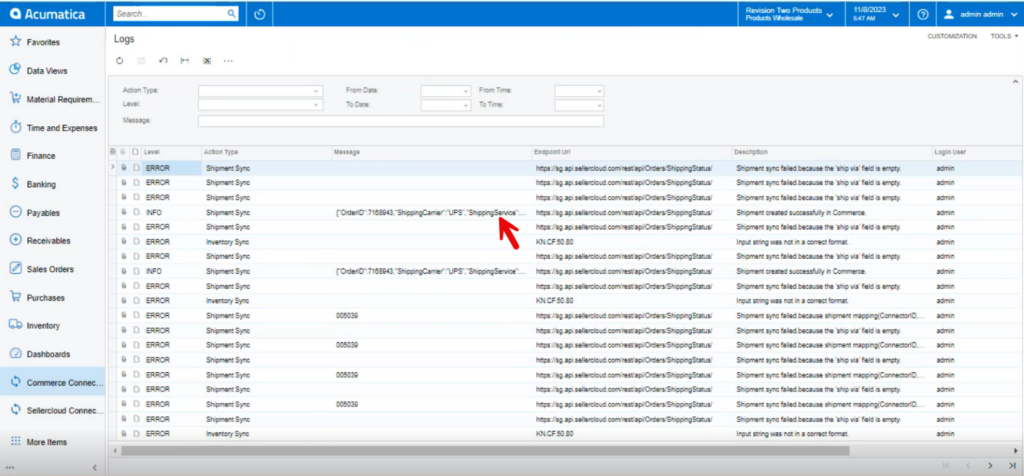
- You must navigate to SellerCloud Connector to view the status of Shipment.
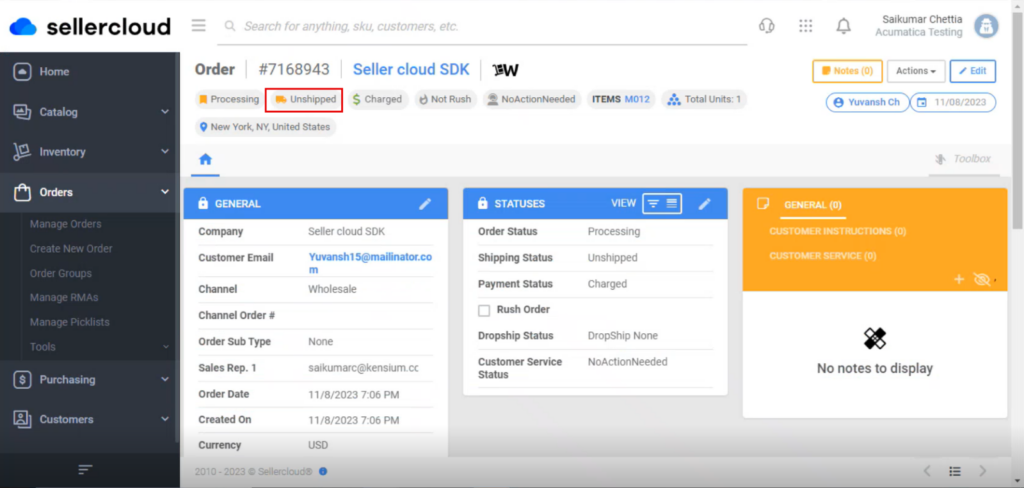
- You need to refresh the screen.
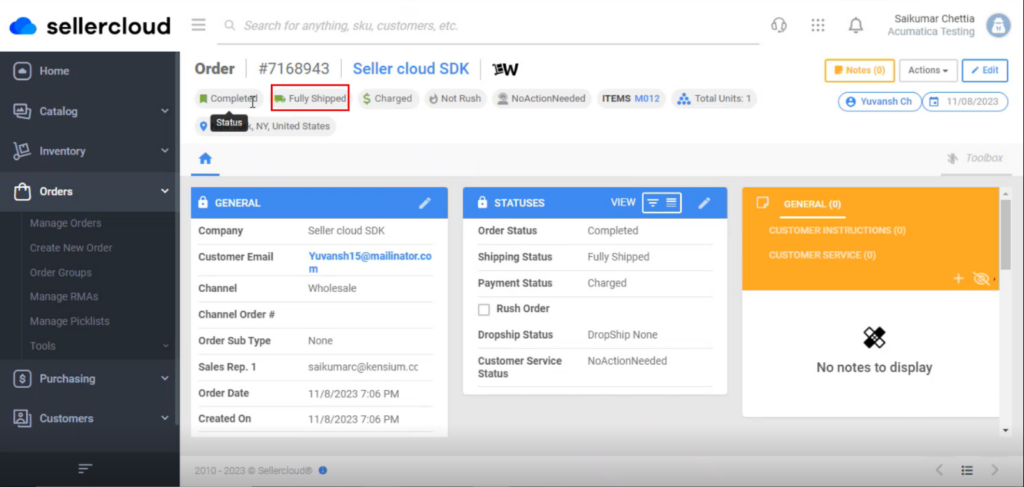
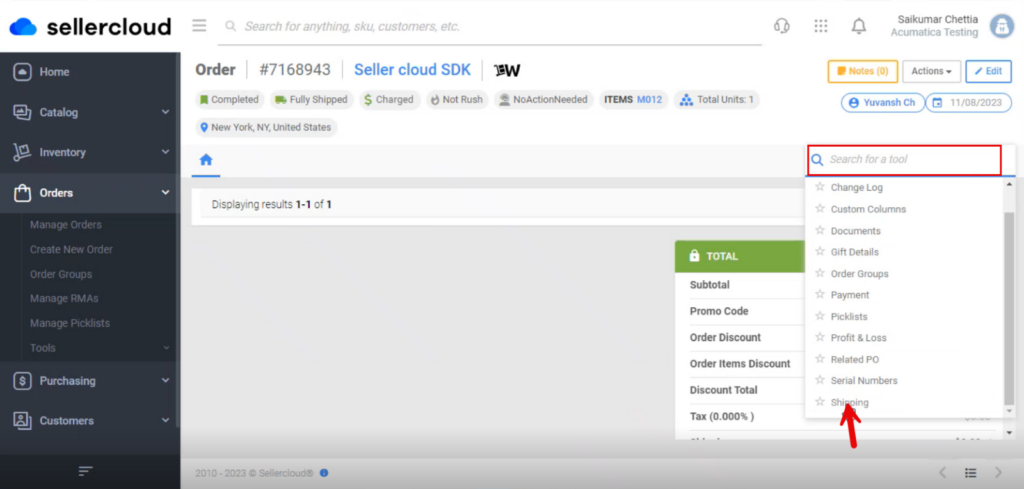
- You can check for the shipping details by searching for [Shipping].