


SellerCloud Connector Package
The first step to install the feature is to run the latest version of the Kensium commerce Framework, SellerCloud Connector.
Steps to Install
- You need to Save the .zip file of the [SellerCloud Connector] , [KCF] package to the local hard drive.
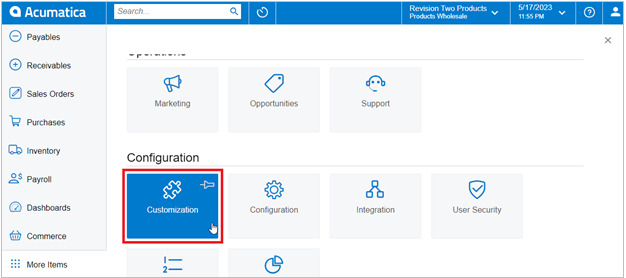
- Go to the left navigation panel in Acumatica and choose [More Items].
- Click on [Customization].
Customization Projects
[OR]
- You need to type the keyword [Customization] in the Global Search Bar.
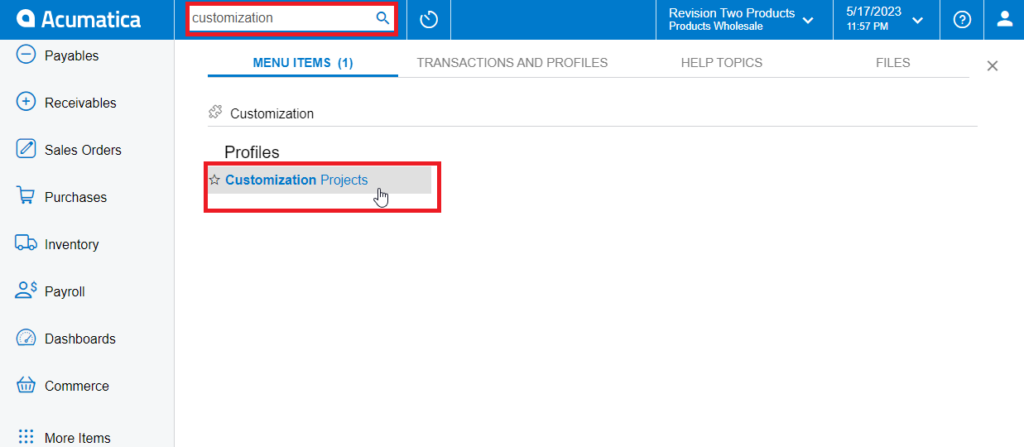
- Click on [Customization Projects].
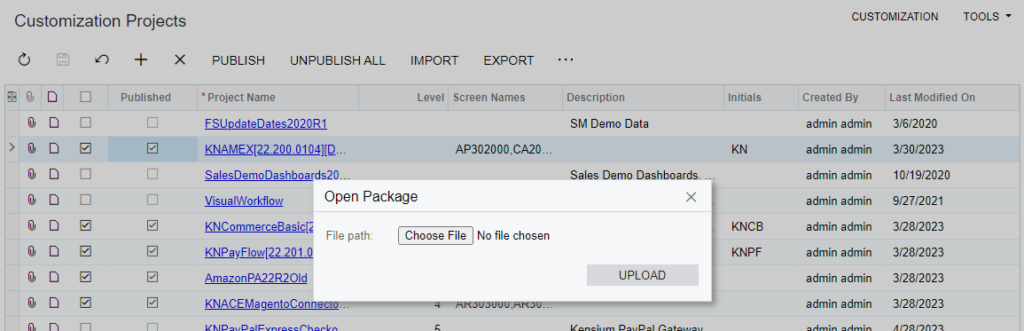
- Click on the [Import] button.

Import product package
- Select the SellerCloud Connector Package and KCF Package .zip file from a local folder.
- Click on [Upload].
Upload product package from local desktop
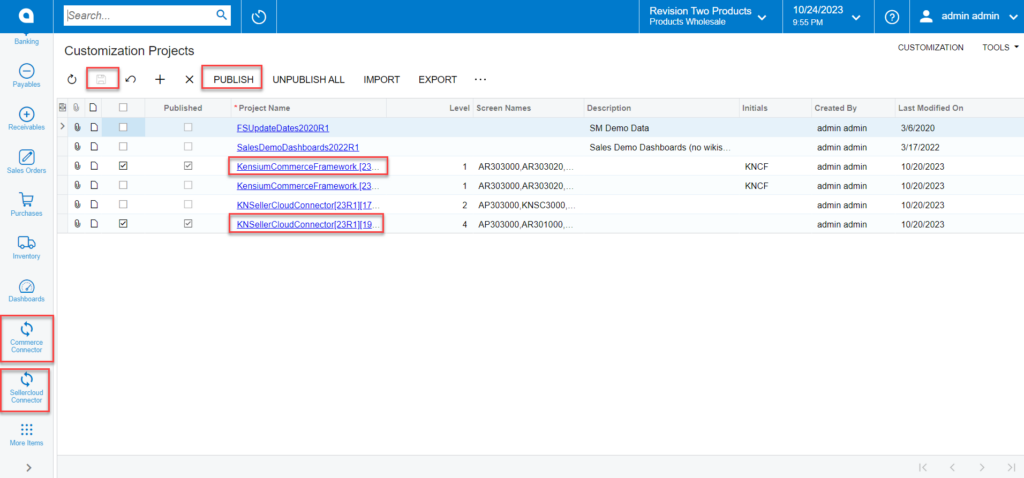
- The file name will appear in the [Project Name] column.
- You need to Specify the level at which the package needs to be released below the Customization projects.
- Kensium’s Commerce Framework
- SellerCloud Connector
- You need to toggle the box on publishing.
Select project and publish
- Click on the [Publish] button.
- Click [Save] to publish the SellerCloud Connector package along with KCF (Kensium Commerce Framework) to the Acumatica instance.