


Managing Store Configuration
The store configuration option includes the following as shown in the figure below:
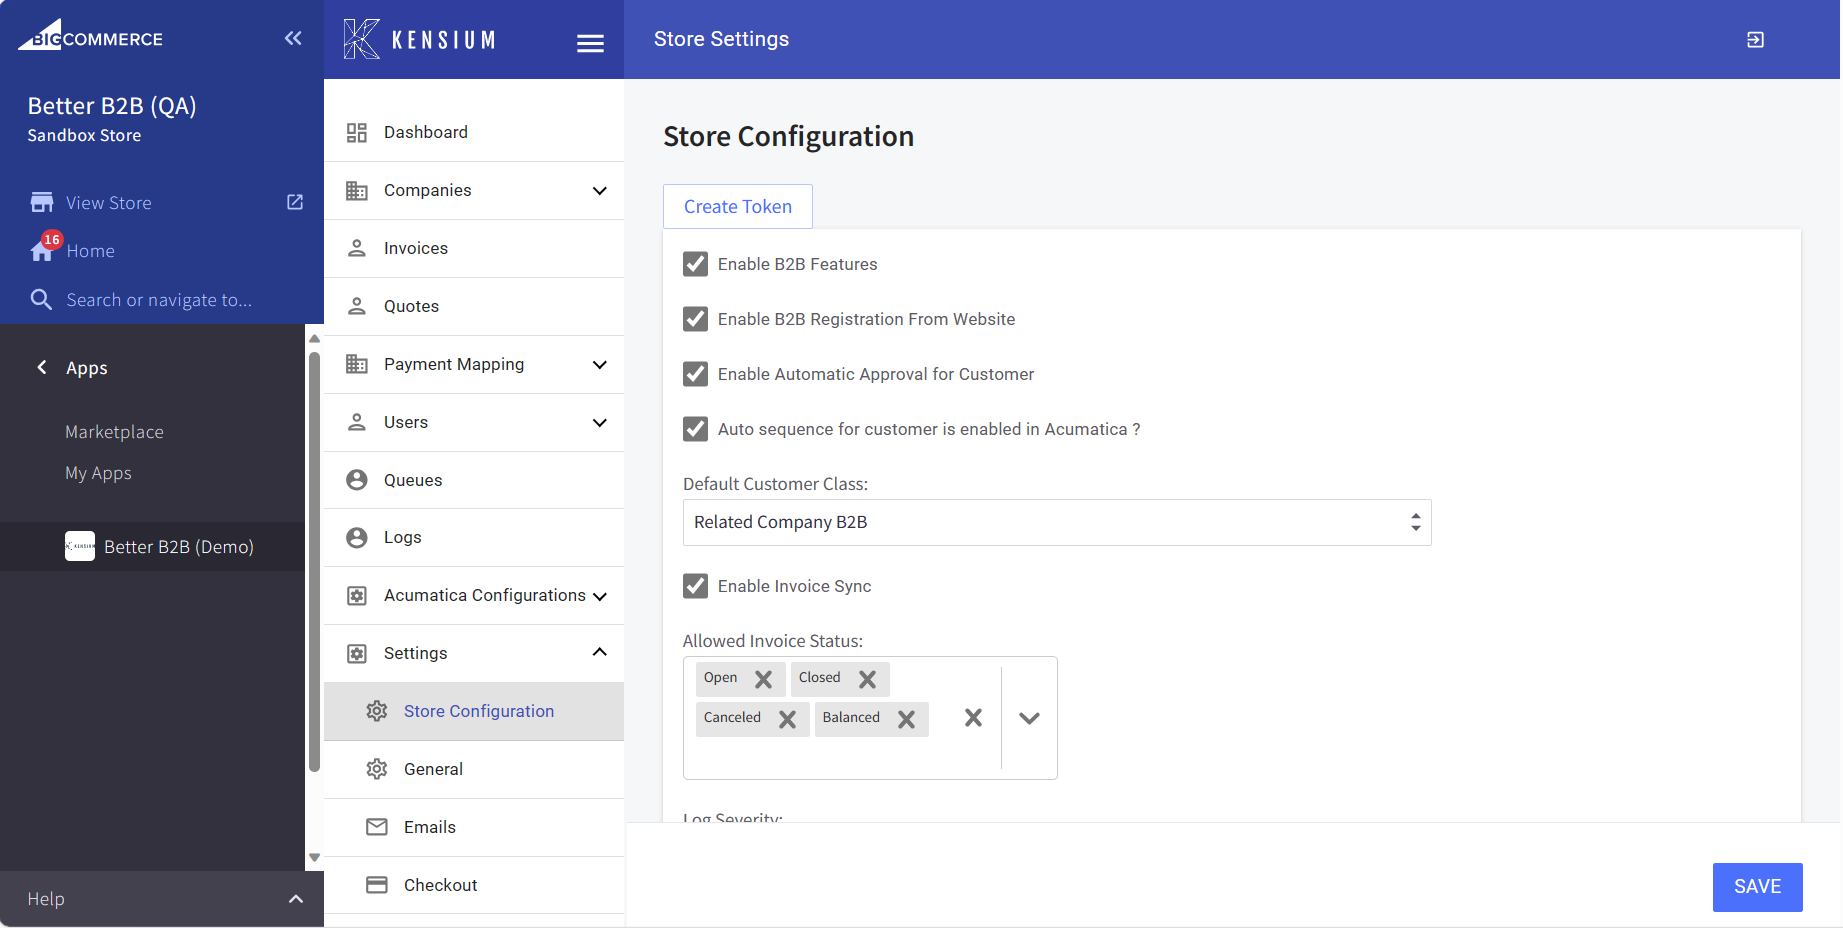
- Enable B2B Features [Checkbox]: In the storefront if you want to enable the B2B feature you must check the box.
- Enable B2B Registration on From Website [Checkbox]: In BigCommerce you can register in two ways. From the front end, you should sign up as [A Business]. [A Customer] option will also be available. To enable the option, you must select [Enable B2B Feature from Website].

- Enable Automatic Approval for Customer [Checkbox]: if you want the customer to be automatically approved you must check the box in the B2B.
- Auto sequence for customers enabled in Acumatica. [Checkbox]: If the number sequence is not created against the customer in Acumatica a text box will be created to enter the Prefix as B2B. This is only applicable if there is no numbering sequence.
- Default Customer Class [Drop-down]: when you are adding a customer in B2B and synching with Acumatica you need to select the customer class. From the drop-down, you need to select the class. However, Default Customer Class: Related to Company B2B is selected for this.
- Enable Invoice Sync [Checkbox]: To enable the Invoice sync from B2B to Acumatica you must check the box. The application allows you to Open, Closed, Cancelled and Balanced Invoices to sync.
-
Log Severity [Drop-down]: You need to select the type of log you want to see. For example, if you select Info, only the successful messages will be displayed in the log. The failed messages will not be displayed. The application allows you to select any of the following:
- Info – Only Successful messages
- Debug – Info, Error (Recommended to select)
- Error – Only Error messages
- Fatal – Failed logs with Fatal Error.
- Log Cleaning [Drop-down]: In B2B the application allows you to clear the Log screen. If you want to clear the log screen you need to select yes.
- Log Entry Lifetime Days: Select the number of days to clear the log from the app. If you set the number of days to 30 days, then the application will clear the 30-day-old logs.
- Customized Styles: It provides store administrators with the capability to override/customize the style and appearance of pages without the need to involve developers.