


Managing Connector Configuration
To proceed with it you need to set up the connector configuration for Better B2B. Under the Commerce Connector, you need to click on the [Connector Configuration].
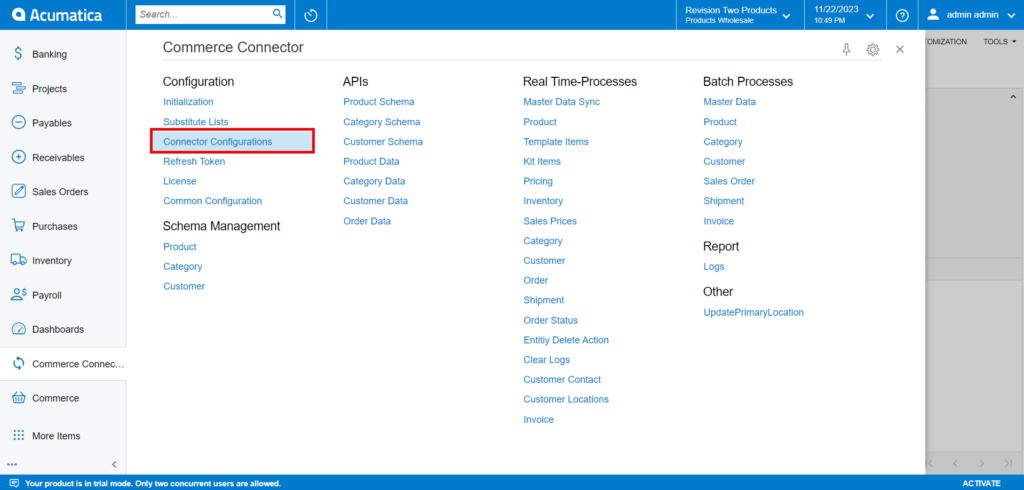
Upon clicking [Connector Configurations] you will be redirected to the new Connector Configurations screen as shown below.
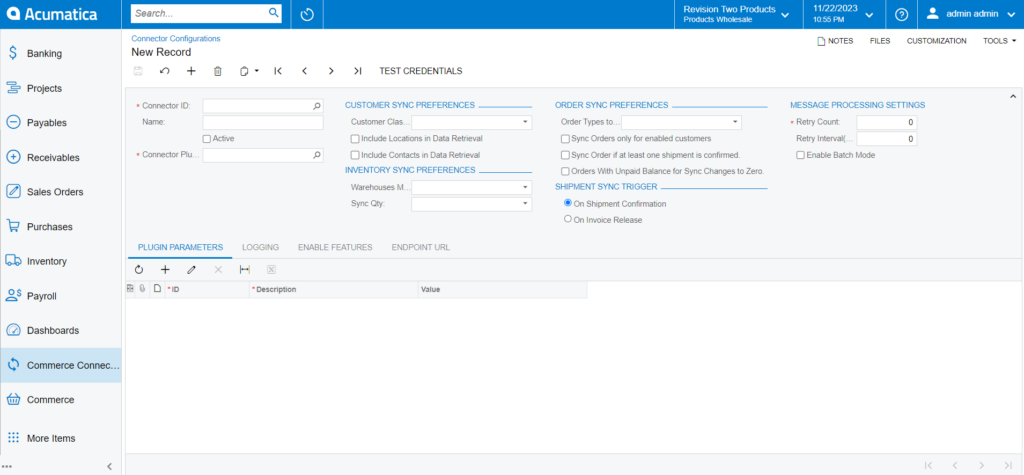
Upon clicking on the New or [+] icon you need to fill up the following section as shown in the screenshot.
| Field | Field Type | Description |
|
Connector ID |
||
|
Connector ID* |
Lookup |
This is the name of the connector id. You can choose the name as per your choice. Use the lookup button to find the desired connector ID. |
|
Name |
Textbox |
Connector Name. |
|
Active |
Checkbox |
The store must be active. You must select the checkbox. |
|
Connector Plugin |
Lookup |
The Connector Plugin will come from the B2B package. They are as follows:
|
|
Customer Sync Preferences |
||
|
Customer Class |
Drop-down |
Select the customer class that needs to be synced from Acumatica to the B2B connector. The drop-down will show the customer class along with a tick-box. |
|
Include Location in Data Retrieval |
Checkbox |
Default it should be checked. |
|
Include Contacts in Data Retrieval |
Checkbox |
Default it should be checked. |
|
Inventory Sync Preferences |
||
|
Warehouses Management |
Drop-down |
Choose the values from the drop-down. [Default] |
|
Sync Qty. |
Drop-down |
Select the available sync quantity as Sync Qty. [Default] |
|
Order sync Preferences |
||
|
Order Types To |
Dop-down |
Select the order types which you want to sync to B2B from Acumatica. |
|
Sync Orders only for enabled customers |
Checkbox |
By default, it should be checked. |
|
Sync Order if at least one shipment is confirmed |
Checkbox |
By default, it should be checked. |
|
Orders with Unpaid Balance for Sync changes to Zero |
Checkbox |
By default, it should be checked. |
|
Shipment Sync Trigger |
||
|
On shipment confirmation |
Radio button |
If you want the sync to take place on shipment confirmation, then select the radio button. (Default) |
|
On Invoice Release |
Radio button |
If you want the sync to take place on Invoice Release, then select the radio button. |
|
Message Processing Settings |
||
|
Retry Count |
Numeric Field |
If the sync has failed, the application should show the details in the logs. Retry count determines how many times it should show based on your input. |
|
Retry Interval |
Numeric Field |
The Retry Interval determines the time interval timing to retry the sync. |
|
Enable Batch Mode (Checkbox should be enabled) |
||
|
Threshold Count |
Numeric Field |
The number of messages processed. |
|
Batch Count |
Numeric Field |
The number of messages to be passed for a single log. |
|
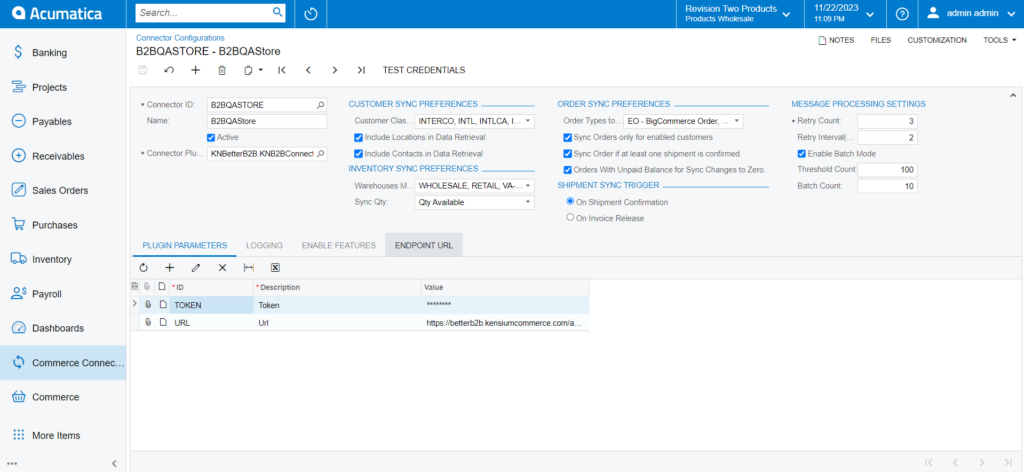
Plugin Parameters |
||
|
ID |
Mandatory Field |
Tokens will be provided by BigCommerce. |
|
Description |
Text Field |
Enter the description. |
|
Value |
For the URL, you need to enter the Acumatica instance. |
|
|
Logging à Setup the Log details under the Report section to see the sync log details. |
||
|
Log info level |
Checkbox |
If checked, you can view the sync log info in the connector log screen. |
|
Log Error Level |
Checkbox |
If checked, in the connector log you can view the sync log error under the Report section. |
|
Enable Features à this will enable the following features. |
||
|
Action Type Descriptions |
Checkbox |
You will have a list of sync types, and these must be checked if you have already checked in the first place in a common configuration. List of Action Type Descriptions:
|
|
Endpoint URL: In simpler terms, it is the URL where a service can be accessed. You don’t have to enter the details. It will be auto-populated. |
||
|
Action Type Description |
Text Field |
This will auto-populate. |
|
Entity URL |
Text Field |
This will auto-populate. |