Invoice Sync in Acumatica
This section will show you how the Invoices are getting synced.
Steps to be followed:
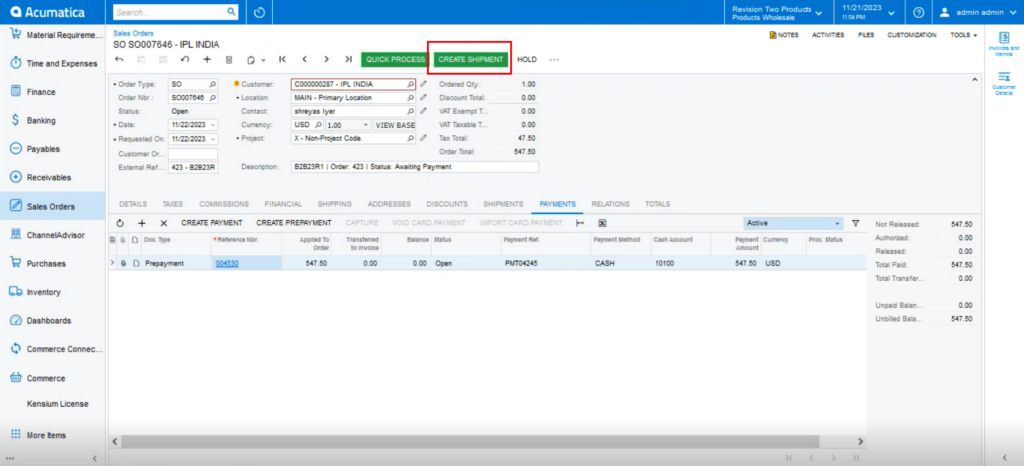
Step 1: You need to click on the option for [Create Shipment] from the Sales Order Screen.
![Click on the Create Shipment](/wp-content/uploads/2023/12/Click-on-the-Create-Shipment-1024x466.png)
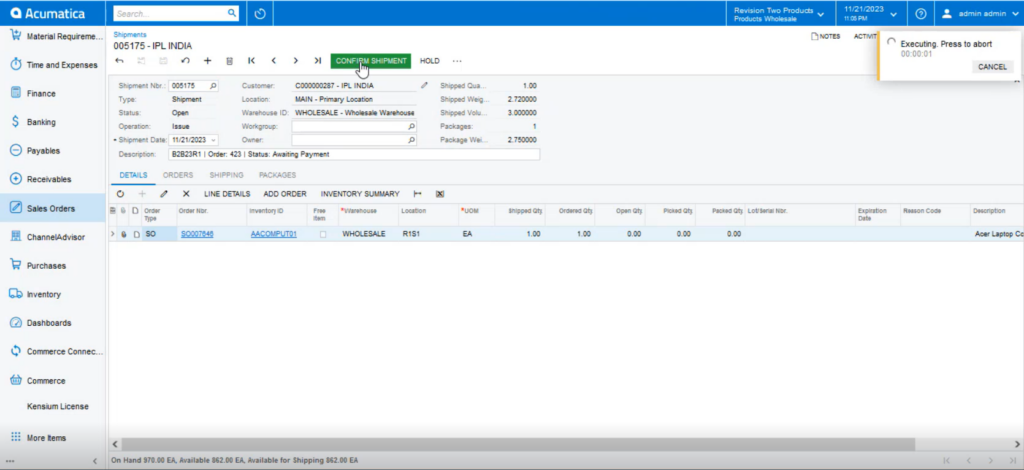
Step 2: Upon clicking the Create Shipment you will get the following screen.
![Specify the Shipment Parameters](/wp-content/uploads/2023/12/Specify-the-Shipment-Parameters-1024x463.png)
Step 3: This will enable the [Confirm Shipment] button.
![Click on Confirm Shipment](/wp-content/uploads/2023/12/Click-on-Confirm-Shipment-1024x470.png)
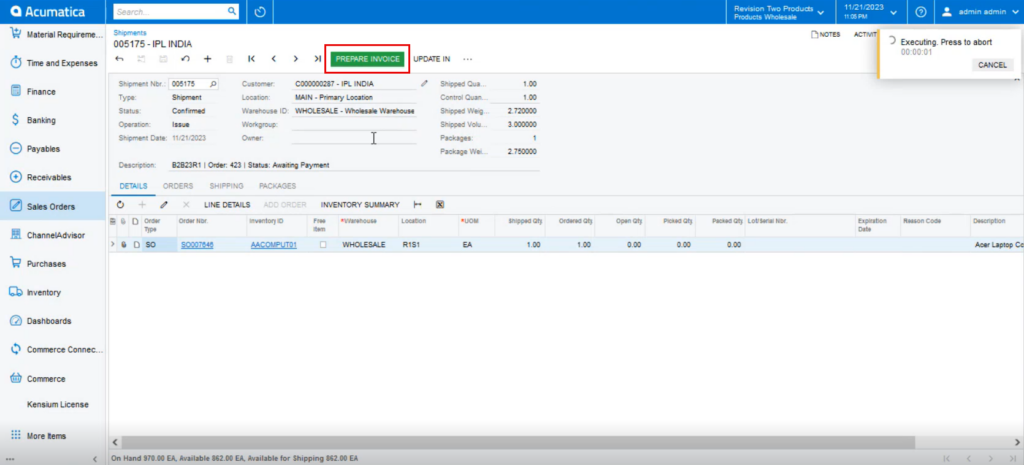
Step 4: Acumatica will start [Preparing Invoice].
![Preparing Invoice](/wp-content/uploads/2023/12/Preparing-Invoice-1024x465.png)
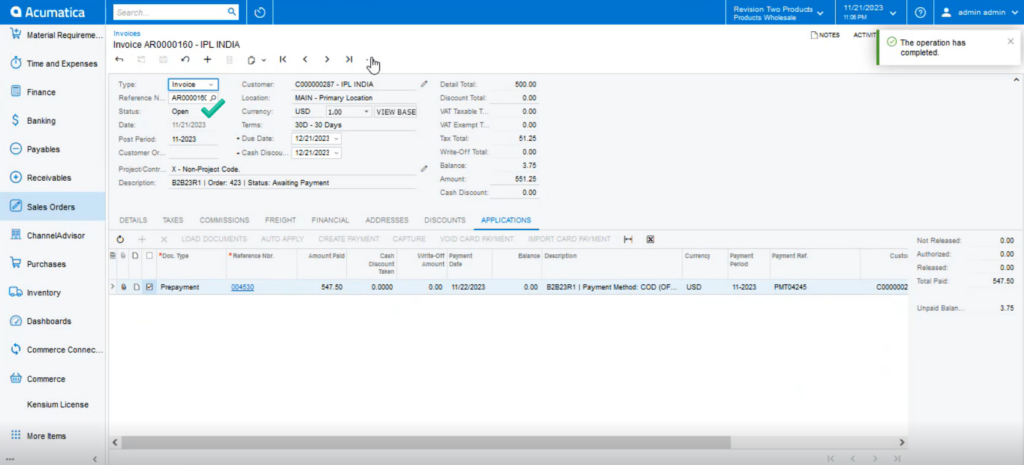
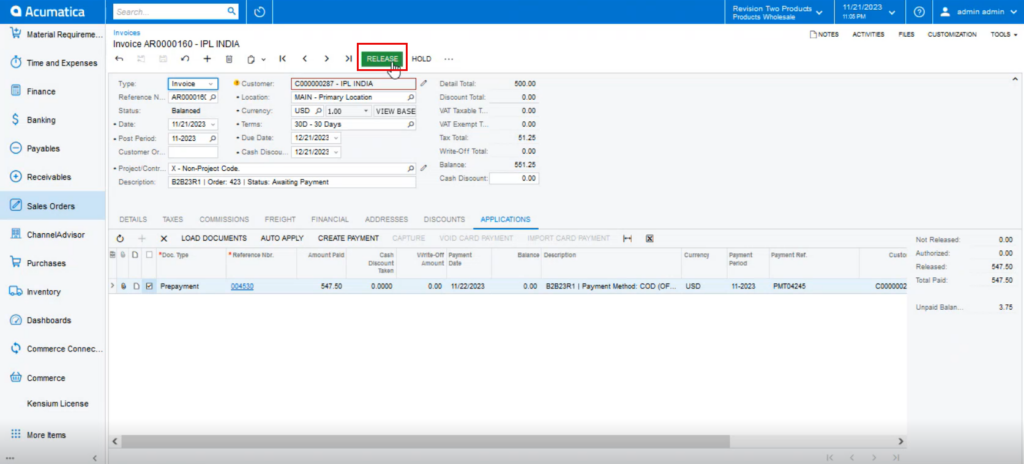
Step 5: Release the Invoice.
![Releasing the Invoice](/wp-content/uploads/2023/12/Releasing-the-Invoice-1024x464.png)
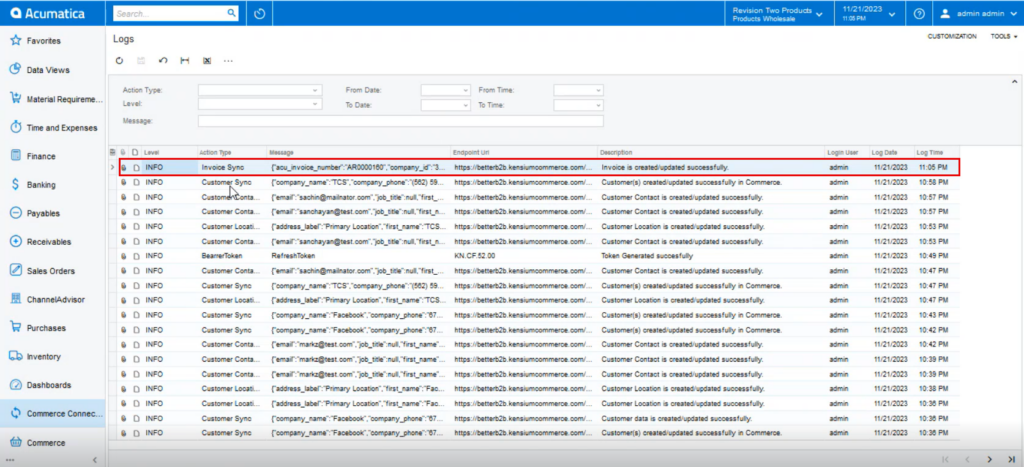
Step 6: After [Release] the invoice is going to sync with the B2B app. Go to the Logs under the Report section of Acumatica.
![Log shows the Invoice is synced](/wp-content/uploads/2023/12/Log-shows-the-Invoice-is-synced-1024x467.png)
Note that, all the statuses will be supported, like Balan, Closed etc.
![Figure Status in Invoice](/wp-content/uploads/2023/12/Figure-Status-in-Invoice-1024x465.png)