Managing Customer sync from Acumatica to B2B
You can sync the customer from Acumatica to B2B. Follow the steps.
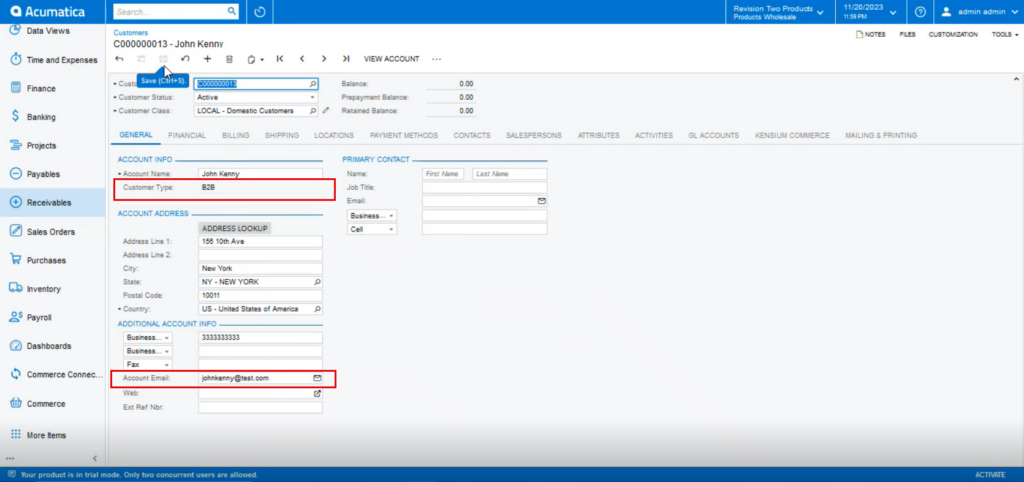
Step 1: Create a Customer within Acumatica. While creating the Customer you must create the Customer type as B2B. Also, the email address is mandatory.
![The customer type should be B2B and Account Email is mandatory](/wp-content/uploads/2023/12/The-customer-type-should-be-B2B-and-Account-Email-is-mandatory-1024x482.png)
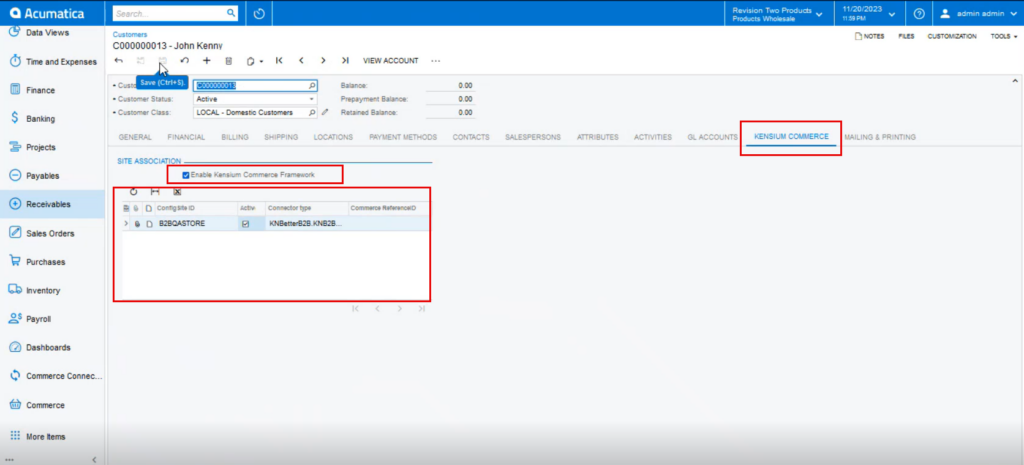
Step 2: Click on the [Kensium Commerce] Tab. Upon clicking you need to enable the checkbox for [Enable Kensium Commerce Framework] in the Site Association.
Check the box of the connection Type [KNB] and save the screen.
![Setting up Kensium Commerce](/wp-content/uploads/2023/12/Setting-up-Kensium-Commerce-1024x465.png)
Step 3: Go to the connector logs under the Reports.
![Customer Sync Details in the Connector Logs](/wp-content/uploads/2023/12/Customer-Sync-Details-in-the-Connector-Logs-1024x466.png)
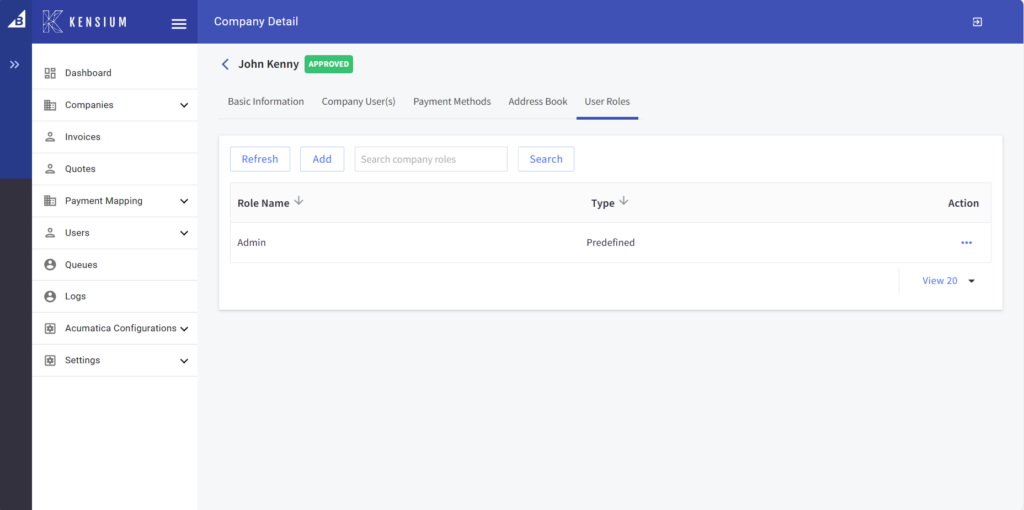
Step 4: Go to the Better B2B and click on the Company.
![Customer synced from Acumatica to Better B2B](/wp-content/uploads/2023/12/Customer-synced-from-Acumatica-to-Better-B2B-1024x485.png)
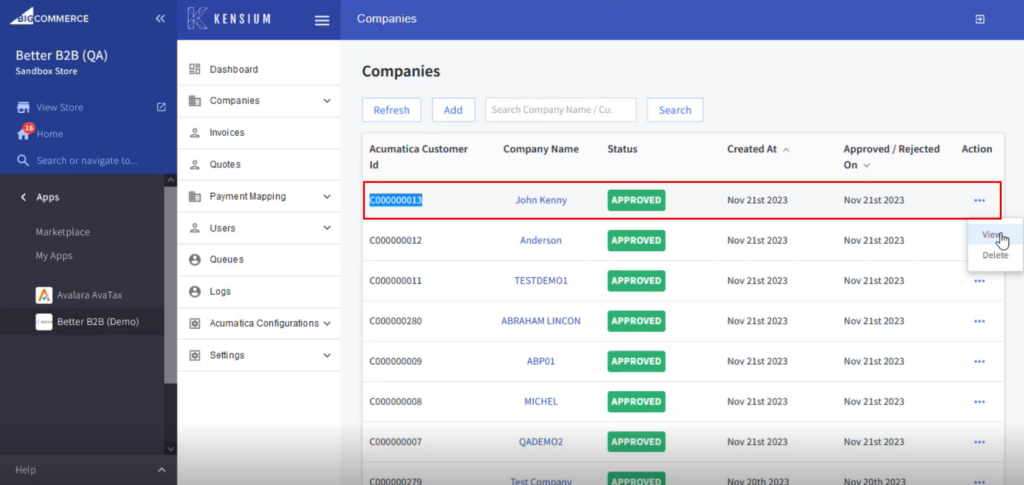
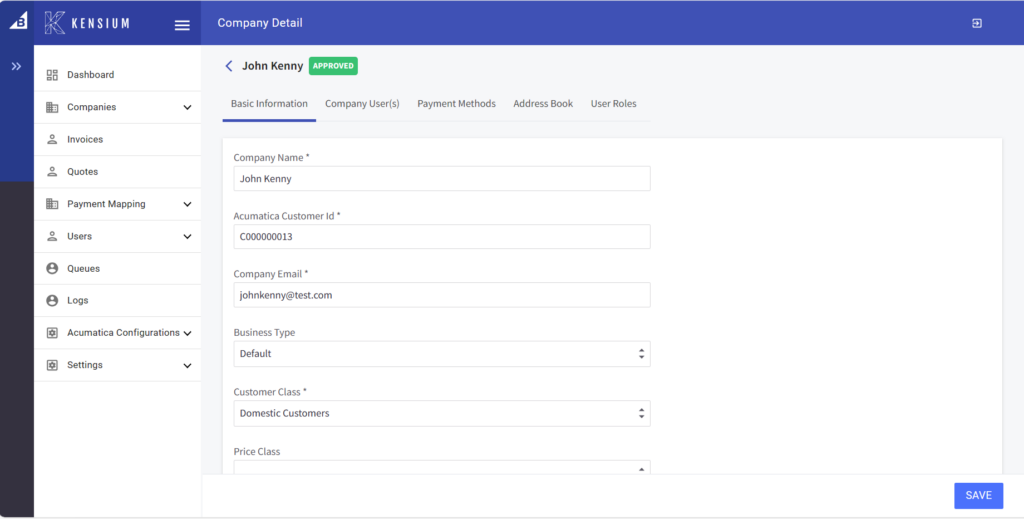
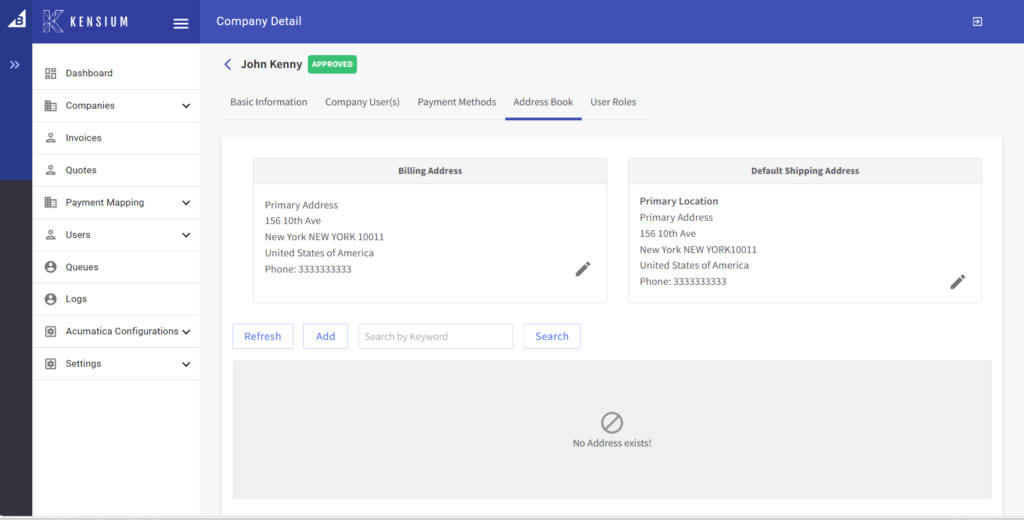
Step 5: Clicking on [View] will give you the details including Basic Information, Company(s) User, Payment Methods, Address Book and User Role.
![Basic Information of the Company](/wp-content/uploads/2023/12/Basic-Information-of-the-Company-1024x519.png)
![Address Book is already](/wp-content/uploads/2023/12/Address-Book-is-already-1024x520.png)
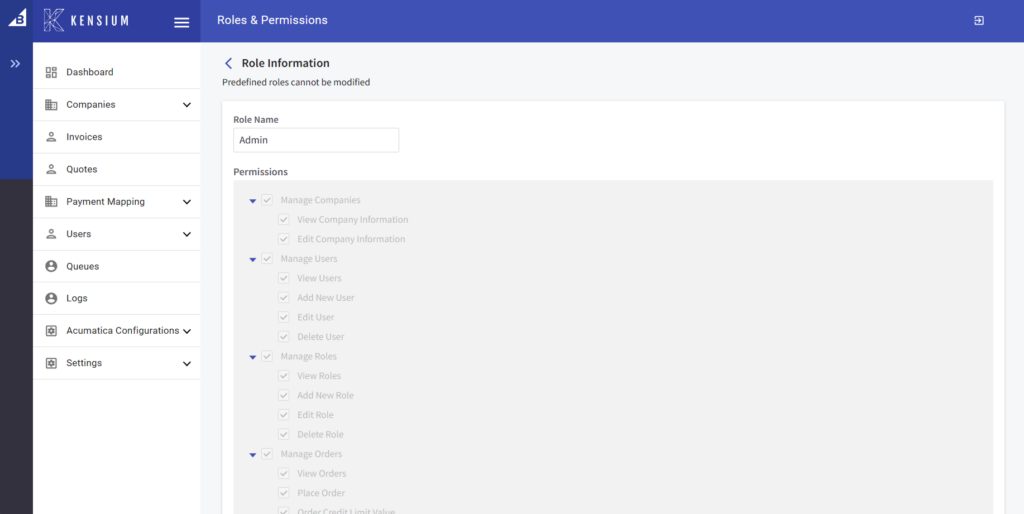
The user role is a Predefined role.
![The User Role is pre-defined](/wp-content/uploads/2023/12/The-User-Role-is-pre-defined-1024x510.png)
![View Option in Predefined Role Information](/wp-content/uploads/2023/12/View-Option-in-Predefined-Role-Information-1024x514.png)