


Attributes Mapping
Attributes gives products extra information by acting as descriptive tags. Configuring attributes and creating mappings between Acumatica and Rithum are crucial. By guaranteeing seamless data transfer between the two systems, this improves product information synchronization.
Create Attributes in Acumatica and Rithum Connector
You need to Navigate to the left panel of Acumatica and click on [Rithum Connector] then click on click on [Attribute Mapping] under [Preferences].
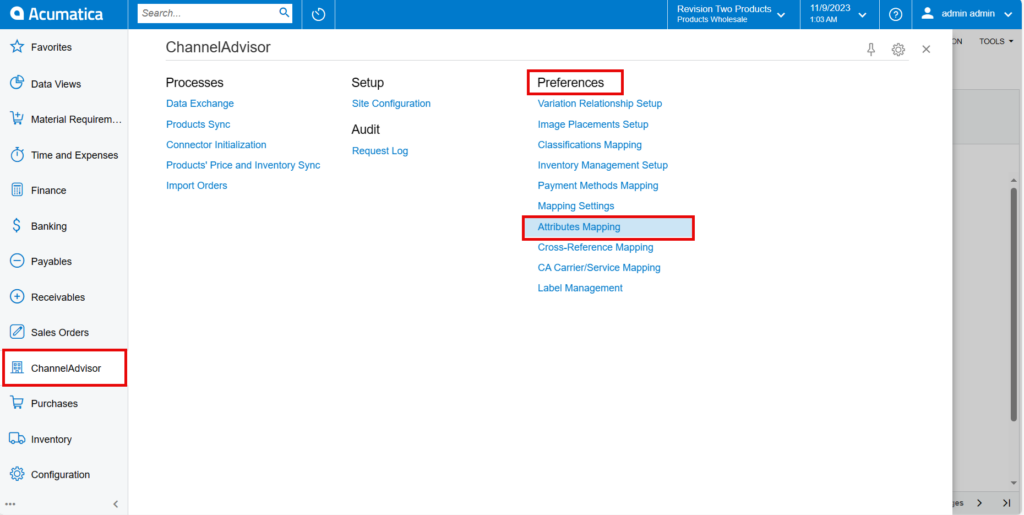
Upon opening the screen, you can view.
REFRESH LIST OF ATTRIBUTES: If you create any Attribute in Rithum Connector it will be available under Rithum Connector Attribute in Acumatica.
INIT ITEM ATTRIBUTES: If you create any Attribute in Acumatica it will sync to Acumatica and will be available in Acumatica Attribute.
You need to select the store from the [Store] selector.
Creating attribute
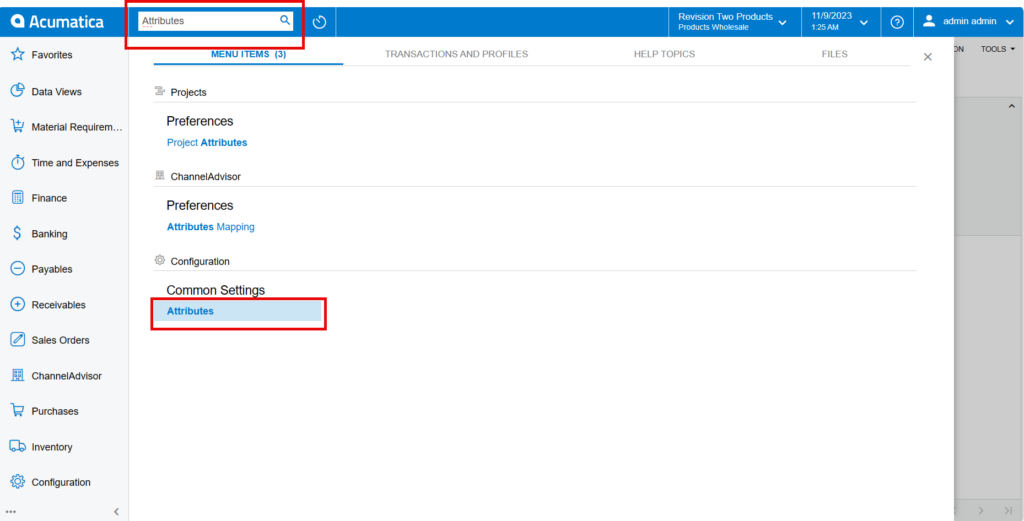
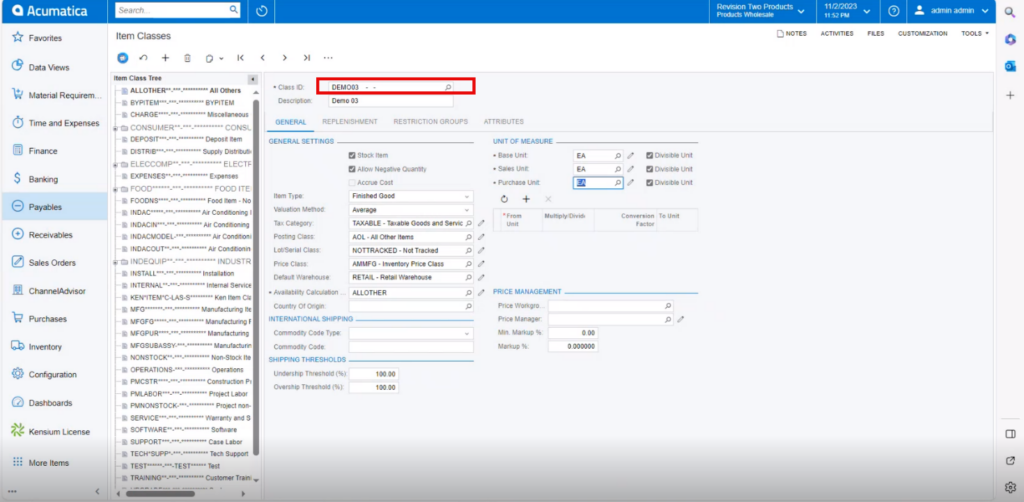
You need to search for [Attributes] in the Global search bar. Click on [Attributes] under [Common Settings] then you will be redirected to item class screen in Acumatica.
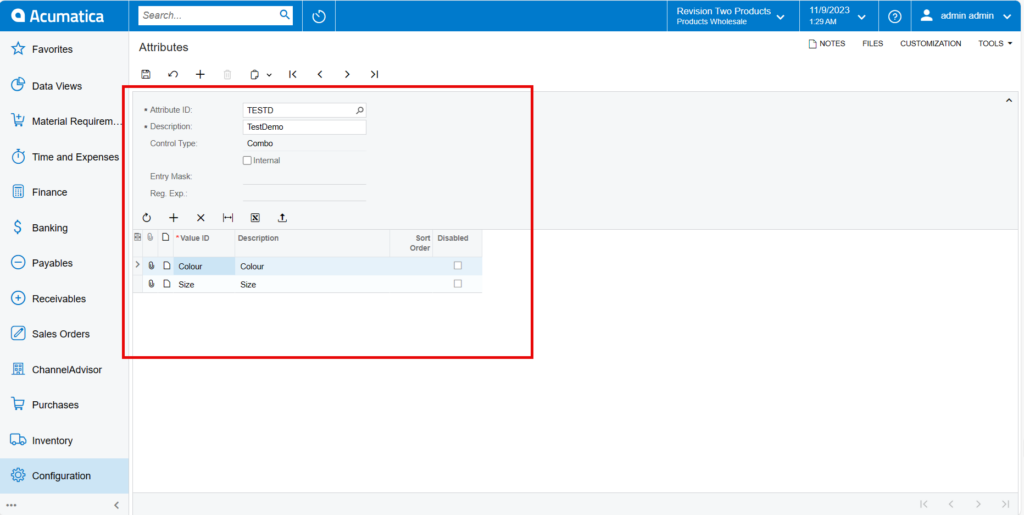
- You need to enter the [Attribute ID].
- You must provide the description for Attribute in the Description Field.
- Select the [Control Type] from the drop-down.
- Text
- Combo
- Multi Select Combo
- Checkbox
- Datetime
- Selector
- Click on [+] icon.
- You need to add the [Value ID], [Description].
- Click on [Save].
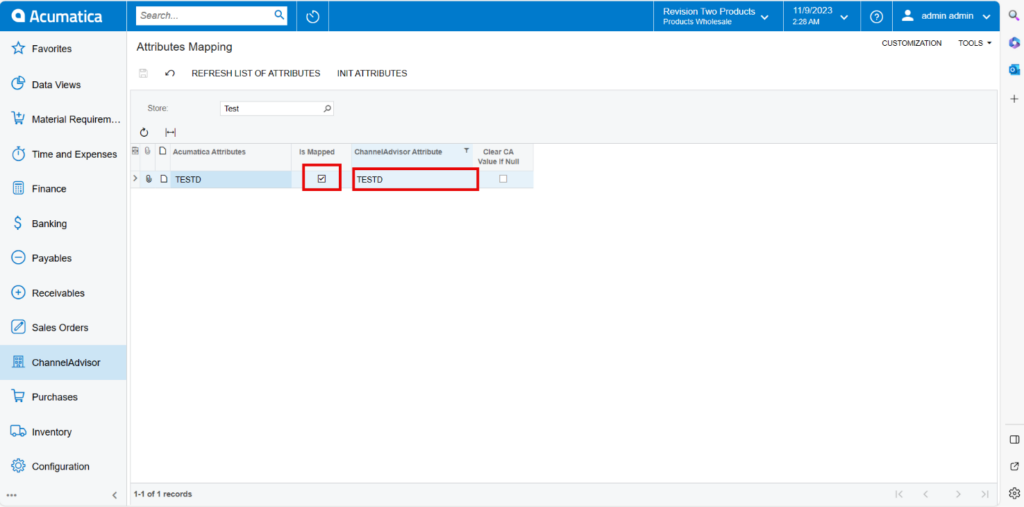
Navigate to Attribute mapping and click on refresh and click on [INIT Attribute] and search for created Attribute in the [Acumatica Attributes].
- Click on [OK].

- You can view Created [Attribute] in [Acumatica Attributes] in Acumatica.
Creating Attribute in Rithum Connector
You need to Navigate to the Rithum Connector and click on [Attributes] under the [Products].
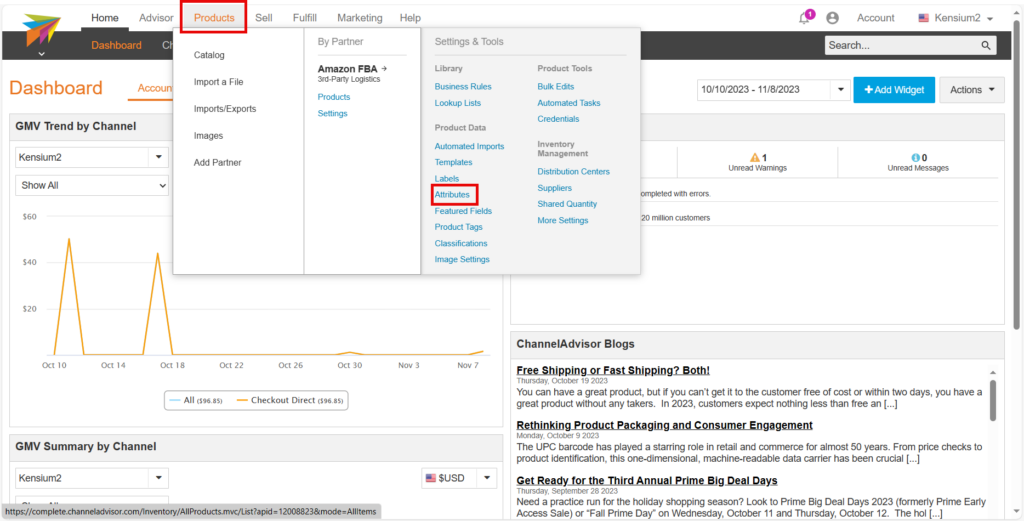
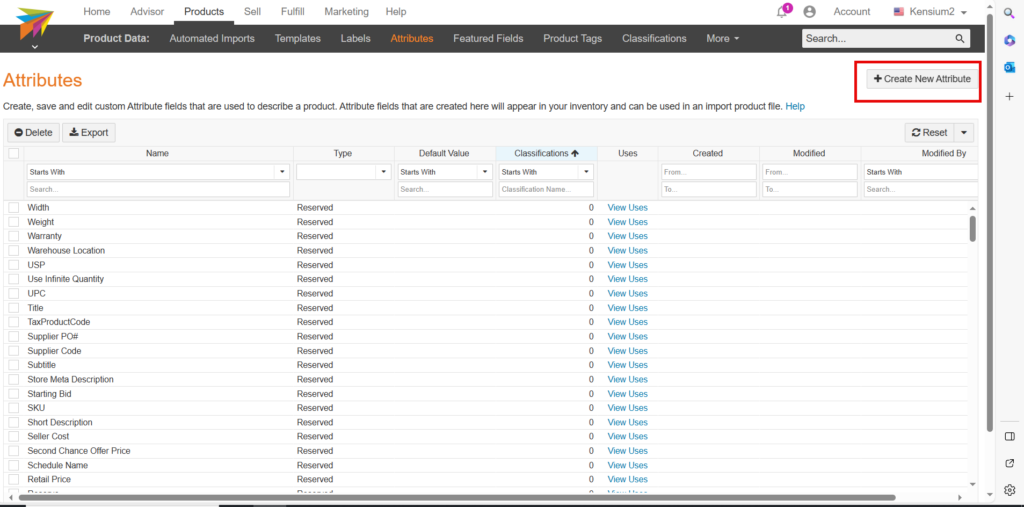
Upon clicking [Attributes], you be redirected to [Create New Attributes] page.
- Click on [Create New Classification].
- You need to enter the [Attribute Name].
- The Attribute Name must match with item class in Acumatica.
- You must enable any one of the [Attribute Type] radio button.
Appears on all products: Attribute will exist within all products in the Rithum Connector account.
Only used on products in a set of Classifications: Classifications which are present will display you need to search for the Classification you created under classification name.
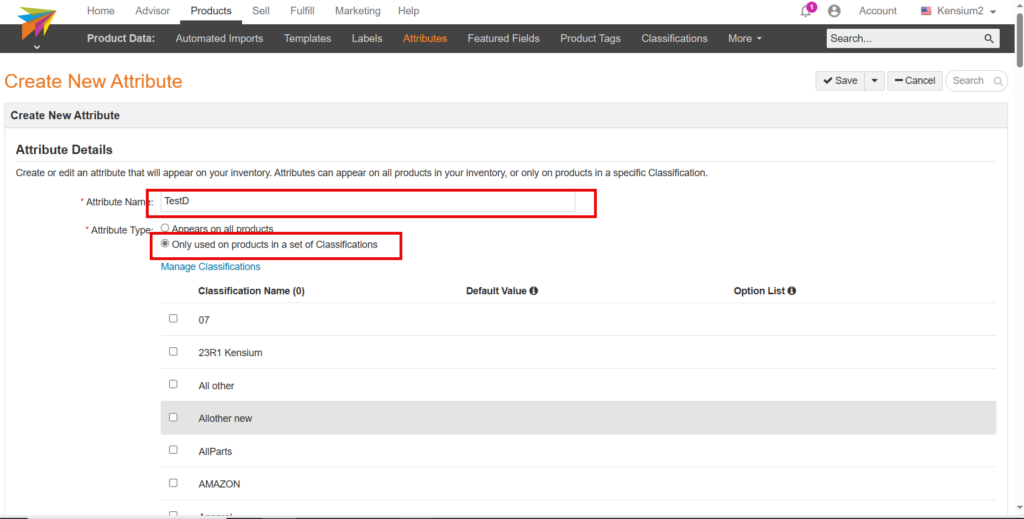
- Toggle the Classification.
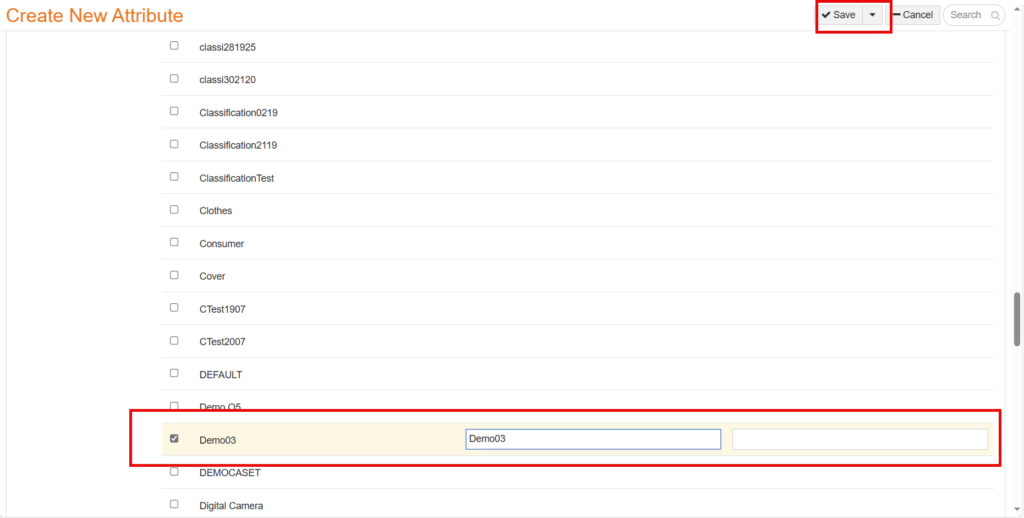
- Click on [Save].
- You can view a validation message labeled [Saved Successfully] on the screen.
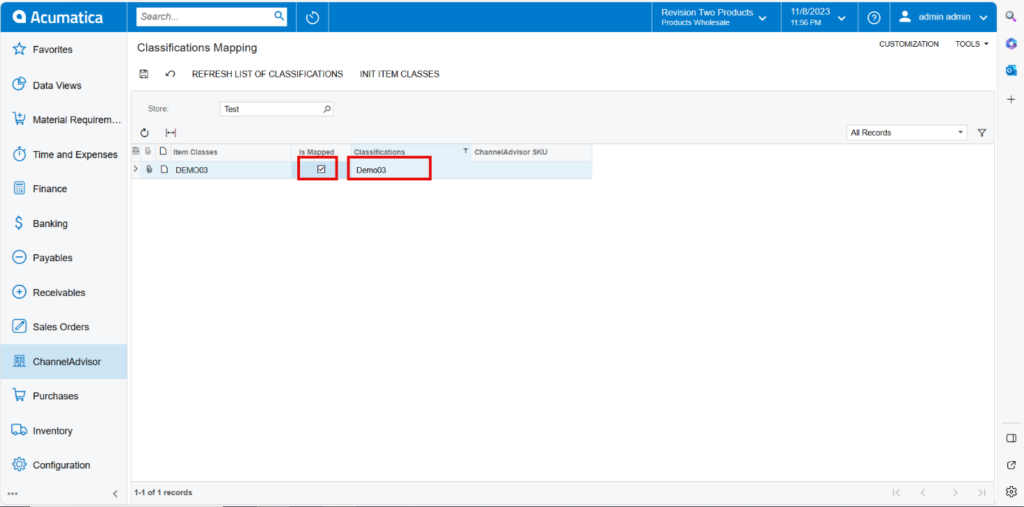
Mapping attribute in Acumatica
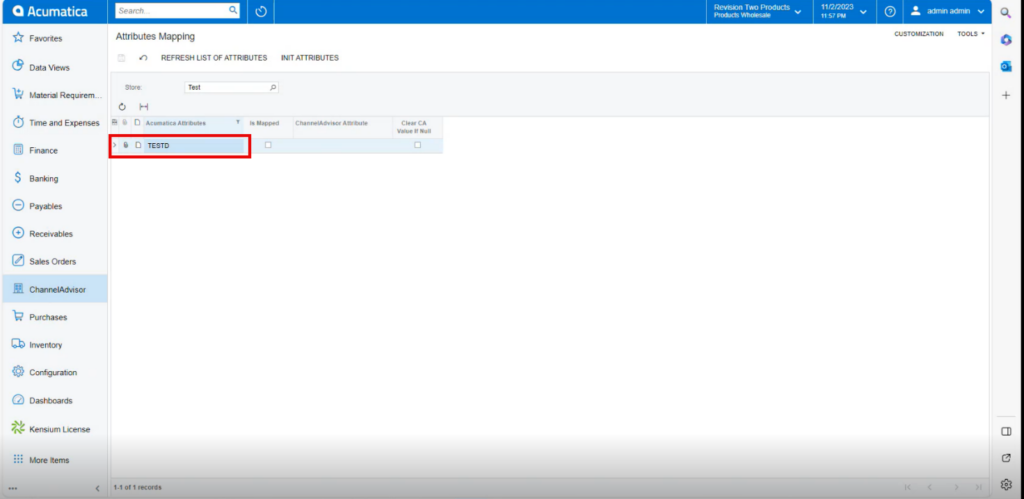
- You need to Navigate to left panel of Acumatica and click on [Rithum Connector] then click on click on [Attribute mapping] under [Preferences].
- Click on [Refresh List of Classifications].
- Upon clicking Refresh it will update the [Attribute list] from Rithum Connector.
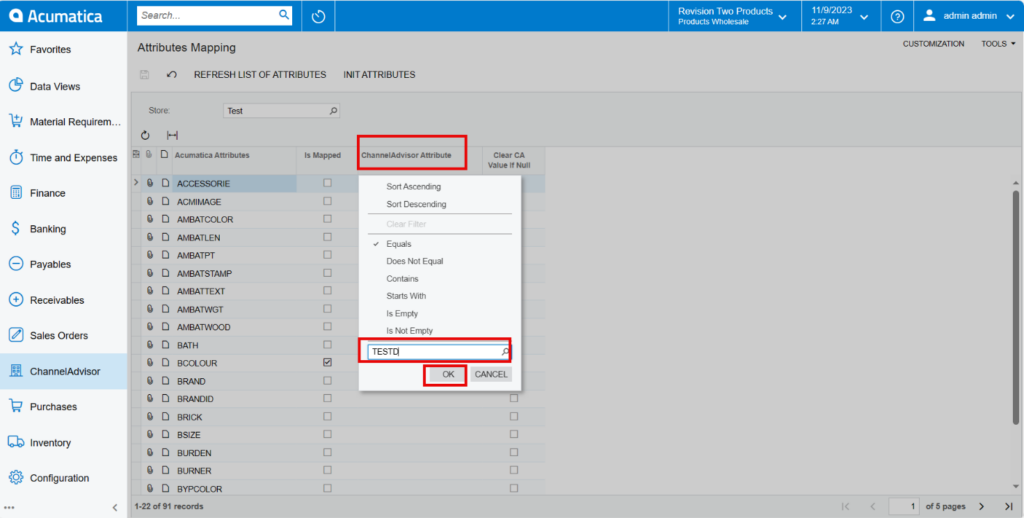
- To perform the sync, the Attribute name must be entered exactly as it appears in Rithum Connector.
- You must Enable the [Is Mapped] radio buttons to sync the stock item from Acumatica to Rithum Connector.
- Click on [Save] to establish the connection between Acumatica Attribute and Rithum Connector attribute.
Note: Attributes of the type class created in CA are available for mapping as of now.
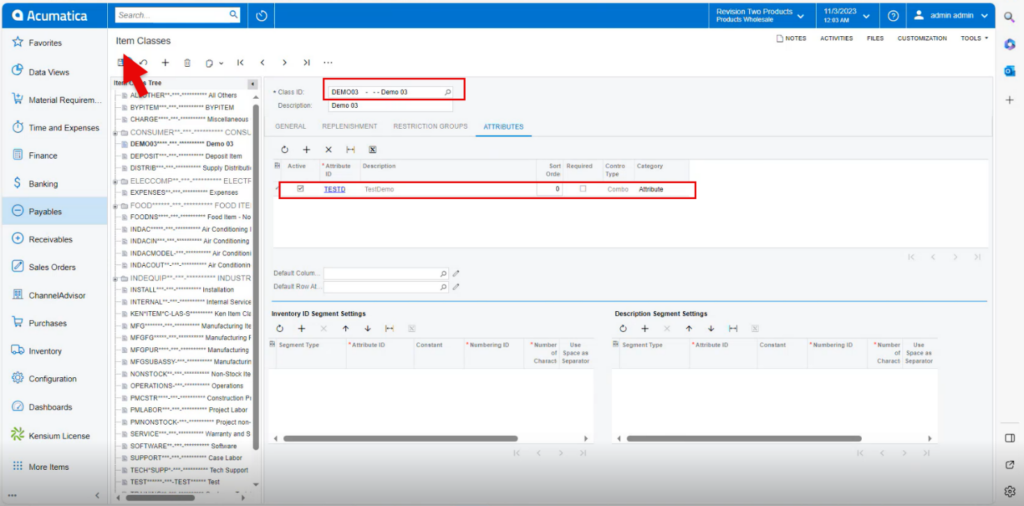
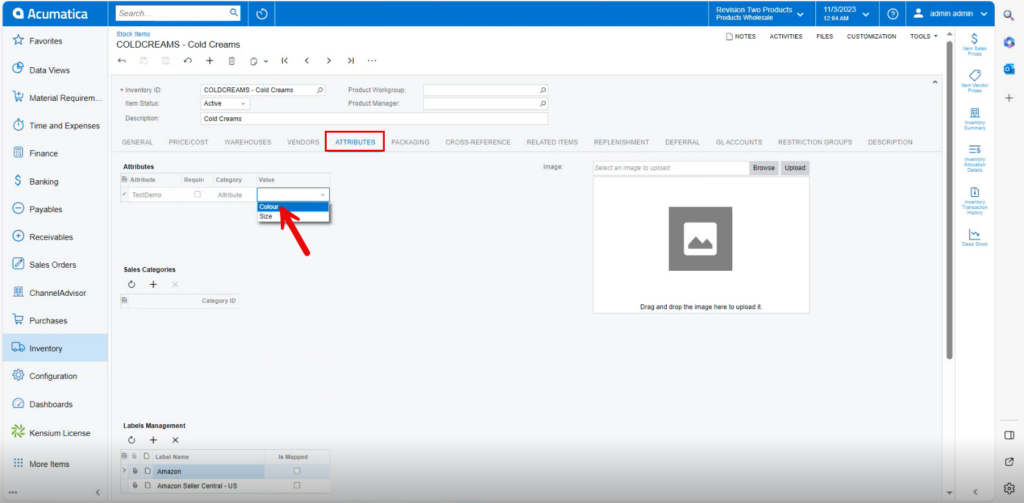
- Click on the [Attributes] tab.
- Click on [+] icon.
- Search for the [Attribute ID] which you have created in the Attribute Mapping.
- Click on [save].

Steps to Create a stock Item in Acumatica
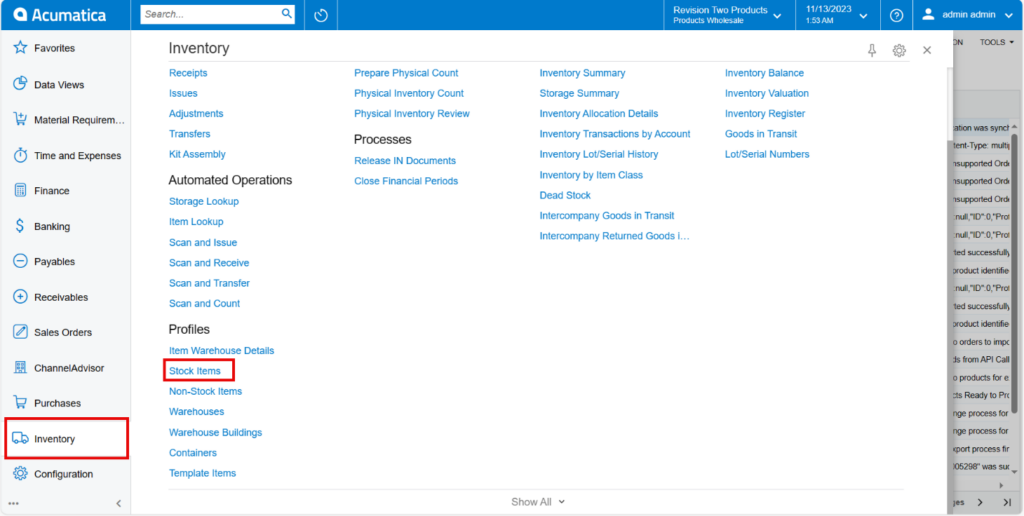
You need to Navigate to the left panel of Acumatica and click on [Inventory] and then click on [Stock items] under [Profiles].
- You need to create a new [Stock Item] in the [Inventory ID].
- Select the Item Status from the Drop- down.
- Active
- No Sales
- No Purchases
- No Request
- Inactive
- Marked for Deletion
- You must add the description in the [Description] Field.
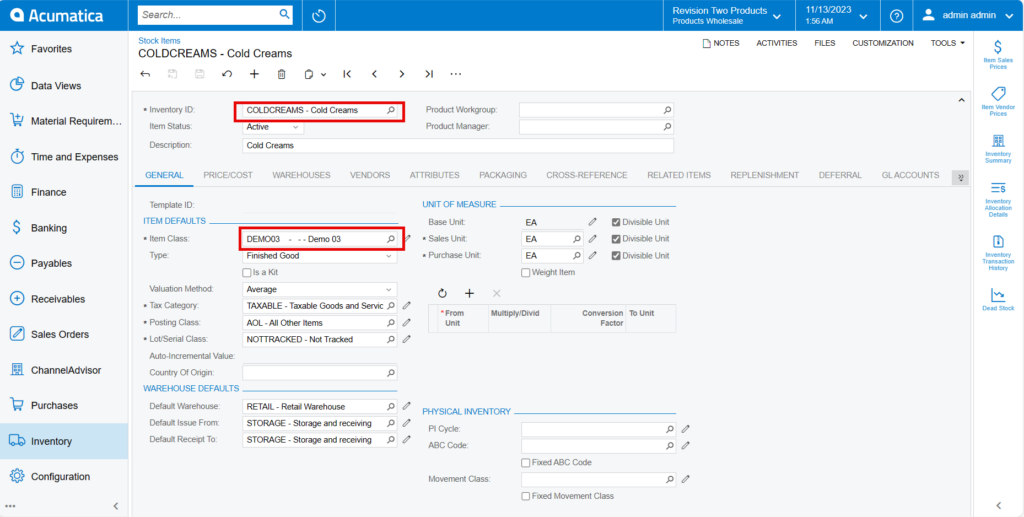
General
- You need to search for [Item Class] which you have Created in [Classification Mapping].
- Click on [save].
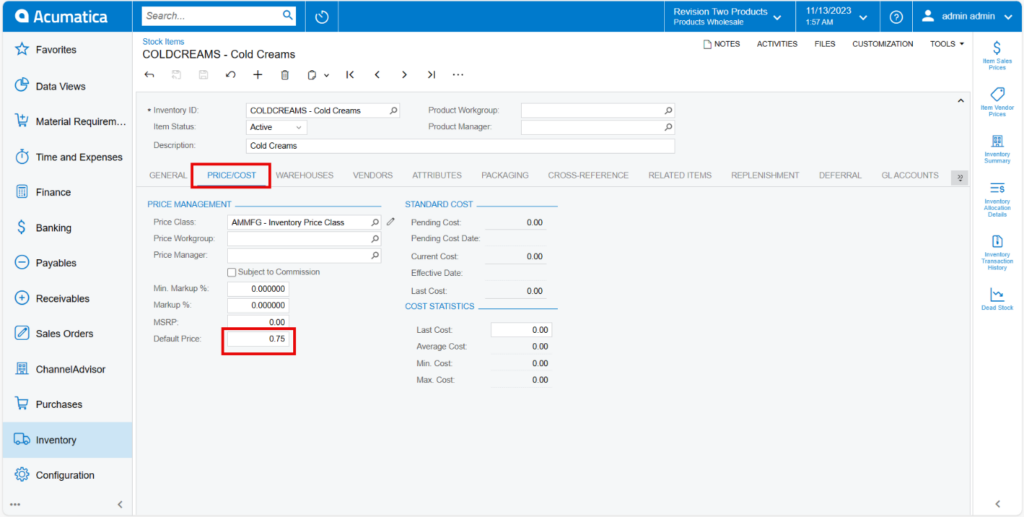
Price/cost
- You must enter the [Default Price].
- Click on [save].
Attributes
- Click on the [Attributes] tab.
- You can see attributes that you assigned to the item class under [Attributes].
- Additionally, the assigned [Value] is shown.
- Additionally, you can view [Associated Rithum Connector Sites] under [Attributes].
- You need to choose the [Active] checkbox if you want to synchronize the stock item from [Acumatica] with the [Rithum Connector].

Two prerequisites to Sync the product.
- In the Classification Mapping [Is Mapped] check box should be enabled.
- The Active check box in the [Associated Rithum Sites] should be enabled.