


Publishing Braintree Package
The first step is to add the Braintree plugin in Acumatica and run the latest version of the plugin customization package. The customization package was developed based on the Acumatica Extensibility Framework.
- Download the latest version of the [Braintree] product package.
- You must navigate to the left side panel in Acumatica and click on [More Items].
- Click on [Customization].
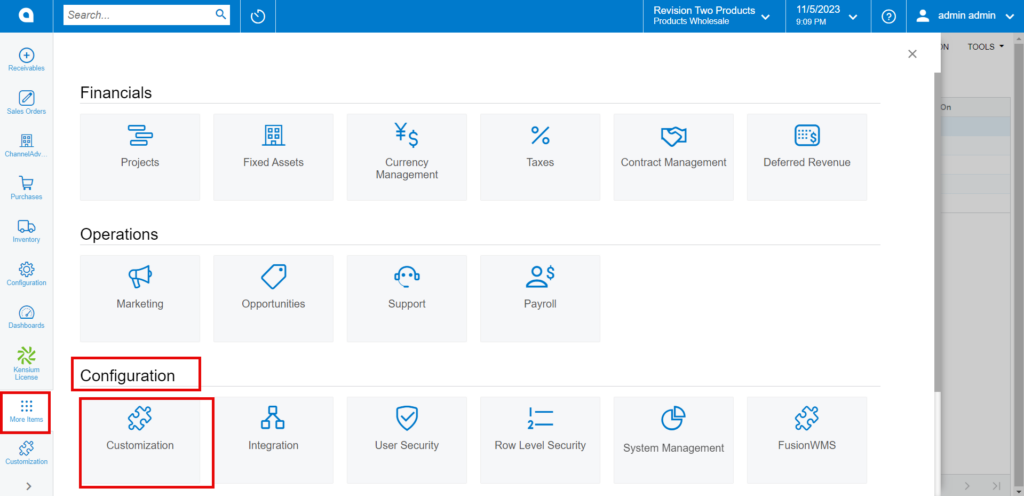
[OR]
- Type the keyword as [Customization] in the Global search bar.
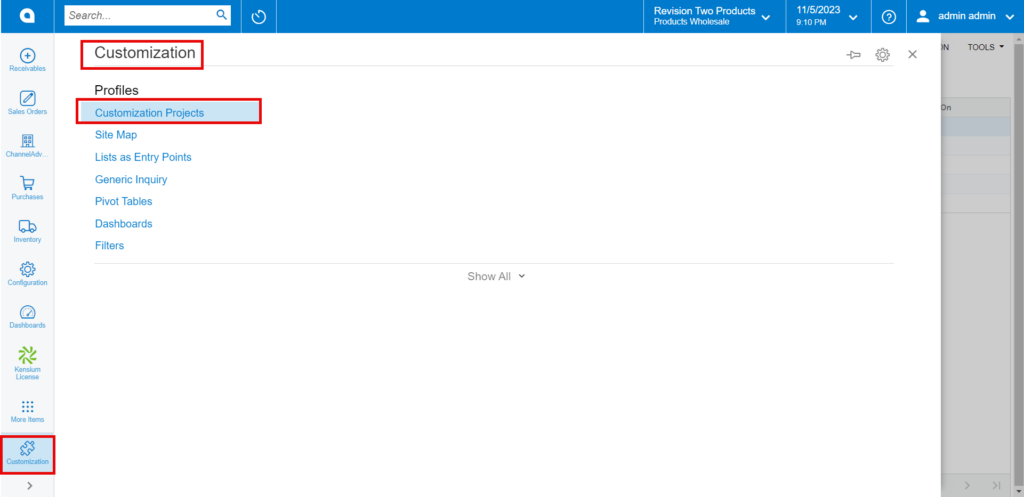
- Click on [Customization Projects].
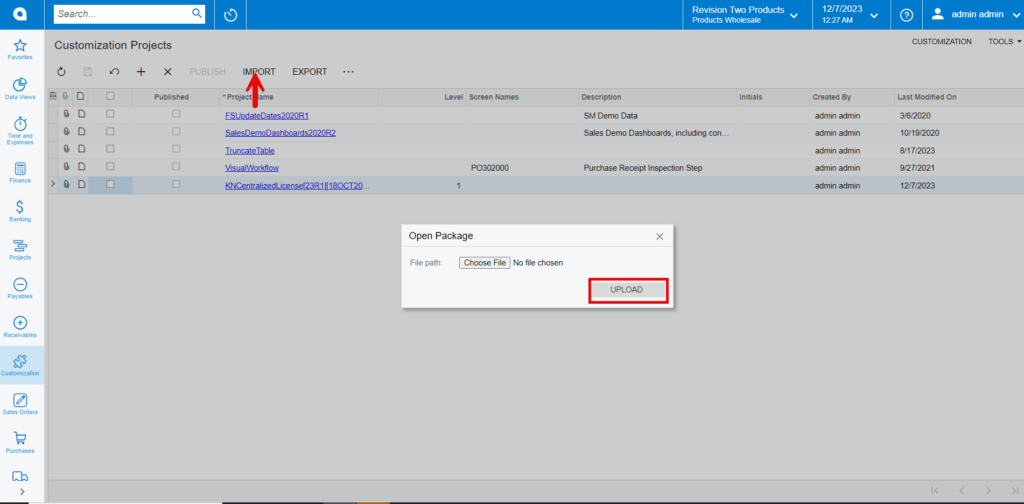
- Click on the [Import] button.

- Upon Clicking [Import] a pop-up will appear on the screen to upload the file.
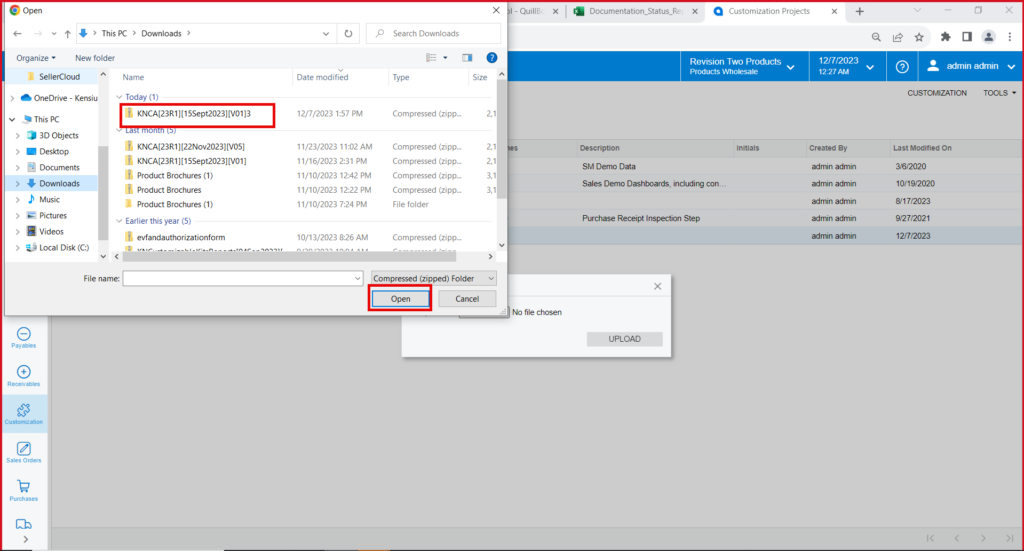
- Select the [Braintree .zip] file from your local desktop.
- Click on [Upload].
- The file name will appear in the [Project Name] column.

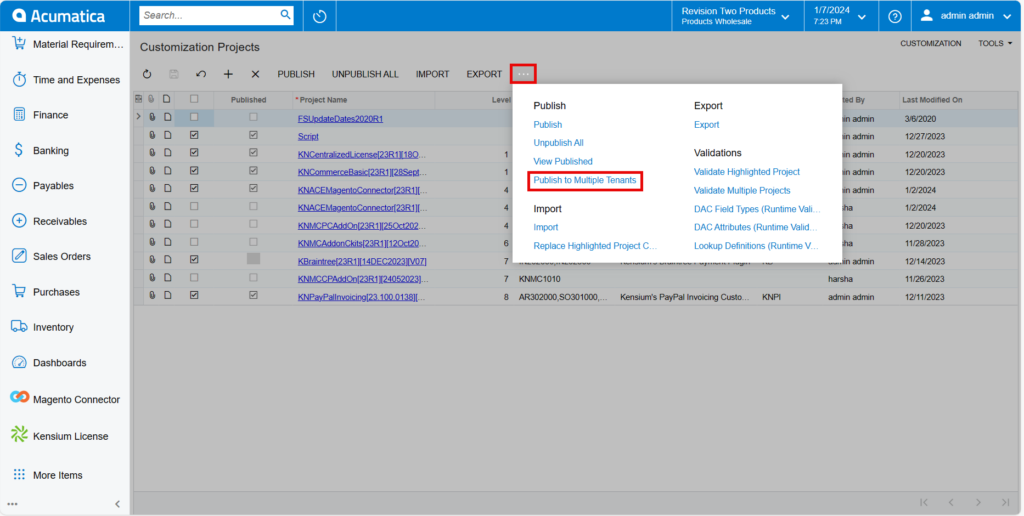
- Select the checkbox/row of the project (Rithum Connector).
- Click on ellipse […] and then click on [Publish to multiple tenants].
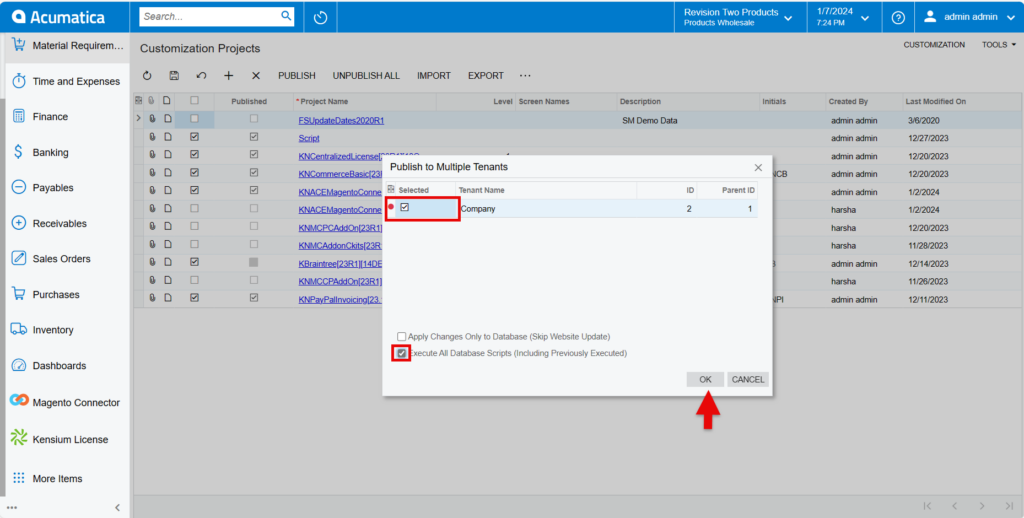
- Click on [OK].
- You can view a pop-up on the screen.
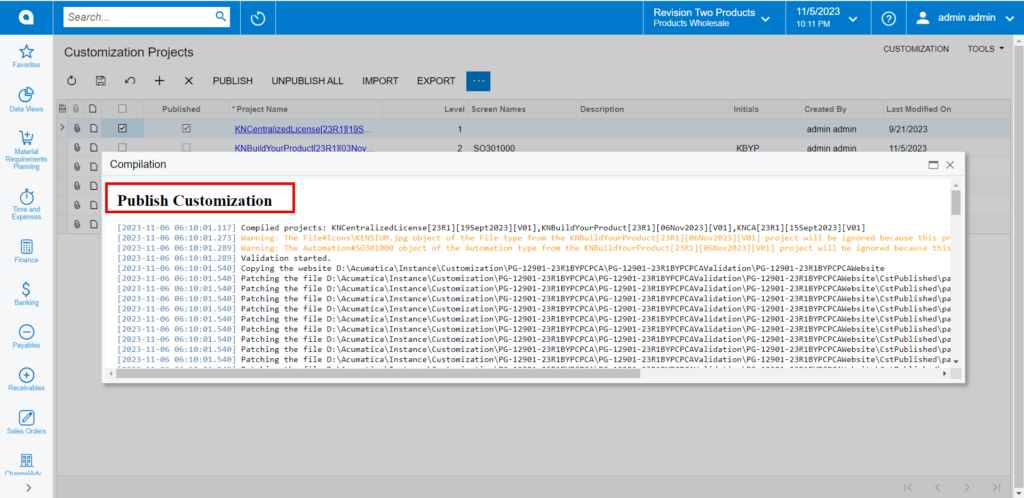
- Click on [Close Completion Plan].
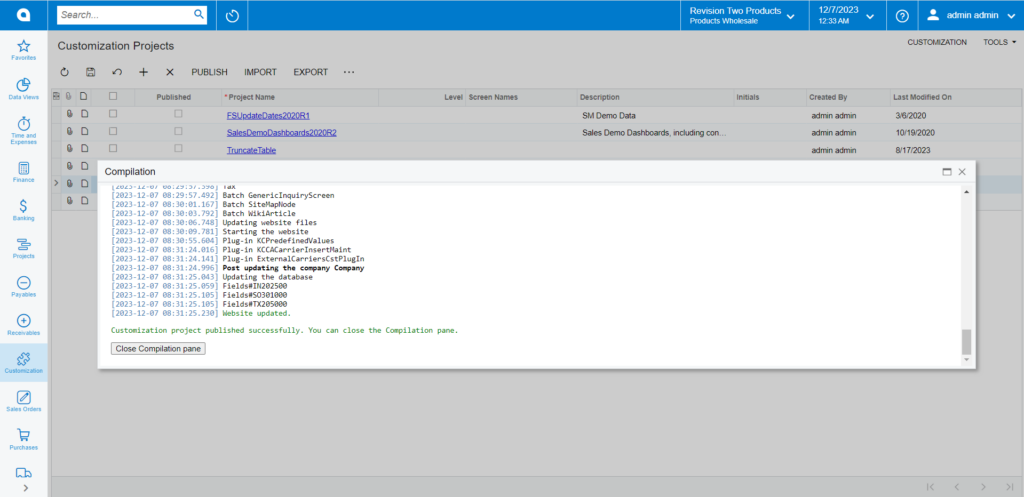
- You can view the Published CA package in Customization Projects Column.
- You must Enable the check box.

- Click on [Save] to publish the [Braintree] package to the Acumatica instance.