


Installation Guide
The first step is to add the Braintree plugin in Acumatica and run the latest version of the plugin customization package. The customization package was developed based on the Acumatica Extensibility Framework.

- Install the ‘KBraintree’ customization package to get started.
- Obtain the latest Braintree plugin package [*.zip] file and save it to a local drive. All packages are saved as a *.zip file.
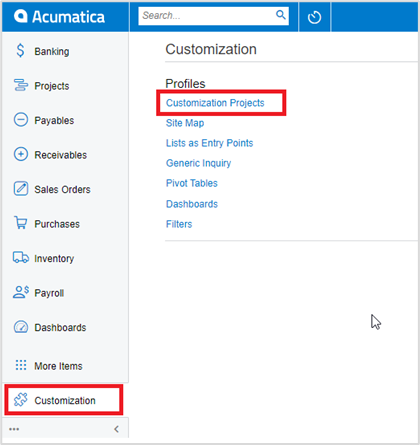
- Go to the [Universal] search field.
- Enter [Customization].
- Click on [Customization Projects].
- The [Customization Projects] screen should appear, as shown above.
- Click the [Import] button.
- Select the [*.zip] file location. Click on [Import].
- The *.zip file will appear in the [Project Name] column.
- Select the checkbox/row for the name of the *.zip file.
- Click the [Publish] button.
If you want to publish the package for a specific company, click the down arrow on the Publish button.
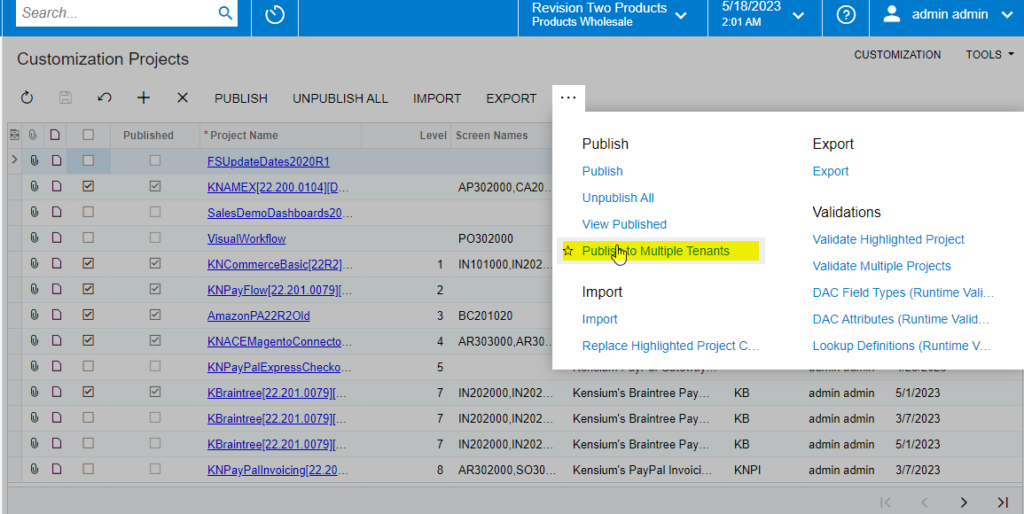
- Select [Publish to Multiple Tenants].
- The Publish to Multiple Tenants pop-up screen will appear.
Select the [Checkbox(es)] for the company names for which you want to publish the package.
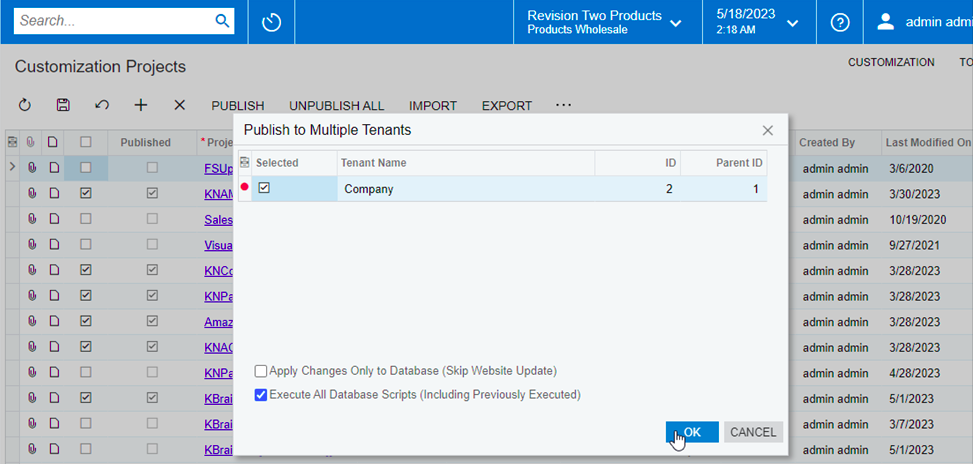
- Click OK.
- Click Save.