Creating a Discount with the defined code
You need to follow these steps to add the discount.
Step 1. Click on the [+] sign to open a New Record.
Step 2. Search for the discount code that you created already.
Step 3. Search for the sequence to enter manually. For example, you can enter 1 or 2 etc.
Step 4. In the [Discount By] field you will have two options as follows:
- Percent
- Amount
If you are allowing a discount by percentage, you must select it from the drop-down.
Step 5. Break By: You will get two options in the break by drop-down.
- Percent
- Amount
Step 6. Click on the [+] button below the [Discount Break Points].
Step 7. A new row will be created on the screen. This row will include the following columns.
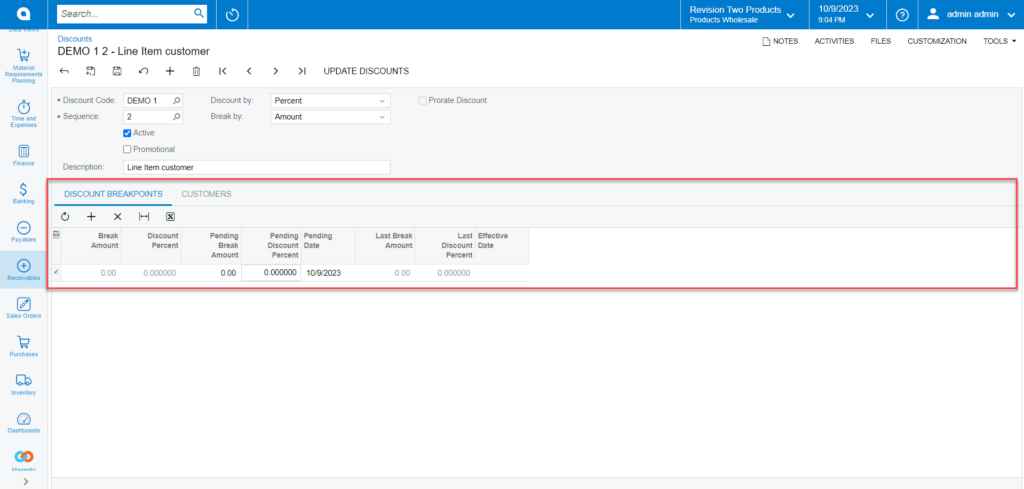
Step 8. Add [Pending Break Amount] which is the same as the Qty added in the Sales Order of CKITS.
When you enter the Sales Order Quantity only the Pending Discount Percentage will apply to the Sales order in the CKITs Item or the Stock Item.
Step 9. Add the percentage in the [Pending Discount Percentage] column.
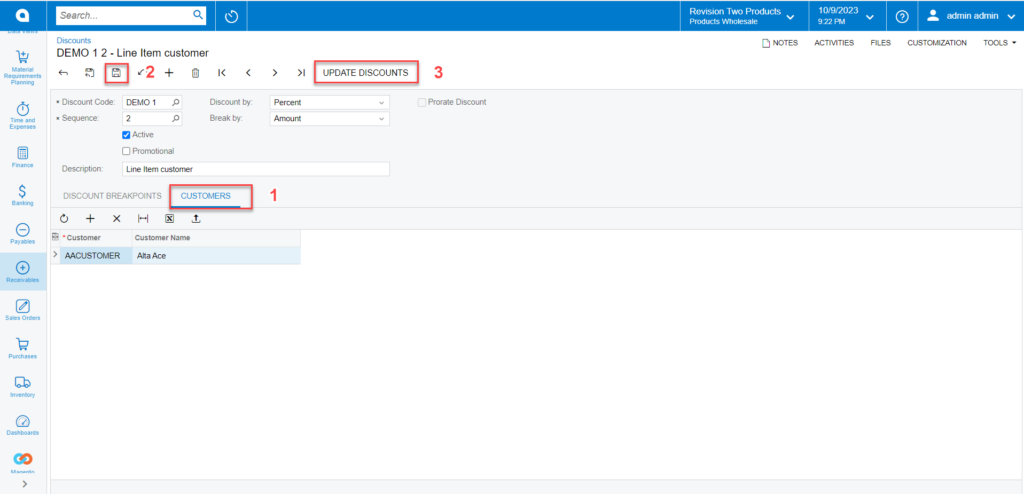
Step 10. Click on the [Customer] tab click on the new [+] sign and search for the customer. This is a mandatory step to apply the Discount to the Sales Order.
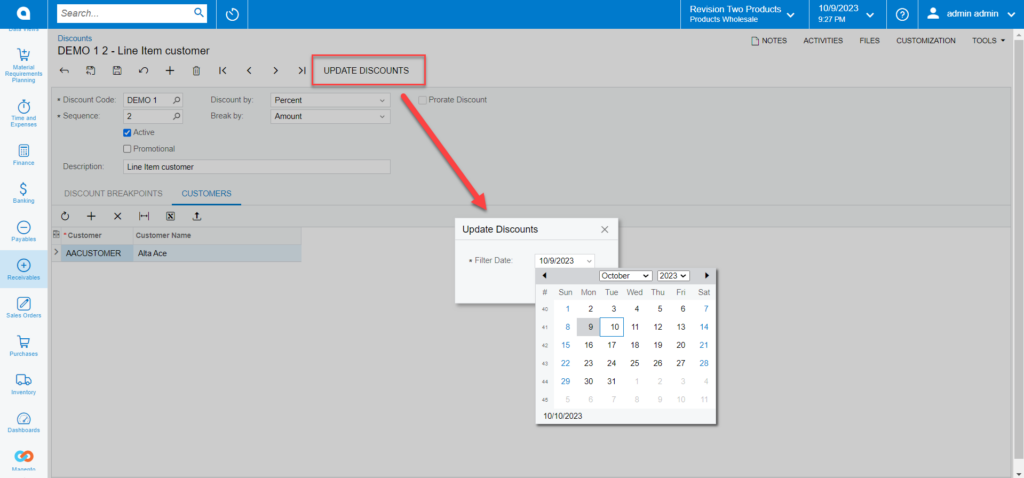
Step 11. Upon selecting the [Customer] save the screen and click on [Update Discount].
Step 12. Upon clicking [Update Discount] you will get a pop-up on the screen with a filter date with a calendar. Choose the date and click on [OK]. By default, the current date is displayed.