Installation Guide
- Save the .zip file of the [PayPal Invoicing] package to the local hard drive.
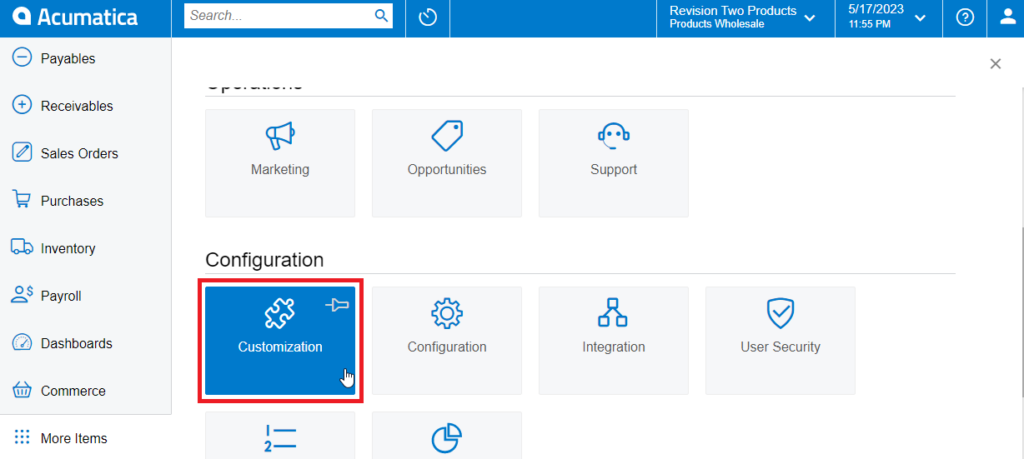
- Go to the left navigation panel in Acumatica and choose [More Items].
- Click [Customization].
[OR]
Type the keyword as [Customization] in the universal search bar.
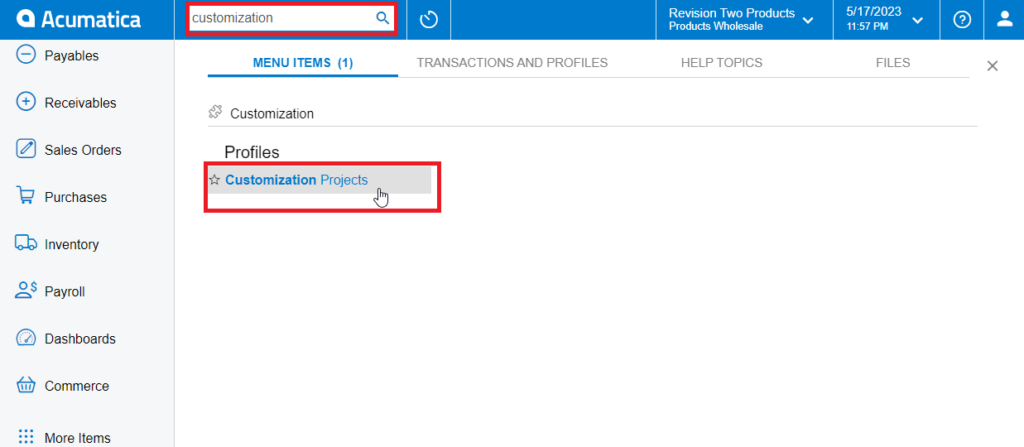
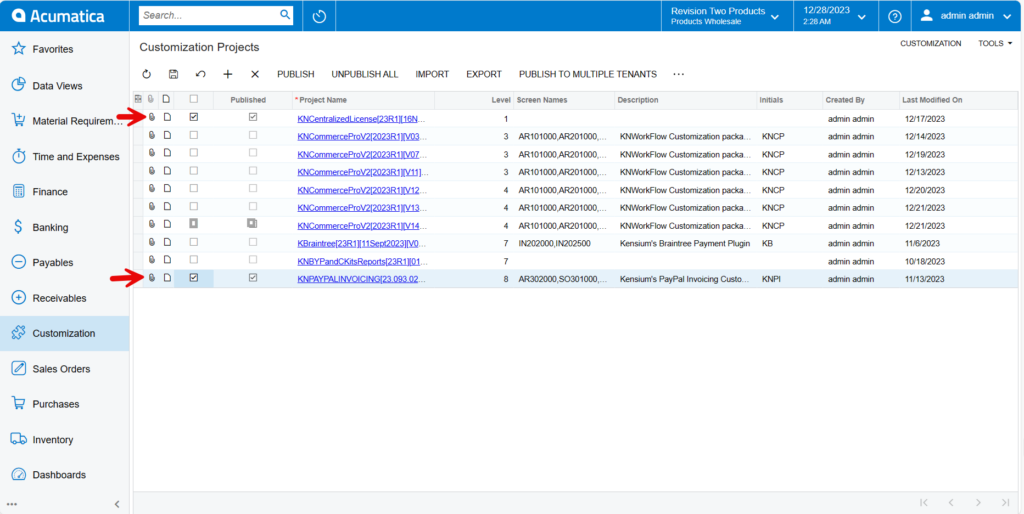
- Click [Customization Projects].
- Click the [Import] button.
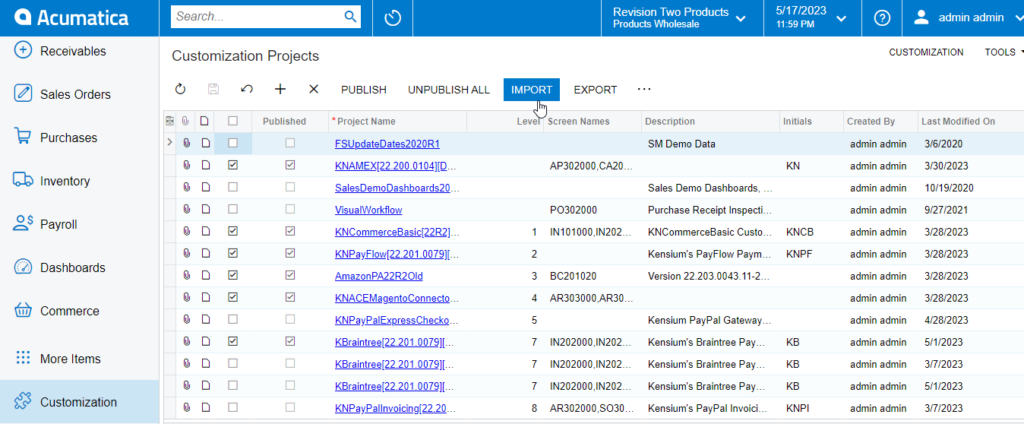
- Select the [PayPal Invoicing] .zip file from your local desktop and click [Upload].
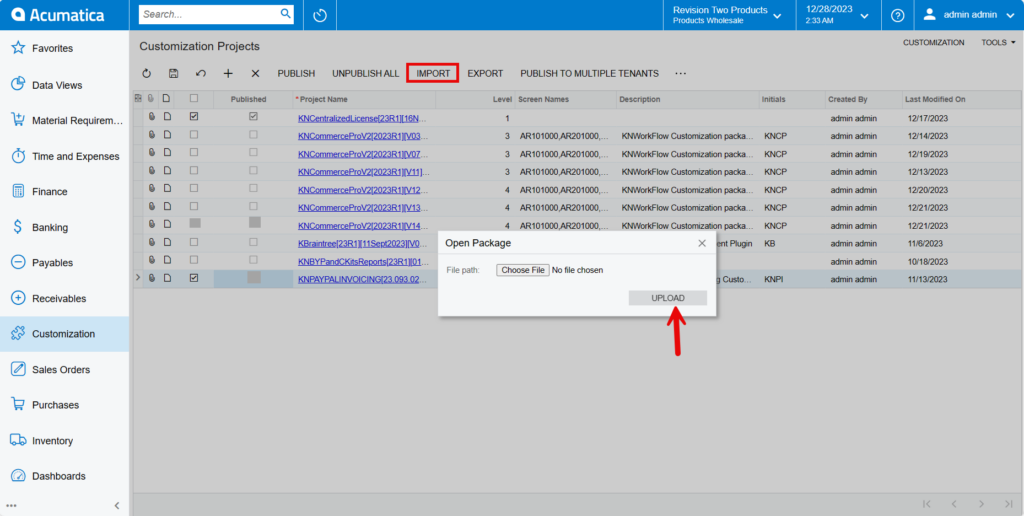
- The file name will appear in the [Project Name] column.
- Select the checkbox/row of the project [PayPal Invoicing].
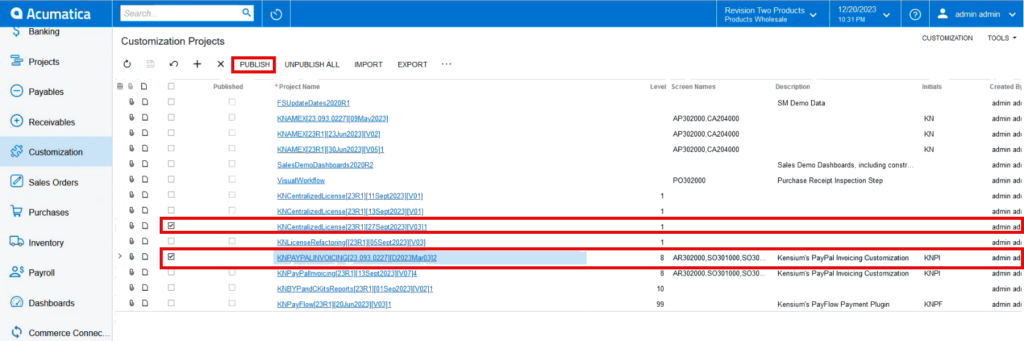
- Click the [Publish] button.
- Click [Save] to publish the [PayPal Invoicing] package to the Acumatica instance.