Physical Count
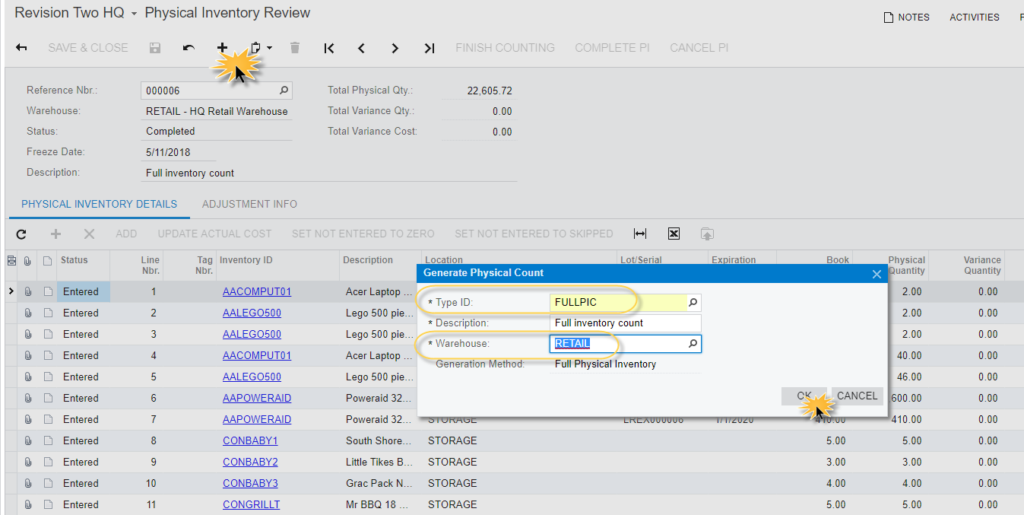
To process a physical count, you must first set up your count Types through the Physical Inventory Types screen. Here you will want to make sure the following two options are turned off in The ERP on the Inventory Preferences screen to perform a physical count on the handheld.
- Add One Unit Per Barcode
- Automatically Add Receipt Line for Barcode
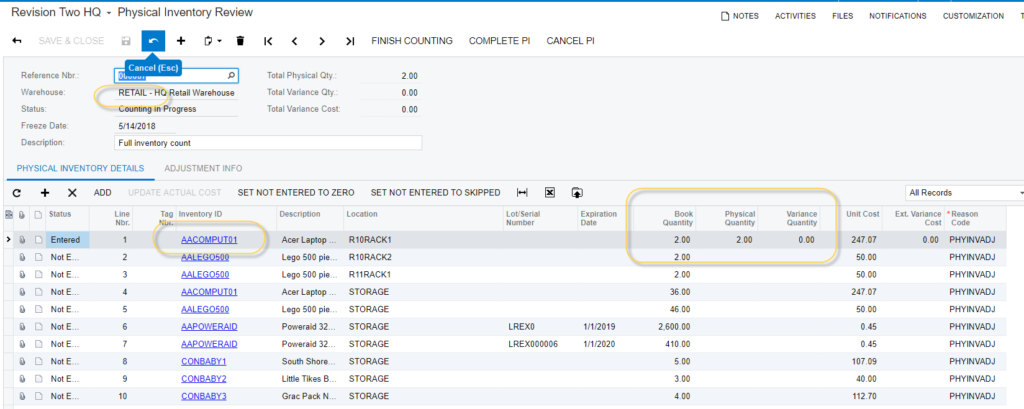
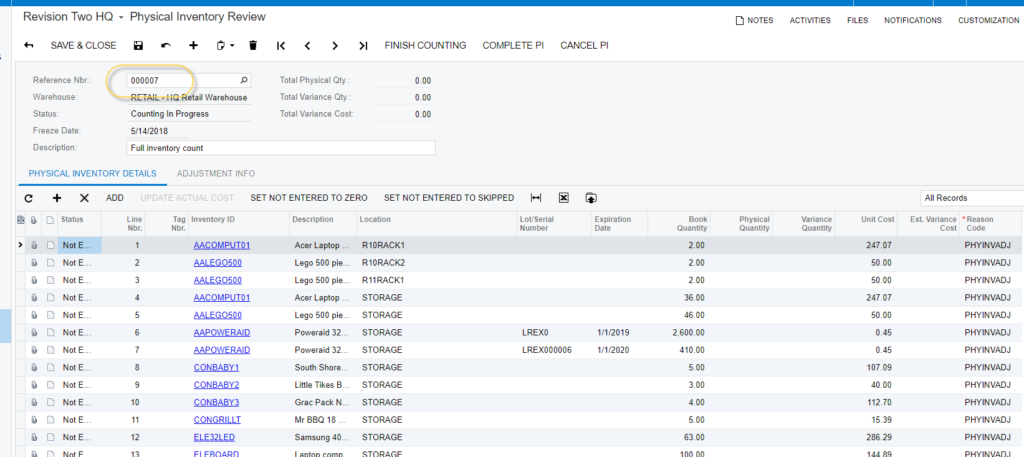
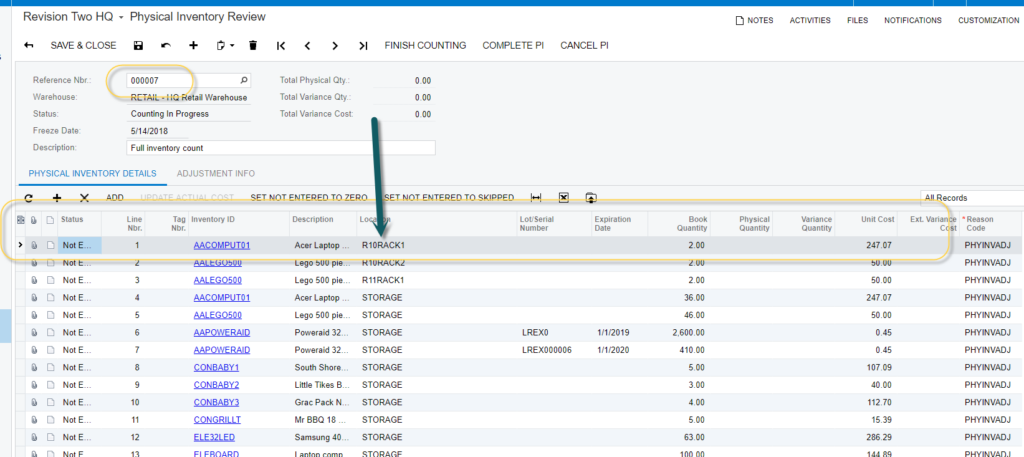
- Once you have configured your count classes you can go to the distribution\Inventory\Process\Prepare Physical Count screen to generate the count. Once generated you should be able to see the information in the Physical Count Inventory Review screen.
From the handheld, you can now scan/enter the count in the Physical Count Screen.
You can flip the scanning options on the handheld by toggling the Count Entry Method Button which will allow you to flip between Enter Qty where you will have to enter in a quantity for each item scanned in OR Default Qty of 1 where each scan of an item will automatically default to 1. This can only be changed at the beginning of the session.
As items are loaded through the menu, they are sent back to the Physical Count Inventory Review screen in real-time to be reviewed. Complete the count and refer to your ERP processes for closing a count.
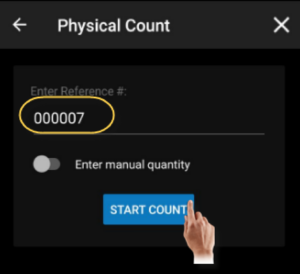
This screen creates a reference number to be checked, which can be reviewed in the WMS from Android, in the physical count feature.
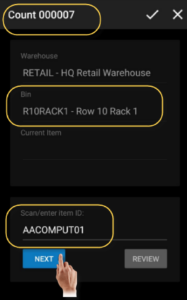
The user should be able to enter a reference # of the physical inventory review created previously in Acumatica, after entering this #, the user will have an option to enter manual quantity, by default this option is not checked and the user can scan/enter each item one by one.
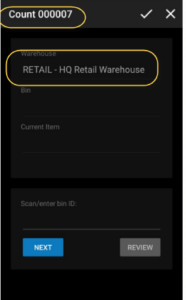
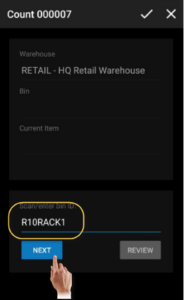
When pressing the button to start an account, if the reference # exists in Acumatica, then a new screen will be shown asking the user for the BIN ID, the user should enter an existing BIN ID, and press on next button.
After doing this, if the bin exists in the warehouse, then the user will be able to start counting the items, the user can scan/enter an item code and then press the next button.
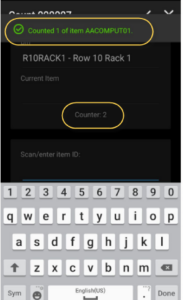
If the item is correct then a message in green will be shown on the top of the screen, let them know to the users that the item has already been counted, and then we press the next button until we finish counting each item.
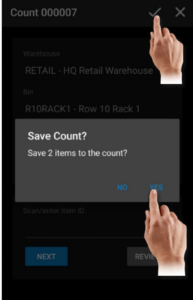
If the user presses the check mark at the top/right of the screen a new window asking the user will be shown, confirming if the user wants to save the X number of items to the count, if user press YES then the count will be done and we return to the WMS menu(refers point 4) We can see all these changes reflected in Acumatica, by selecting the Reference number in the physical inventory review screen, as you can see in the image below the physical count is done.