Pick, Pack & Ship
Acumatica Configuration:
Warehouse:
- Pallet Stock Location. Set up PStock or PalletStock as an Active location in the warehouse to be included in the quantity available, with sales, receipts, transfers and assembly allowed. Set the Pick Priority to a relatively high number so other locations are allocated before Pallet Stock.
- Pallet Ship Location. Set up PShip or PalletShip as an Active location in the warehouse to be included in the quantity available, with sales, receipts, transfers, and assembly allowed. Set the Pick Priority to 999. This location is used to store pallet IDs and contents for shipments in process or completed.
- Pick Sequence. The Fusion WMS Pick Sequence overrides the Acumatica routing and allows for optimum pick flow. When used in tandem with Zones (Note: More recent versions of Acumatica allow the operator to define a “Path” which is redundant with Fusion WMS Pick Sequence.)
- Zone. If Zones are used, the user may also select the zone in which they are operating. Examples of a Zone would be an external yard, freezer, bulk storage, etc. If zones are used, FusionWMS will split a single pick list by zone so that the user will only see picks within their zone. When their pick is complete, they can declare or view the staging area where the other picked items on the shipment are located.
- To use zones first go to the zone tab in the warehouse setup and add Zone IDs with their respective descriptions. Then put the zone adjacent to the Acumatica Location ID. When using zones, the Pick Sequence will now define the route within the zone as well as in the warehouse. From the handheld the operator may select one or all zones.
Sales Order
- Sales Order Preferences – Boxes. Fusion WMS allows the operator to scan or enter the box to be packed. To limit the number of boxes visible to the handheld, Fusion WMS will only recognize those with a FusionID. This may be a barcode which can be scanned. Also, there is the ability to provide a Default Box type. This will be the default Container presented on the handheld which may be overridden as necessary.
Basic Methods:
FusionWMS Advanced provides two basic methods in the pick / pack process.
- Pick and then Pack. This assumes a two-step process where shipments are first picked. This will move the picked items to a designated location (Typically SHIP). There, a second process, Pack, allows for the assembly of containers.
- SO Pick. A shipment number may be scanned or entered into the Shipment field or the operator may select Get Next. Get Next will present the next available shipment available (See Zone Picking). LOAD will load the shipment to the handheld.
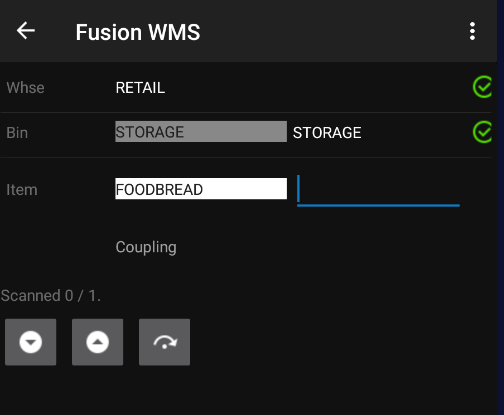
Once a shipment is loaded onto the handheld, the user is presented with the ability to REVIEW (the pick), CANCEL, or PICK ITEMS. PICK ITEMS will present the user with the items in pick sequence order. The process is to scan/enter the location, and the item and enter the quantity. If entering the lot or serial number is required the user will be prompted for the same for confirmation. Note there is the ability to scan each item rather than entering the quantity if desired.. - Wave Pick. Wave picking allows you to combine multiple shipments into a single pick list. The Wave Pick process is handled separately from that of standard picking. To wave pick you first must select the shipments to be included on the wave.
Please note: Wave Picking can be done via paper picking or paperless picking. The Wave Pick can be created in one of two areas:
To create a wave pick from the Process Shipments screen you will select the action Create Wave Pick.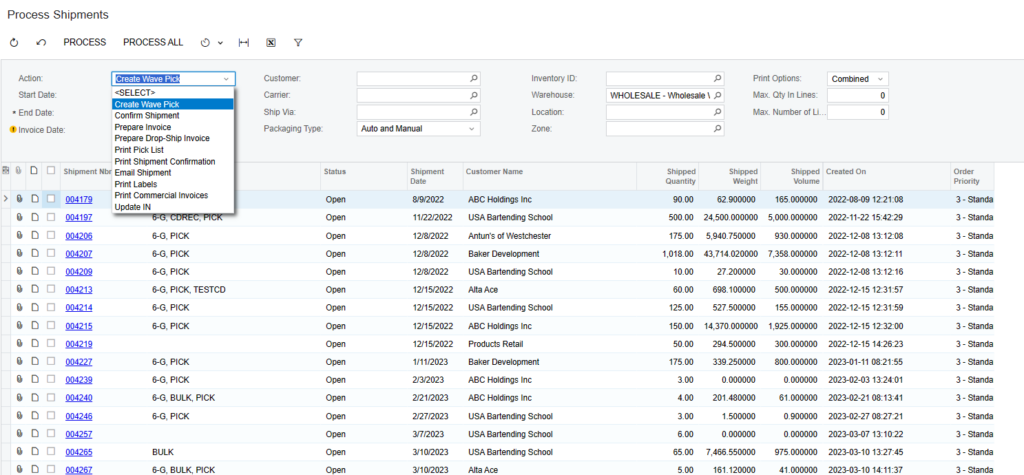
Fusion WMS has added certain desired fields such as Zone and Create Date / Time which are helpful when determining what shipments to include on a wave pick. When selected you will show a list of shipments available to be included in the wave pick. Once selected these shipments these shipments will be included in the wave Pick and not available for individual Pick.
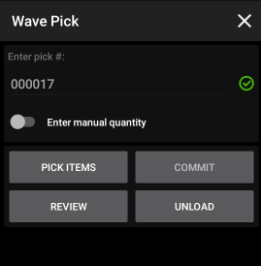
Scan or enter the wave pick number and the operator will be routed through the warehouse in an optimum manner to pick all the items included on the wave. The handheld will reflect the location, items, and combined quantities. The paper pick list will reflect the distribution of those contents among the selected shipments.
- Pack. Select PACK to pack shipments which have been picked. Note to be eligible to PACK items must be in the Shipping Location and the shipment must be marked Picked. The capabilities of PACK will depend on what modules are installed.
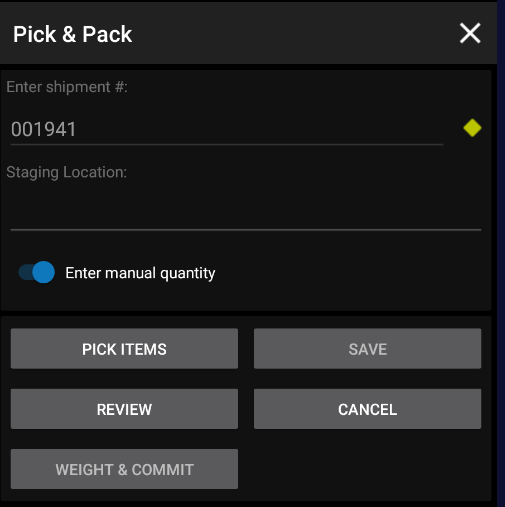
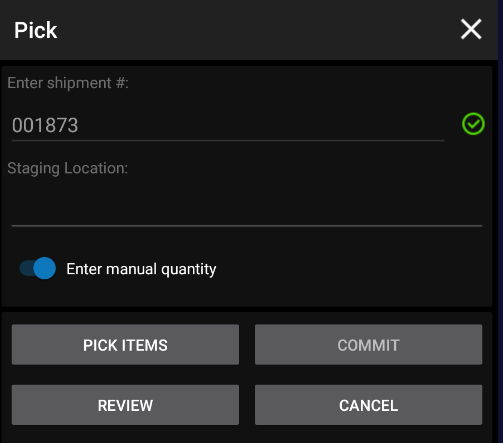
After selecting the PACK icon from the handheld enter or scan the shipment number and you will be presented with the following menu:
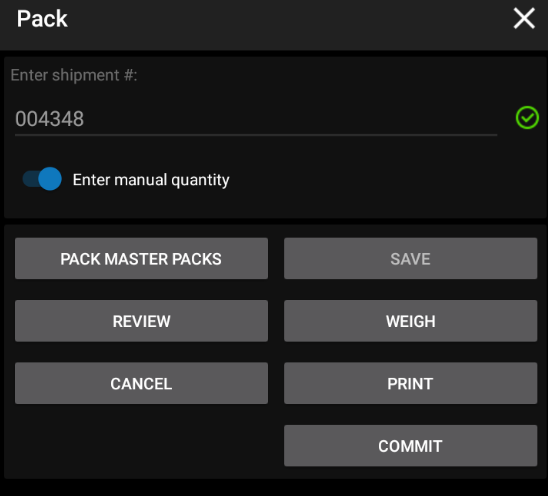
As with other menus REVIEW will show each line item, the quantity on the order and the quantity packed thus far. Activity from previous sessions will also be highlighted.
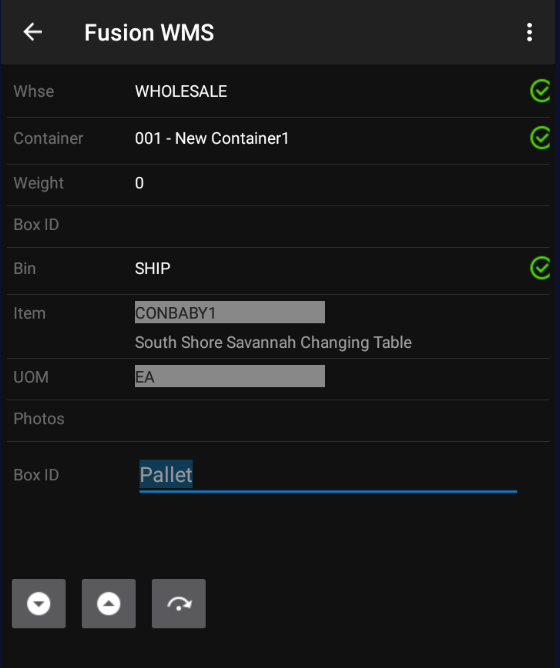
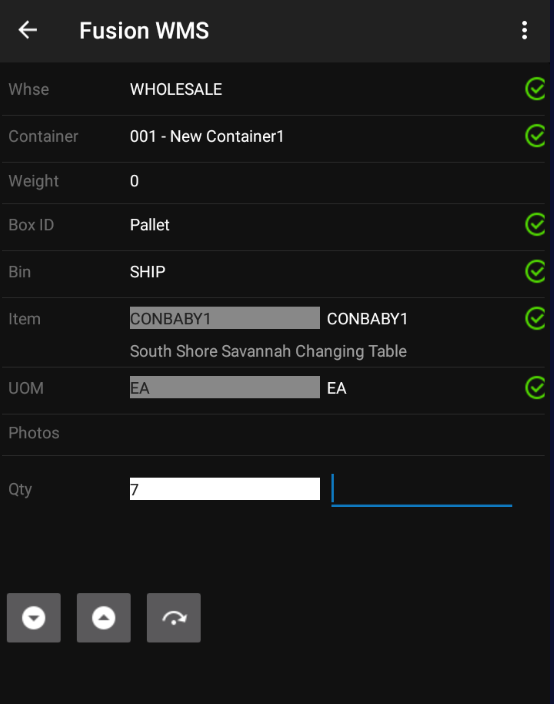
Select Pack and Fusion WMS assumes you are packing a container i.e., box pallet, etc. and the default Box ID will be presented. In this case Pallet. This may be overridden by scanning or entering another Box ID. After confirming the Box, the item to be packed is presented along with the quantity. After scanning the item and entering the quantity the next item to be packed will be presented. At any time by selecting Container, you may create another box by either scanning an existing container or creating a new container.
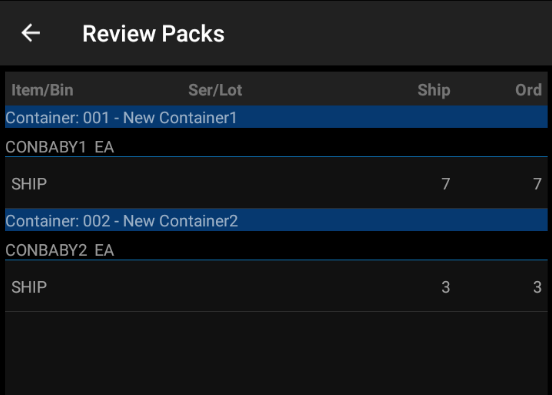
In this example two containers were created each with one item as seen in the REVIEW presented below:
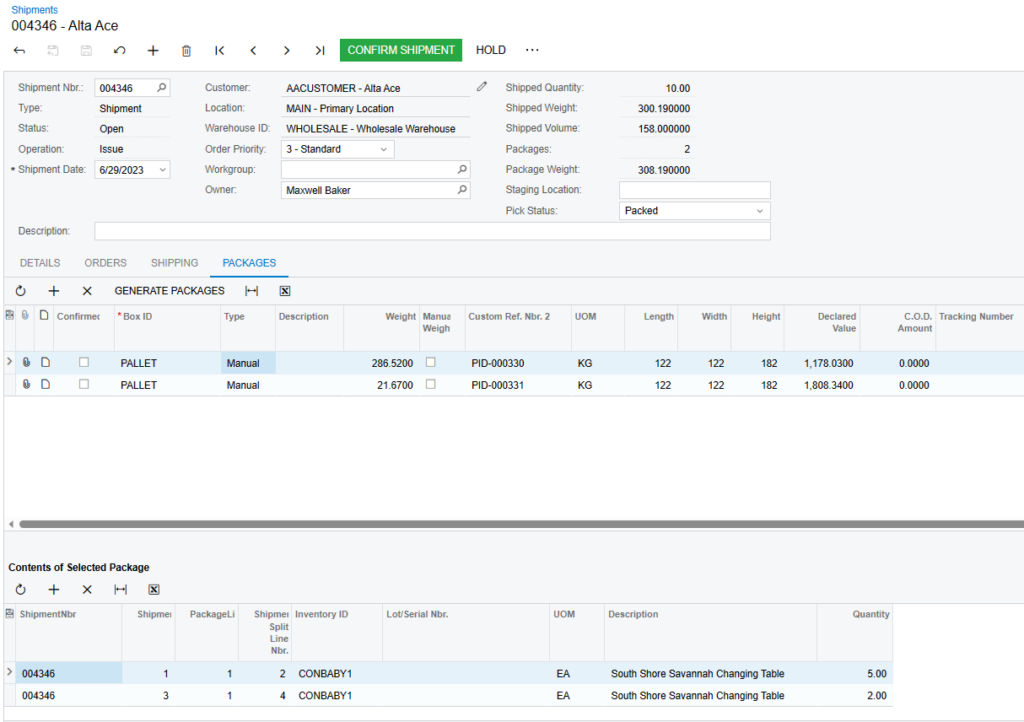
Selecting SAVE will create the containers in Acumatica. Note that Acumatica Packages are not created. Once saved, the weight can be entered, and a container label printed from the handheld. Containers can be unpacked and repacked as needed before Acumatica Packages are created. COMMIT will create the Packages on the Acumatica Shipment and change the Pick Status to Packed.
- PICK to PACK. This requires Fusion WMS Advanced and assumes that containers are assembled during the pick. For a large LTL or TL shipment the picker will grab a pallet or stack of boxes and begin assembling one or more container(s) while picking. The picker is required to select a container before beginning picking.
- Pick to Container Once a shipment has been loaded into the handheld the user is presented with several options: PICK ITEMS, REVIEW, CANCEL. Select PICK ITEMS to begin.
The next step is to select a container.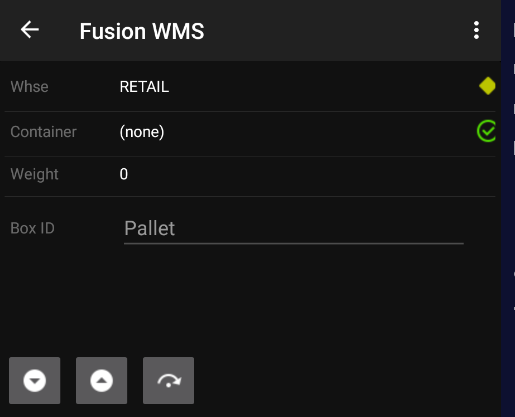
Select Container 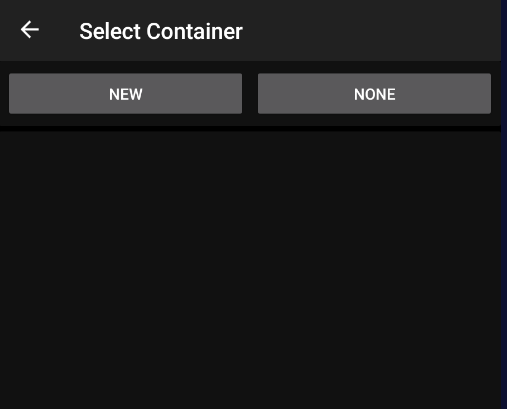
Select New or choose Container 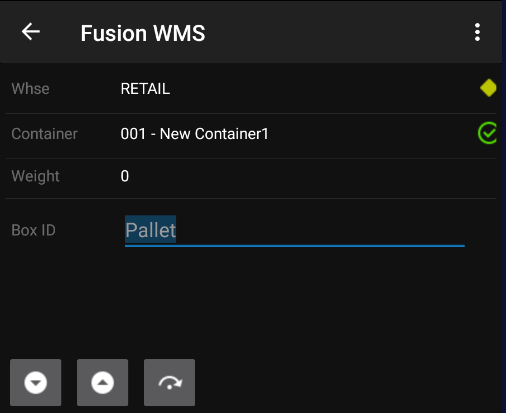
Pack Container At any time, the user may move between containers by selecting the target container before scanning the next item.
- REVIEW. At any time before selecting SAVE, the user may review packed items by selecting REVIEW which will display the containers with contents.
- SAVE. When items are packed as desired, select SAVE which will create the containers in Acumatica. Note, that packages on the Acumatica shipment are not created until COMMIT.
- WEIGH & COMMIT. Once packed and created the user may now enter the weight of the user may now enter the weight of the container by scanning/selecting the container and and entering the weight. With the weight entered. selecting COMMIT will create the packages on the Acumatica Shipment along with the box dimensions and weight.
When all items have been picked, COMMIT will be available. COMMIT will create a transfer in Acumatica moving the items from their picked location to the Shipping Location for the Warehouse as defined. the Pick Status of the shipment in Acumatica to Picked.
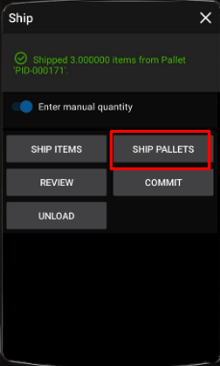
Ship
The ship is an elective final step in the shipping process. Elective because a shipment can be confirmed through the packing process if desired. However, in those cases where a shipment may be picked, packed, and staged for future completion, SHIP can be used to confirm the final shipment in Acumatica.
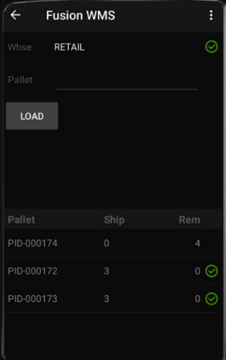
Select the Ship Icon and the operator will select items or containers. Selecting containers will present a list of containers on the shipment. When all of the containers are scanned, as indicated by the green check box, the operator may Commit the shipment which will Confirm the shipment in Acumatica.