


Mapping Product Attribute Schema
Product Attribute Schema must be mapped to ensure product data can be moved from Acumatica to Magento. Acumatica attributes are considered metadata and must be mapped before syncing products.
To begin, select an attribute that has been added to an item class that is enabled for Magento sync in Acumatica. Navigate to the Magento Connector workspace in Acumatica and select Product under the Schema Management section.
-
Click Refresh Schema.
- The attributes will refresh successfully with a green checkmark.
- Toggle the Active box next to the attribute that must be mapped.
- Click Save.
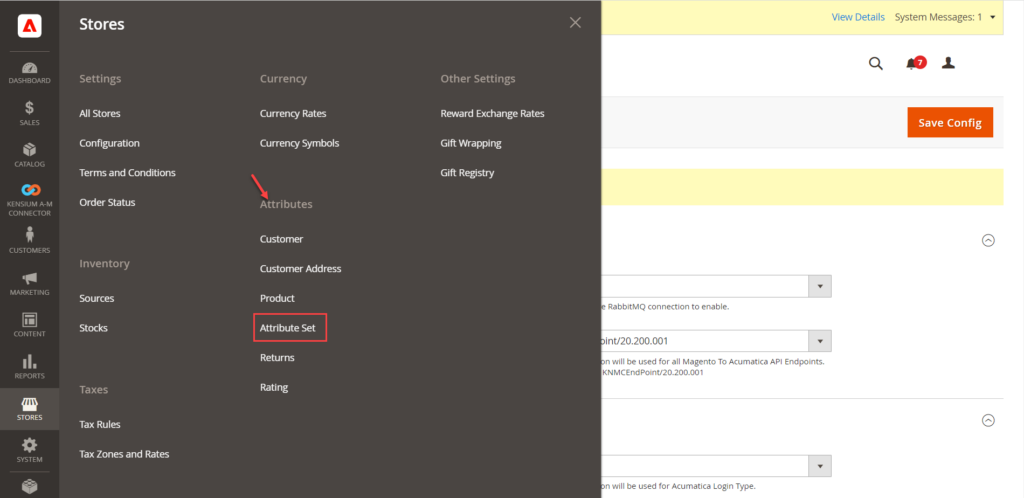
To view the successfully synced attribute, navigate to the Store’s workspace in Magento and select Attribute Set. Attribute Sets are equivalent to Acumatica item classes.
- Click the Attribute Set (item class) that the Acumatica attribute is assigned to.
- In the Groups section, scroll down to the Acumatica folder.
- The attribute will appear in the Acumatica folder.
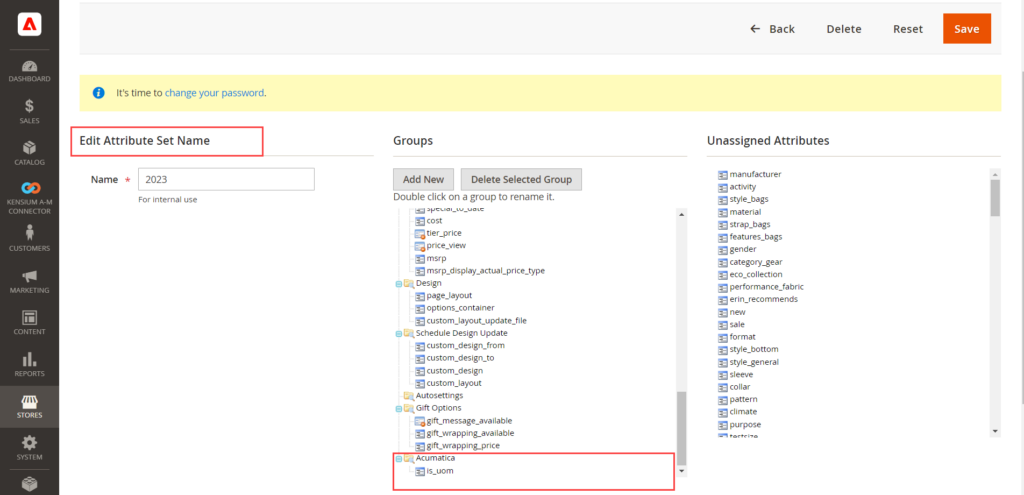
Default Magento attributes will appear in the General folder. It is important to note that the connector will not adjust any existing attributes located in attribute sets in Magento. If the attribute appears in the Unassigned Attributes list, the attribute may be dragged and dropped into the Acumatica folder.
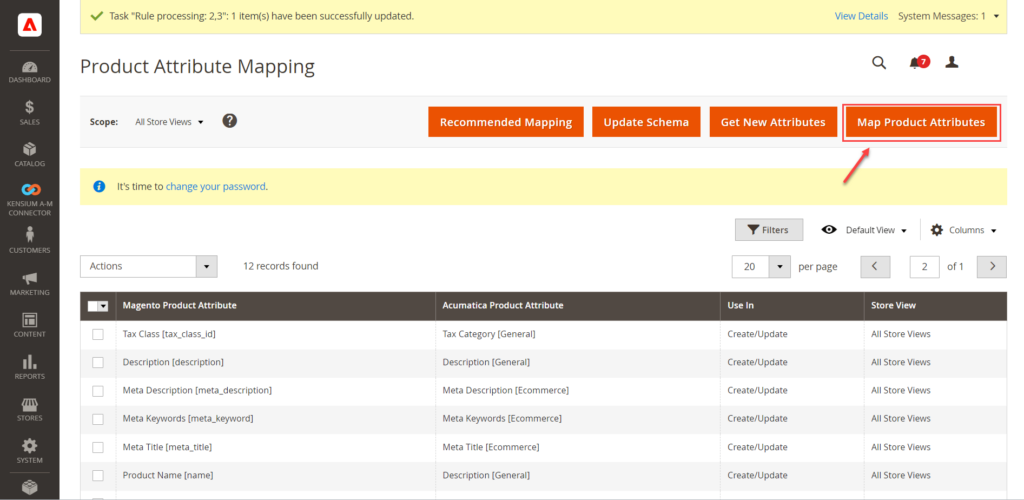
Now that the attribute has been assigned to the Attribute Set, the attribute can be made and mapped in Magento for syncs. Navigate to Magento’s Kensium A-M Connector workspace and select Product in the Mapping section.
- Select a Store View in the top left-hand corner.
-
Click Update Schema.
- If the Magento Product Attribute already exists for the Acumatica Product Attribute, skip stepping 8.
-
Click Get New Attributes
- The list of unmapped attributes from Acumatica will be rendered.
- Click Create next to the Acumatica attribute that will be made into a Magento attribute.
-
Under Attribute Properties
-
Enter a Default Label
- This is the display name of the attribute.
-
Enter a Catalog Input Type for the Store Owner
- This will update the interface of the options for the attribute.
-
Enter the Values Required option.
- This will determine whether the attribute is a required field.
-
Enter a Default Label
-
Under Advanced Attribute Properties.
-
Enter an Attribute Code.
- This is an internally used code for attributes.
-
Enter a Scope.
- This will designate where the attribute will be visible.
-
Enter an Attribute Code.
- Click Save Attribute. The Magento Attribute will now be created based on the information from the Acumatica Attribute and appear in the Magento Product Attribute column of the Product Attribute mapping page.
- Click Update Schema.
- Click on [Map Product Attributes].
- Select the [Magento Product Attribute].
- Select the [Acumatica Product Attribute].
- Click on Save.
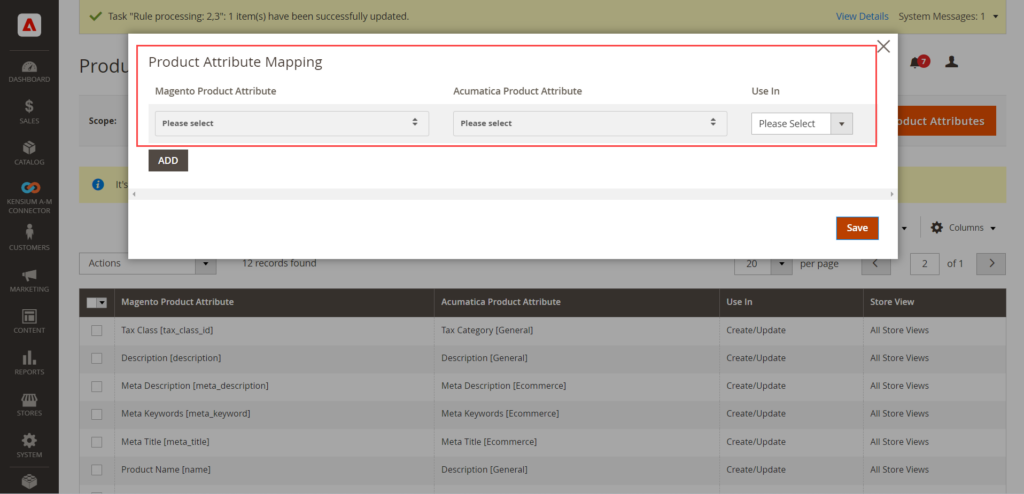
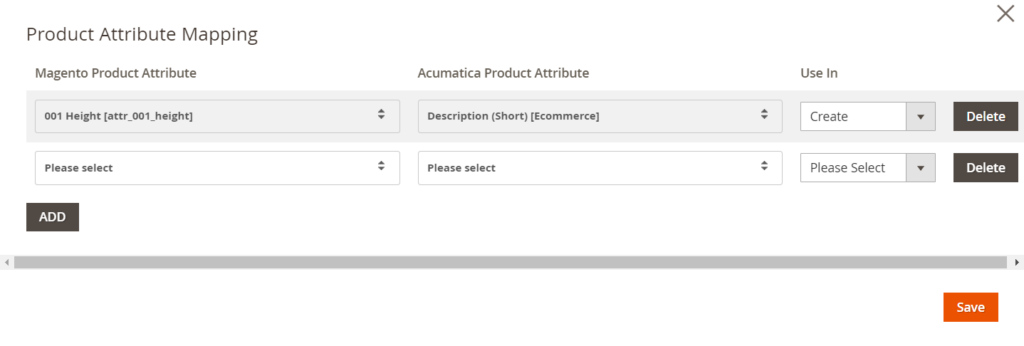
To complete the mapping, you need to click on [Save] as shown above.