Basic Configuration in Magento
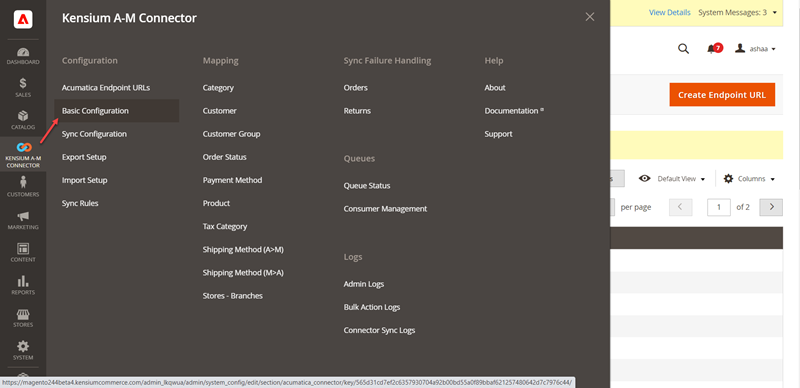
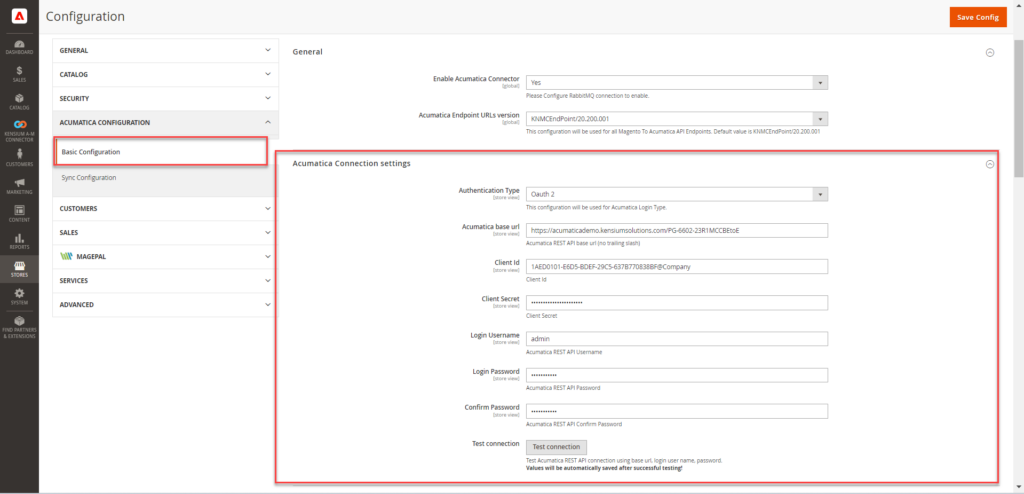
To configure the connection in Magento, navigate to the Kensium A-M Connector workspace in Magento and click Basic Configuration.
|
Field |
Field Type |
Description |
|
|
General |
|||
|
Enabling Acumatica Connector |
Drop-down |
You will have two options in the drop-down Yes & No. Yes-> To process the data in Magento from Acumatica you must select yes. Default [Yes] should always be se selected. No-> The Data will come from Acumatica, however, Magento will not process the data and [Save] I within Magento. |
|
|
Drop-down |
This field shows the Acumatica endpoint. For every version update, Acumatica will provide an updated version. The updated version is displayed at the top of the list. We recommend you use the latest version and select the latest one. |
||
|
Acumatica Connection Settings |
|||
|
Authentication Type |
Drop-down |
The drop-down provides two options.
You must select Oauth2 as the authentication type. We have explained this in the following section. |
|
The Logging section of the Basic Configuration page allows a user to select the actions that can be logged during data exchanges between Acumatica and Magento.
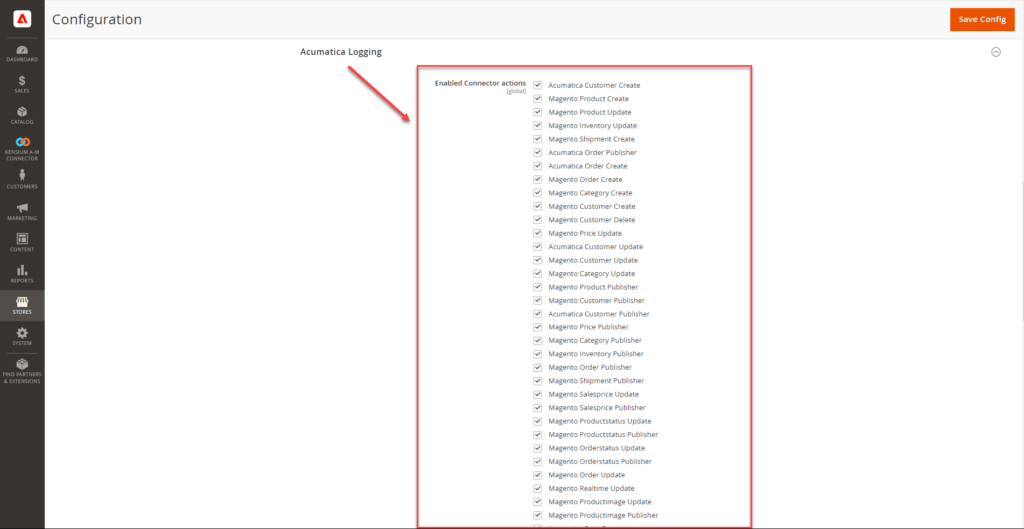
You should check the options under [Enable Connector Login.] The feature allows you to see the Connector logs in the Kensium A-M Connectors.
Click on the Kensium A-M Connector on the left panel and click on the Connectors Sync Logs under the Logs option as shown below.
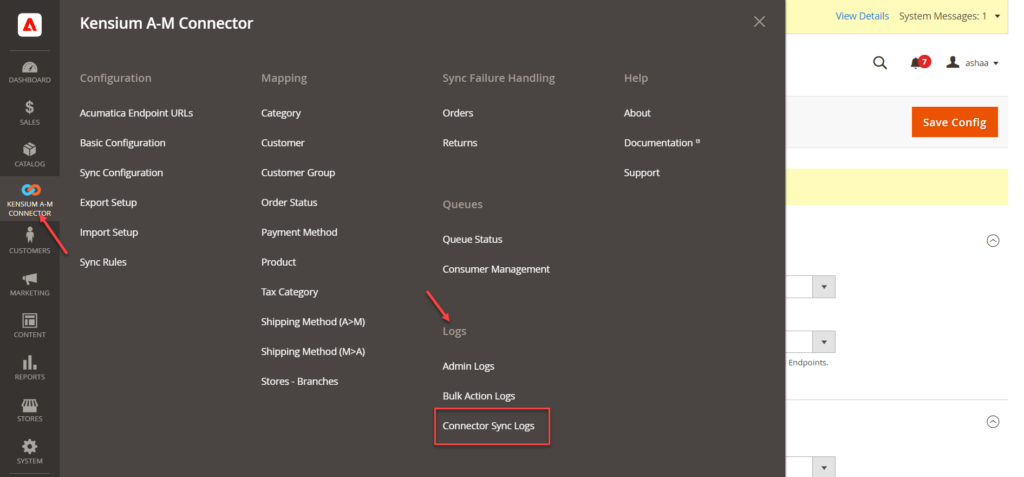
If the option under Acumatica Logging is clicked, then in the Connector Sync Logs, you will be able to see the details of the action. That action could be successful or failed, irrespective of whether the browser will show the action. The same has been shown in Figure 21
|
|
The Log details will only be shown if you have checked the [Enable Connector actions]. |
Actions that are to be recorded in Magento logs can be toggled on in the Acumatica Logging section of the Basic Configuration screen.
- Toggle the Logs that are needed.
- Enter a value for the Log Entry Lifetime, days.
- Enter a Log Cleaning Frequency.
- Select the Show in System Messages preferences.
- Click Save Config.
|
Field |
Field Type |
Description |
|
|
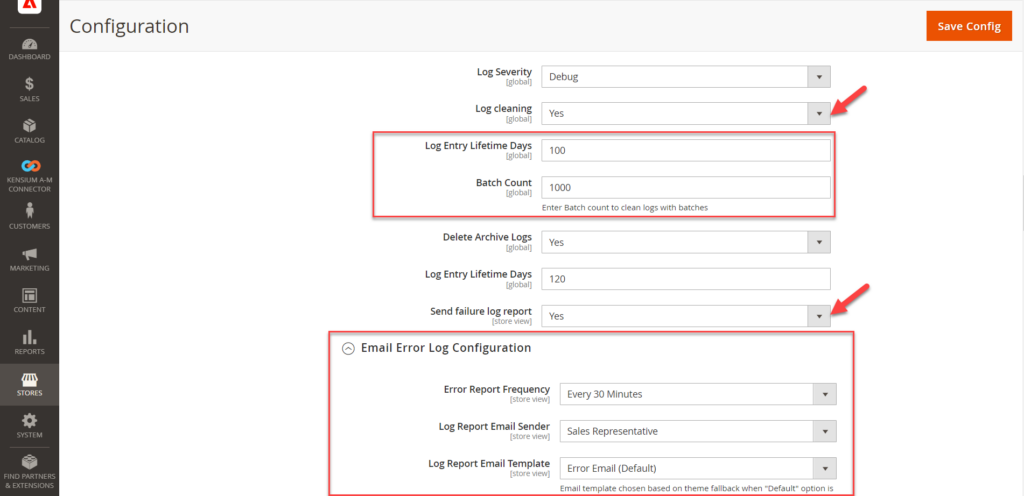
Log Severity |
Drop-down |
Available options:
We strongly recommend that the user select the [Debug] mode. |
|
|
Log Cleaning |
Drop-down |
|
|
|
Log Entry Lifetime Days |
Text Filed |
Enter the number of days for which you want to keep the logs. If you want to keep the logs for one month enter 30 and so on. |
|
|
Batch Count |
Text Field |
Enter the number of records you want to delete from the database in a single go. For example, if you enter 100 in the batch count the application will delete 100 records at a time. |
|
|
Delete Archive Logs |
Drop-down |
After deleting the logs, the application will archive the deleted logs in the database. So that in case the user wants to retrieve those our back-end team will pull the records back. Options available:
Recommend selecting [YES]. |
|
|
Log Entry Lifetime Days |
Text Field |
Enter the number of days you want to keep in the database. Post your specified period the archived log will be deleted from the database permanently. |
|
|
Send failure log report |
Drop-down |
In case of failure, the application provides an option to send an error report. You will have the option to select Yes and No. If yes, then you will see a new section Email Error Log Configuration. If you select No, the system will not send any notification to you. |
|
|
Email Error Log Configuration |
|||
|
Error Report Frequency |
Drop-down |
Select the frequency from the drop-down. You can choose a frequency of 30 minutes, 1 hour, 2 hours and so on. |
|
|
Log Report Email Sender |
Drop-down |
You can choose the role of the sender. The application will automatically send a trigger email. |
|
|
Log Report Email Template |
Drop-down |
Choose the system-defined template. |
|
|
Email Recipient |
Text box |
Enter the recipient’s email address. For multiple email addresses, you need to use a coma separator |
|
|
Send Error Report For |
Text box |
From the list of the sync entities, you can choose the failure report. For example, if you do want to receive the failure report for price sync you can select that by [CTRL +Click]. This action will uncheck the item from the default list. |
|
|
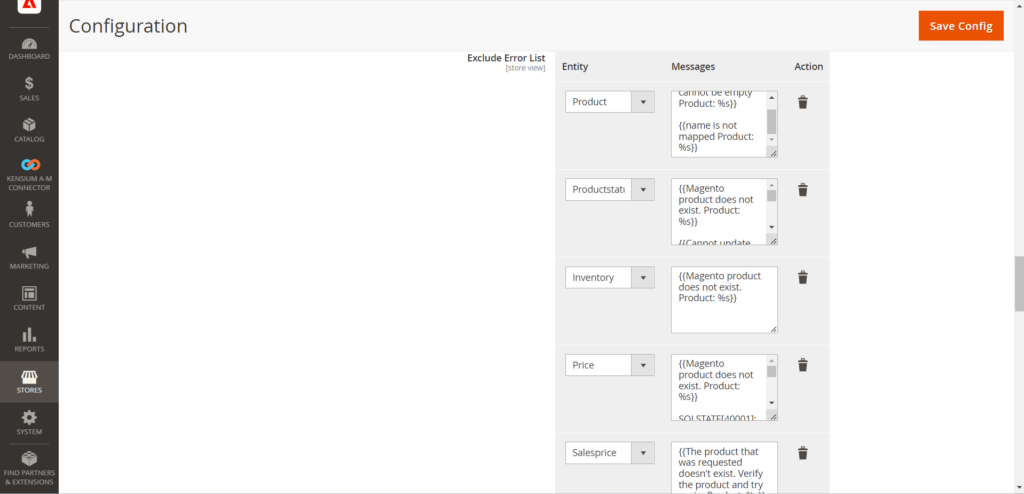
Exclude Error List |
Text box |
This is an additional filter. Select the messages to exclude from the email. If the failure log contains these messages, it will be excluded from the email. This is based on the entity and can be customized. Entity refers to Product, Price, Inventory etc. You need to choose the entity from the drop-down. You can add or delete the entity and the respective message. |
|
|
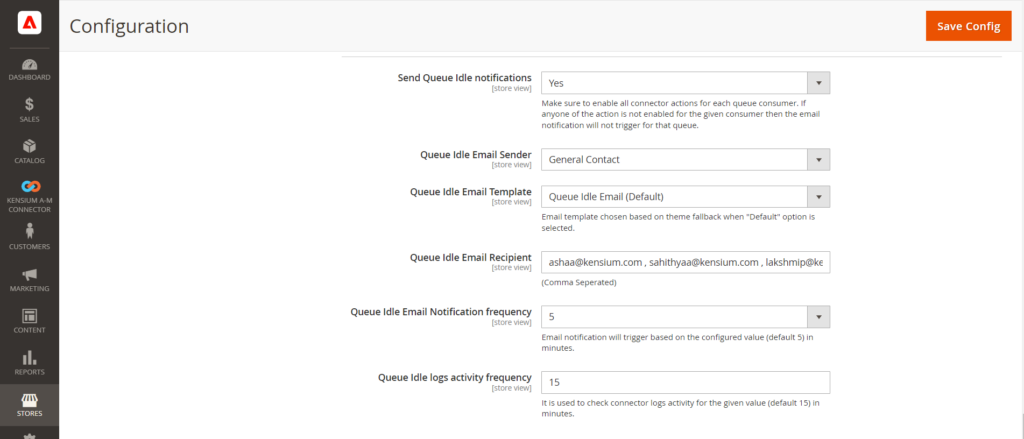
Send Queue Idle Notifications |
|||
|
Send Queue Idle Notifications |
Drop-down |
The role of the Queues is very important. They run the data and alert the system administrator. If it’s idle, then the sys system will not process the data, even though Acumatica is processing the data. Option Available:
|
|
|
Queue Idle Email Sender |
Drop-down |
Select the email sender when the queue is idle. |
|
|
Queue Idle Email Template |
Drop-down |
The default template is provided by the application. |
|
|
Queue Idle Email Recipient |
Text box |
Recipient’s email address so that the application can send the alert message. For multiple email addresses use a comma separator. |
|
|
Queue Idle Email Notification Frequency |
Drop-down |
Based on the value of the field the email notification will be triggered. The default value is set to 5. You can change it by using the drop-down. |
|
|
Queue Idle Logs activity frequency |
Drop-down |
This determines how long the system is idle. The default value is set to 15 minutes. So, if the connector log activity is idle for 15 minutes despite the count existing then every 5 minutes the application is going to alert the email recipient. |
|
|
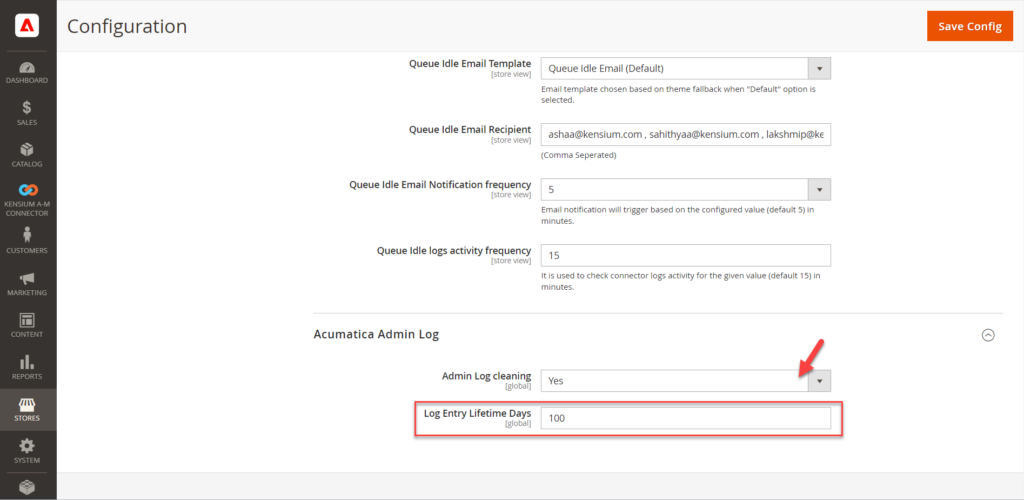
Acumatica Admin Log |
|||
|
Admin Log Cleaning |
Drop-down |
You can find an option for [Admin Log]in Magento K-M Connector Settings under Logs. Any configuration updates are displayed in Admin Logs. In the Settings, you will have two options.
|
|
|
Log Entry Lifetime Days |
Text field |
Specify the number of days you want to keep the logs in the Admin Log section. |
|
|
|
After setting up the basic configuration you must save the changes by clicking on [Save Config]. |